🚗Carton BMW M4 G82🚗 _Made with Carton 🪤

Intro Image created with Inshot
Good Day Great People of #DIYHUB . Today I'm going to be Sharing How I Converted a Piece of Carton to a Carton BMW M4 G82. Since I'm a Fan of Muscle and Racing Cars I decided to Create one of my Favorite Cars the BMW M4 G82 with a Piece of Carton. It's really been a While since I made cool stuffs using only Carton. And today's task really made me to think Hard a little bit.
Here are the Few Materials I used to Accomplish this Task

An Aluminum Rod
A syringe
Glue
Rollers from An Old Printer
Carton
Blue Film from an Old Book
White Paper
Blue Pen
A Ruler
A Pencil
My Procedures

The First Task was to make Sketch of the Dorsal View of The Car In the Carton that I'll use to start the structure. (Note that I copied this image from Google)


Now I'm done with the Sketch, I now Cut the Sketch which would be used to form the structure.
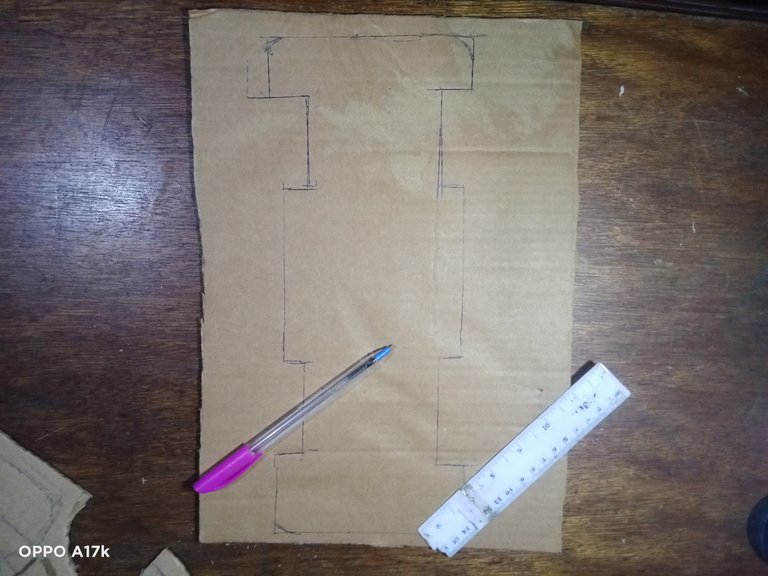
3. As we Know, In a car 🚗 the part that holds and carries the parts of the Car is the Chassis. So we draw the something that would serve as Chassis. When I'm done with the Drawing I then cut.
|
|
|---|


4. Now we add Reinforcement to the Chassis we've Created so that it'll be able to carry the body without bending. After adding reinforcement we then add the Syringe we cut were the Tyres and Aluminum Rod would sit in.
 5. Next, we add the Chassis and Sides of the car together by using Glue.
|
|
|---|


6. We Add the Top and Back of the car with Carton
|
|
|---|


7.I then Draw the Front of the Car which I'll add to the Body. After Drawing it, I then had Attached it to the Body of the Car Which makes it to have a Good Look.
|
|
|---|


8. The Next Step I took was to Draw the Chassis of the Tyre with Carton and Attach it to the Old Printer Roller who I used as the Tyre.
|
|
|---|


9.The Next Step I took was to Draw Our Hive Logo with a Caption "HIVE DIY". I not that Good in drawing be it's been a While (2 Years Ago) I made Drawing of anything. But I just had to do my Best to Draw something that looks like the Hive Logo.

Finally I Added a Blue Film from an Old Book and also the Logo I Drew. Now I'm done with adding all the Pieces together, Here is My Final Result.
Thanks for Going through my Post Dear Reader and Thanks for Dropping By.

All My Images were Originally taken By Me with My Two Phones (Oppo A17k and Infinix Hot 10 Play)
Your BMW is super impressive. You really got all the details spot on. Thank you for sharing your work
selected by @stevenson7
Thank you :)
This is Cool mehn
I really love the art work here
You did well. Someday, you will carry me on the car to places I have wished to go with cars😁
lOLZ 😆
Wow 😲, this is a very nice creativity indeed, I really like how the motto looks in the final results, keep it up
Thanks for Dropping By;)
This is really cool, you've got some crafty skills to enhance here. Nice one 👍🏻
Thanks So much:)
Sending you some Ecency curation votes!
Thanks :)
My pleasure!
!INDEED
It looks great, my friend.👌
Thank you 😊
Love it❤️😍. I Am New but fellow me and see some diy techniques
Thanks
Bro, this little model turns out so well! Congratulations! You should add some color to make it look even cooler! Thanks for sharing your work on our DIYHub community. We hope to see more from you soon! ✌️
Thanks for the Tip, I'll do so in my Next Task