[Eng/Esp] Splinterlands Art Contest Week 332, Creation DARK-ENCHANTRESS
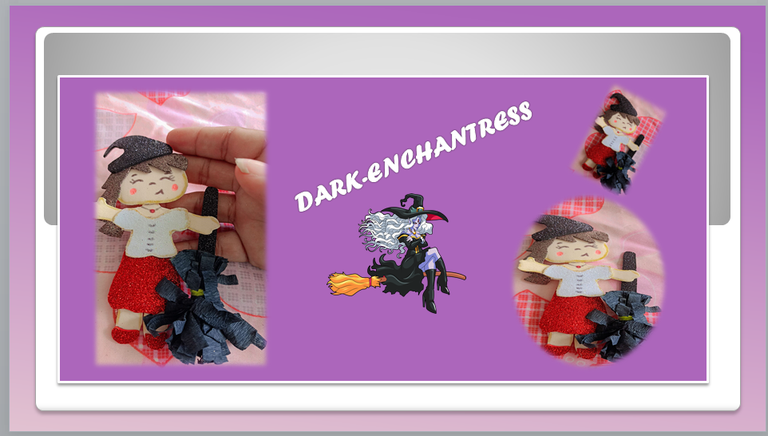
Feliz noche para todos, inicio de una nueva semana, espero que esté llena de muchas bendiciones para todos, en este día me inspire en una Hermosa bruja hecha con foami, tome como referencia esta gran carta de Splinterlands DARK-ENCHANTRESS, una gran guerrera, como toda una mujer batalladora y luchadora por lo que se propone, sin más a continuación les explicaré el paso a paso.
Espero que les guste a todos.
WE BEGIN - COMENZAMOS
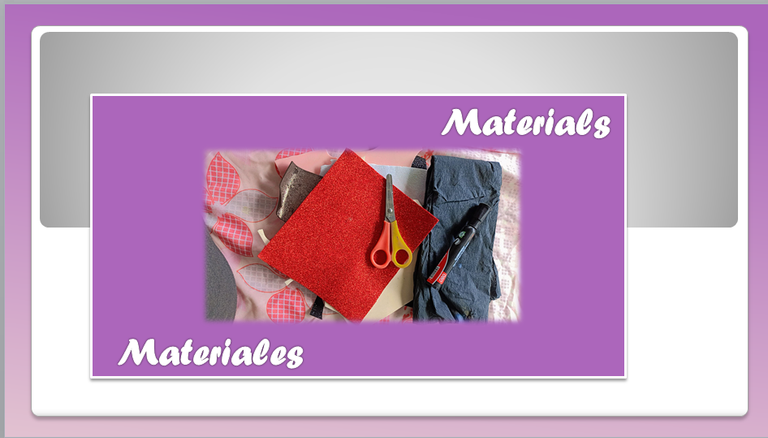
Materials:
Graphite pencil.
Silicon and scissors.
Black marker.
Frosty white foam.
Frosted black foam.
Apple green brown foami.
Frosty red foam.
Skin-colored foam.
Black crepe paper.
Lápiz grafito.
Silicon y tijera.
Marcador negro.
Foami blanco escarchado.
Foami negro escarchado.
Foami marrón verde manzana.
Foami rojo escarchado.
Foami color piel.
Papel crepe negro.
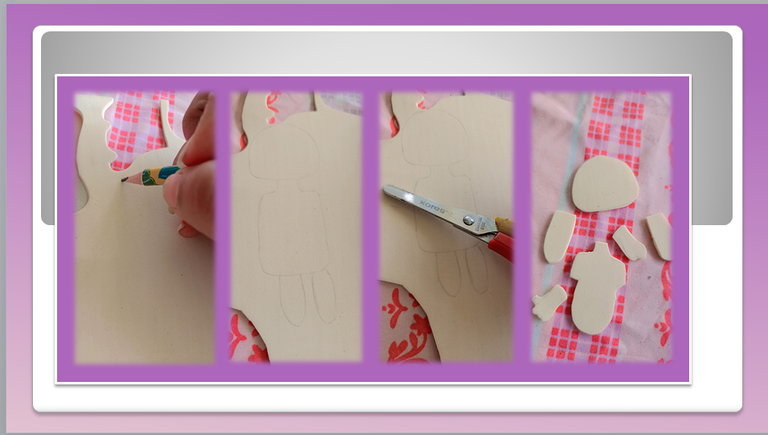
Paso 1:
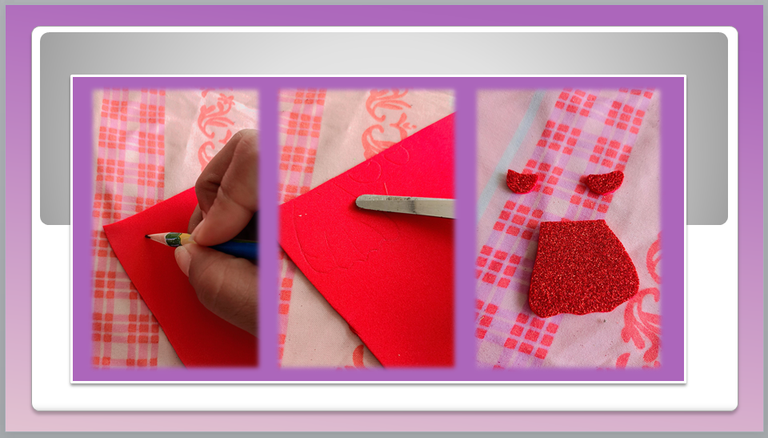
First step, with the skin-colored foam, create all the parts of your body, the head, your silhouette, your legs and hands, cut out each one.
Primer paso, con el foami color piel, cree todas las partes de su cuerpo, la cabeza, su silueta, sus piernas y manos, recorte cada una.
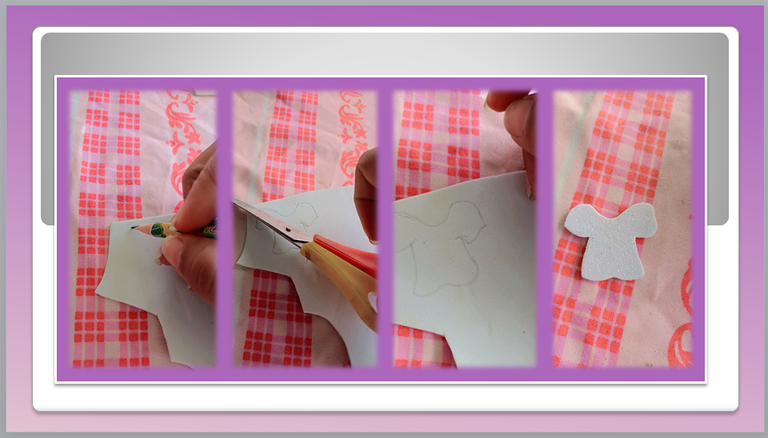
Paso 2:
As a second step, with the frosty white foam, I made the shirt brilliantly. On the other hand, with the frosty red foam I made the skirt that she would wear. Having everything marked, I cut out.
Como segundo paso, con el foami blanco escarchado, le hice la camisa de manera brillante. Por otro lado, con el foami rojo escarchado le realicé la falda que usaría ella. Al tener todo marcado, recorté.
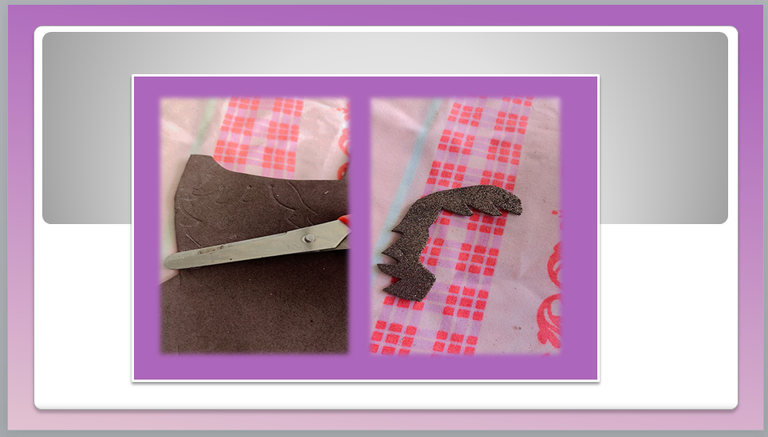
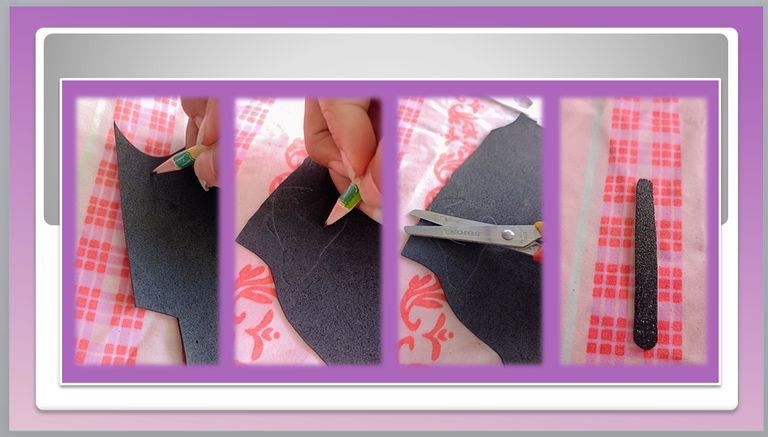
Paso 3:
As a third step, with the frosty brown foam I made her hair with a nice pompadour, and with the frosty black foam I made the witch's hat and the cane of her flying broom.
Como tercer paso, con el foami marrón escarchado le hice el cabello con un lindo copete, y con el foami negro escarchado realicé el gorro de bruja y el bastón de su escoba voladora.
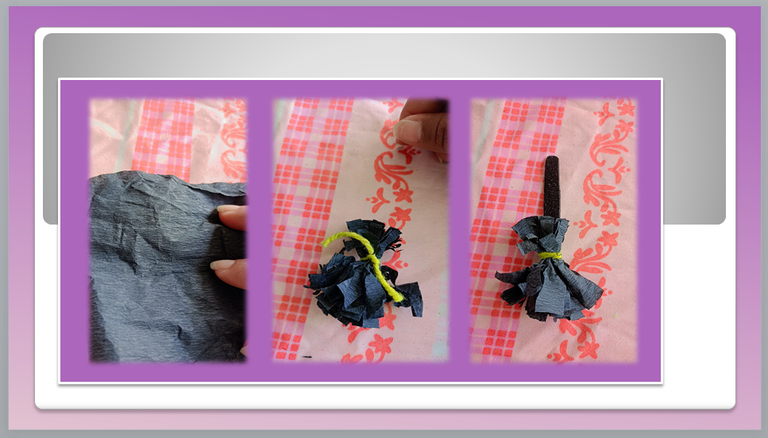
Paso 4:
As a fourth step, use the black crepe paper, make the different strips that will be the bottom part of this broom, imagine below.
Como cuarto paso, utilice el papel crepe negro, realice las distintas tiras que serán la parte de abajo de esta escoba, imagenes a continuación.
Paso 5:
As the fifth and final step, with all the parts ready, I began to form and create my foam art using silicone as glue.
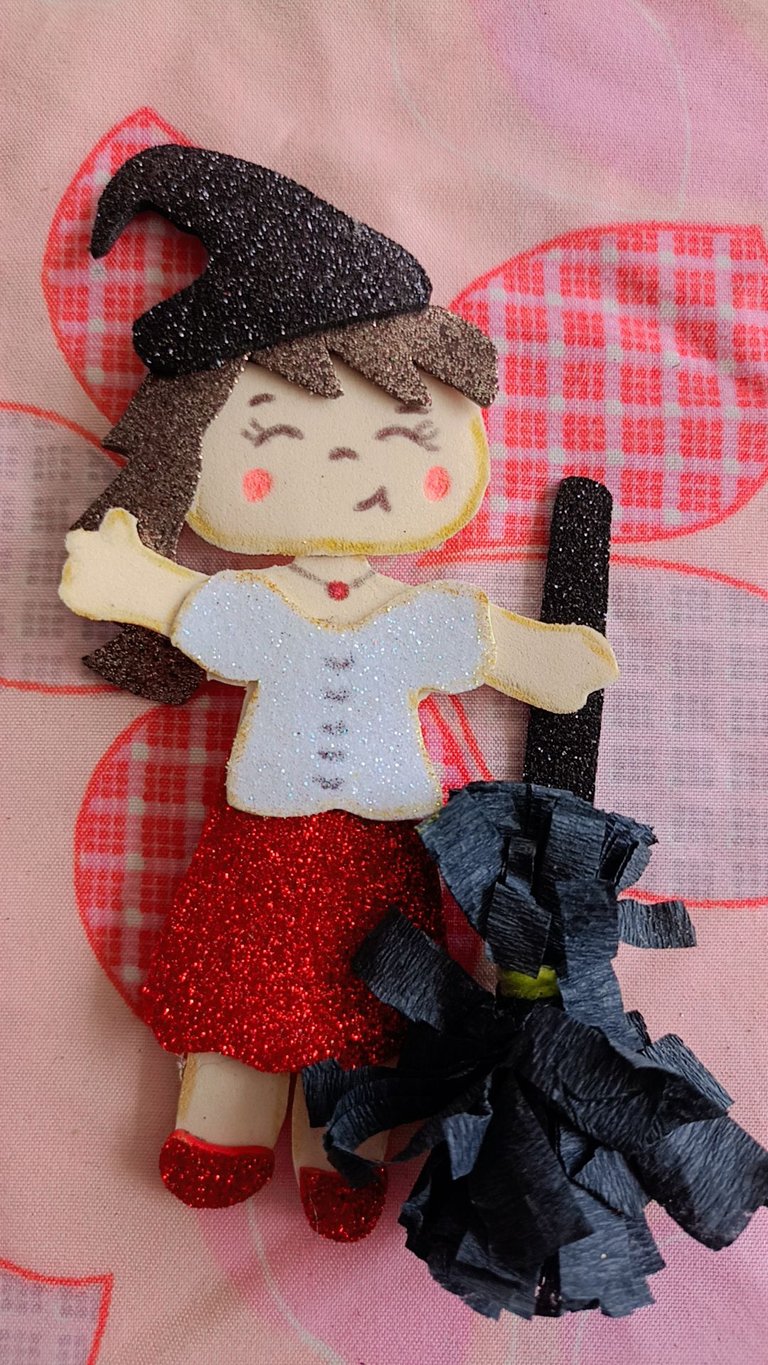
Finished work.
Enjoy it.
Como quinto paso y último, con todas las partes listas, empecé a formar y crear mi arte de foami utilice como pegamento el silicon.
Trabajo finalizado.
Disfrútenlo.

Fuente / Source:
Traductor
All photos are my property taken with my Oscal c70 Smartphone..📷
🌺 My name is @Brindyschi 🌺


Until a future opportunity
Success for all 👊
The final result is impressive. It looks pretty good. Love it. You did a great job! Thanks! Keep it up!
Gracias por su apoyo ❤️
https://bsky.app/profile/did:plc:rag2mftdy2alo7rtmyttmpk4/post/3lhwrygelff2c
https://bsky.app/profile/did:plc:rag2mftdy2alo7rtmyttmpk4/post/3lhwrygelff2c
The rewards earned on this comment will go to the author of the blog post.
Gracias