The Art of Synergy: My Ultimate Chaos Legion Synergy Team for Briar Patch Ruleset

In Splinterlands, mastering synergy between cards can be the deciding factor between victory and defeat. While some players throw together a collection of powerful cards and hope for the best, I’ve developed a finely tuned strategy that revolves around the art of synergy — a meticulously crafted team where every card enhances the effectiveness of all others on the battlefield.
Here’s a detailed breakdown of how this powerful lineup works, ensuring a perfect balance of offense, defense, and endurance that leads to consistent wins.

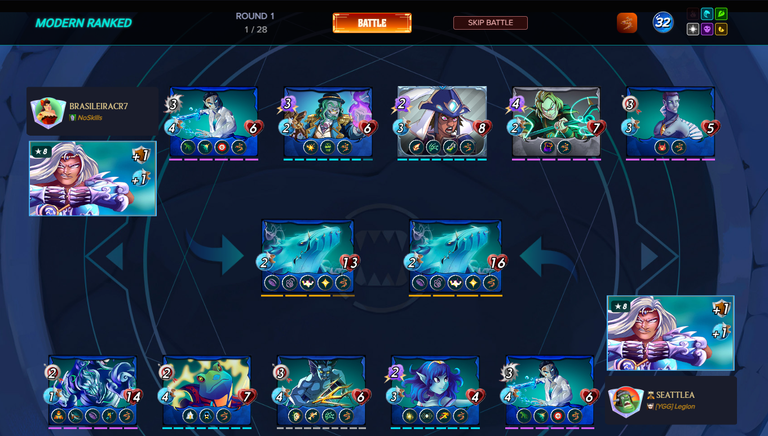
The Battle
You can see the Modern Diamond League battle here: https://splinterlands.com/battle/sl_f5c31fbe47ca4347f9c7f5ae0bffd164?ref=seattlea
The Foundation: Kelya Frendul, the Synergy Catalyst

Kelya Frendul, a Rare Water summoner from the Chaos Legion set, is the perfect leader for this strategy. She provides:
+1 Armor: Protecting all monsters on the team from physical attacks, allowing them to absorb additional damage.
+1 Speed: Speed plays a critical role in determining attack order, dodging attacks, and maximizing offensive output.
These boosts alone create an immediate edge, but what makes Kelya exceptional is how perfectly her bonuses align with the abilities of the six carefully chosen cards that follow.
🐳 Position 1: Baakjira – The Indomitable Tank

At the forefront of this synergy-driven lineup stands Baakjira, a Legendary tank from the Chaos Legion Core set. Baakjira doesn’t just serve as a wall — it’s a support powerhouse that amplifies the effectiveness of the entire team.
Slow: Reduces the speed of all enemy monsters by one point, stacking with Kelya’s speed boost and River Nymph’s Swiftness, ensuring my team moves first.
Strengthen: Increases the max health of all friendly monsters by one, giving the entire team more durability.
Why Baakjira Shines in This Setup:
Against magic-heavy teams, its Void ability minimizes incoming damage.
In battles with fatigue rounds, Baakjira’s high base health gives it unmatched longevity, often ensuring survival when all other cards fall.
Position 2: Tide Biter – The Blast Defender
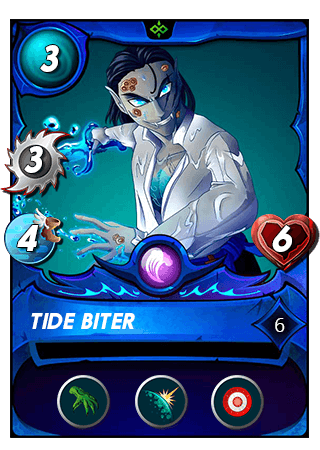
Tide Biter, an Epic Chaos Legion Reward card, is an essential piece of the puzzle, positioned second to shield the backline from devastating Blast attacks.
Reflection Shield: Completely nullifies damage from Blast, which would otherwise shred through my support cards. It also works wonders in the Briar Patch ruleset, where it doesn't take damage from their thorns.
Why Tide Biter Fits Perfectly:
Protects key support cards like River Nymph and Angelic Mandarin from Blast damage.
In Briar Patch ruleset, Tide Biter shines by taking minimal damage while chipping away at the enemy.
Position 3: River Nymph – The Cleansing Swiftness
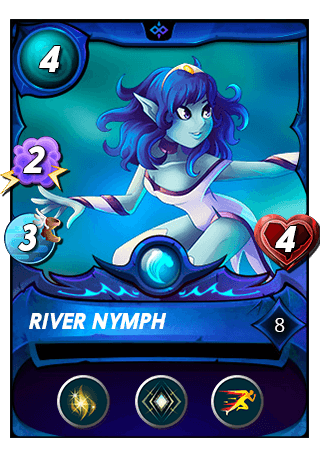
River Nymph, a Rare Chaos Legion card, plays a dual role that helps my other cards.
Swiftness: Boosts the speed of all friendly monsters, stacking with Kelya’s summoner buff and Baakjira's slow ability to ensure I always go first.
Cleanse: Removes negative status effects like Poison, Affliction, and Cripple — a crucial safeguard for Baakjira, who often finds itself as the target of such abilities.
Why River Nymph is Critical:
In poison-heavy rulesets, Cleanse ensures that Baakjira’s health isn’t whittled down.
The added speed from Swiftness compounds with Kelya’s speed boost and Baakjira’s Slow, making it nearly impossible for opponents to strike first.
Position 4: Merdhampir – The Late-Game Lifesaver

Merdhampir, a Common Chaos Legion Reward card, is an unsung hero in this strategy, capable of single-handedly shifting the tide of battle.
Life Leech: Increases Merdhampir’s health and max health by 50% of the damage dealt, allowing it to scale rapidly as the match progresses.
Why Merdhampir is a Game-Changer:
In stalemate situations where only Baakjiras remain on both sides, Merdhampir’s growing health gives me the edge in fatigue rounds. I won countless battles in this situation due to the health of Mardhampir in the fatigue rounds.
Positioned in the fourth slot, Merdhampir acts as a natural shield for Angelic Mandarin once the first three cards fall.
Position 5: Angelic Mandarin – The Triage Specialist
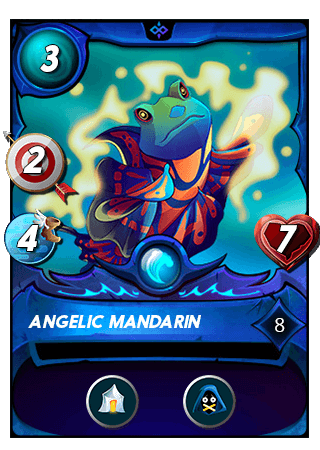
Angelic Mandarin, a Rare Chaos Legion Core set card, serves as the perfect bodyguard for Wave Brood.
Triage: Heals the backline by targeting the most wounded ally, usually Wave Brood, which absorbs most of the enemy’s fire with its Taunt ability.
Silence: Reduces enemy magic damage, making Baakjira and other support cards even harder to take down.
Why Angelic Mandarin is Indispensable:
Heals Wave Brood consistently, ensuring that the taunting behemoth remains standing longer.
The Silence ability diminishes magic threats, creating a safer battlefield for the entire lineup.
Position 6: Wave Brood – The Taunting Protector
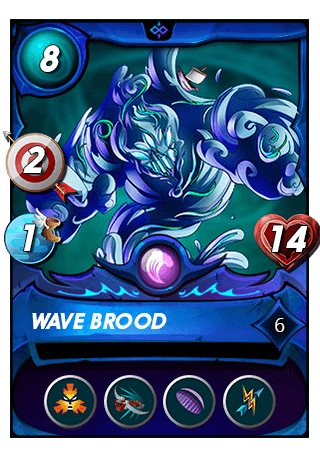
Wave Brood, an Epic Chaos Legion Core set card, anchors the backline with its massive health pool and a critical role in the team’s defensive posture.
Taunt: Draws enemy attacks away from more fragile support monsters, protecting River Nymph and Angelic Mandarin from direct assaults.
Why Wave Brood is Vital:
It serves as a damage sponge, absorbing attacks and allowing support monsters to continue contributing for longer.
Angelic Mandarin’s Triage ensures that Wave Brood stays alive as long as possible, further enhancing its effectiveness.
How Synergy Secures Victory
Each card in this lineup is handpicked not just for its individual strength but for how it complements the abilities of every other card. This synergy creates a team that:
Neutralizes Speed Disadvantage: Kelya’s speed boost, Baakjira’s Slow, and River Nymph’s Swiftness ensure that my monsters attack first, controlling the flow of battle.
Maintains Survivability: Baakjira absorbs damage, Wave Brood draws attacks, and Angelic Mandarin provides consistent healing.
Mitigates Magic and Blast Damage: Silence from Angelic Mandarin reduces magic damage, while Tide Biter shields the backline from Blast attacks.
Overcomes Fatigue and Stalemates: Merdhampir’s Life Leech ensures a steady increase in health, which can be decisive in fatigue rounds where other monsters fall.
If you have some staked SPS please vote for my SPS Validator Node HERE
If you wonder what is the best way to get involved you can use my link to begin your Splinterlands and HIVE journey.
My favorite faction ;D
!BBH
Thanks :)
https://www.reddit.com/r/Splinterlands/comments/1jo8prp/a_perfectly_synergetic_card_set_for_briar_patch/
The rewards earned on this comment will go directly to the people( @seattlea ) sharing the post on Reddit as long as they are registered with @poshtoken. Sign up at https://hiveposh.com. Otherwise, rewards go to the author of the blog post.
Looks like a pretty good team I tend to lean towards that summoner as well. I usually pair it with that neutral clock to give me an extra speed boost.
Couldn't use any more low/no damage cards in this battle, my damage output would have been too small :)
This post has been manually curated by @bhattg from Indiaunited community. Join us on our Discord Server.
Do you know that you can earn a passive income by delegating to @indiaunited. We share more than 100 % of the curation rewards with the delegators in the form of IUC tokens. HP delegators and IUC token holders also get upto 20% additional vote weight.
Here are some handy links for delegations: 100HP, 250HP, 500HP, 1000HP.
100% of the rewards from this comment goes to the curator for their manual curation efforts. Please encourage the curator @bhattg by upvoting this comment and support the community by voting the posts made by @indiaunited.
Delegate Tokens and HP to Fallen Angels to earn weekly rewards!
Delegate | Join to the guild
Congratulations @seattlea! You received a personal badge!
Participate in the next Power Up month to get another one!
You can view your badges on your board and compare yourself to others in the Ranking
Check out our last posts:
I should try this. Almost every time I encounter a ruleset where I submit a similar lineup, I favor Merdaali Guardian over River Nymph. Sometimes I place Anasth Soothsayer (Heal and Tank Heal) right in front of Wavebrood but then I notice I lack firepower.
Thanks for sharing!
Yep you should try it with River Nymph, she is a small mana card and perfect to clear the negative effects like poison or affliction from the main tank. When mana is big there is that Range attack and Snipe Riftwatcher card that also works...
Thanks for sharing! - @underlock
