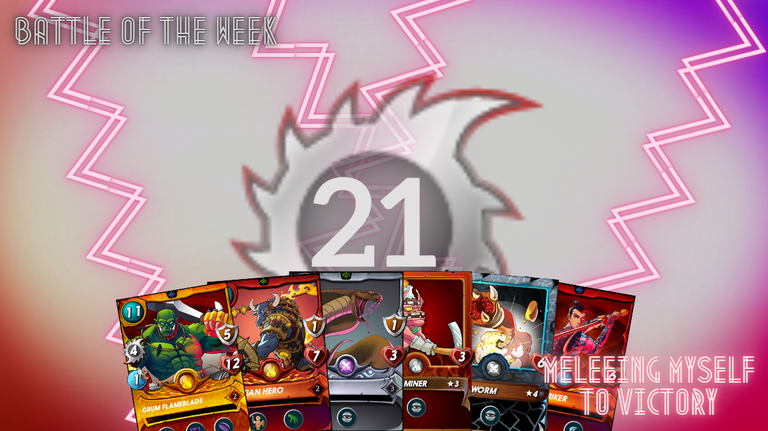
Splinterlands Battle Of The Week: Meleeing myself to Victory

The Ruleset

- Rulesets - Deflection Field & Born Again
- Mana Cap - 42
- Active Elements -


Here's my starting lineup
Summoner: Tarsa
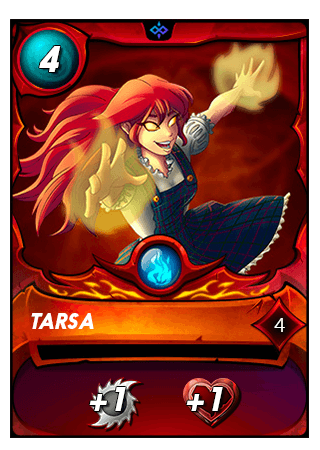
- With the ruleset and element pick that I got I felt like my best team was in fire element
- So in my case I went with Tarsa as my summoner
- He was the best possible summoner for the full melee team I had in mind
1st Position: Grum Flameblade
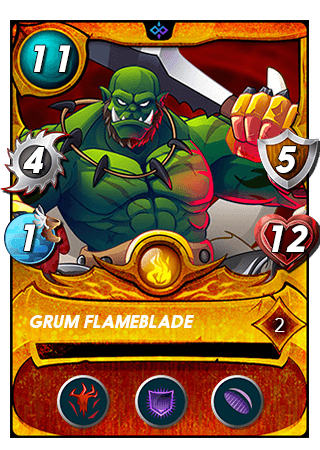
- Grum Flameblade was one of my main tanks for this battle
- Main reason I like Grum Flameblade here a lot is his Bloodlust ability
- Also as Death element was active my enemy might play magic based comp so the Void and Void Armor might come handy
- Bloodlust - Every time this Unit defeats an opponent, it gets +1 to all stats
- Void Armor - Magic attacks hit this Unit's armor before its Health
- Void - Reduced damage from Magic attacks by 50%
2nd Position: Ferexian Hero
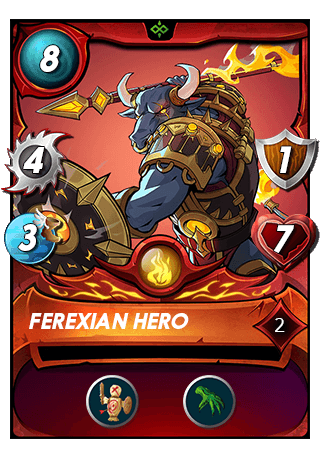
- Ferexian Hero was my choice for the Reach monster for this team
- I usually play Radiated Brute as my Reach monster but in this battle I had a lot of mana which meant I could play higher costing monster to get little more stats
- Weapons Training - Gives attack type and power to adjacent no-attack units (max of 3 power)
- Reach - Can use melee attacks from the second position
3rd Position: Uraeus
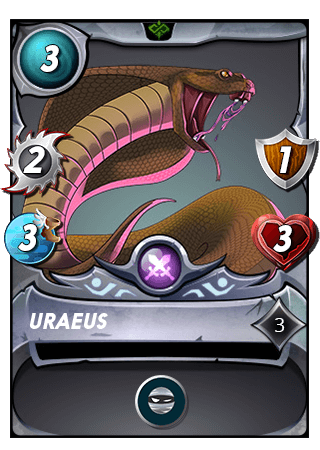
- Uraeus was my first Sneak monster
- Love Uraeus so much just because how many stats you get for only 3 mana
- Sneak - Targets the enemy unit in the last position
4th Position: Kobold Miner
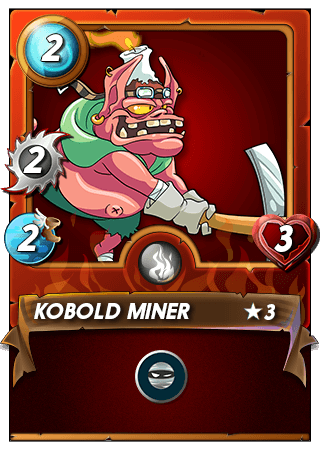
- Next up in line is another low mana Sneak monster
- Also an amazing monster with high stats for low mana
- The only reason I like Uraeus more than Kobold Miner is that Uraeus is an neutral monster and can be played in almost every battle
- Sneak - Targets the last Unit on the enemy Team instead of the first Unit
5th Position: Sand Worm
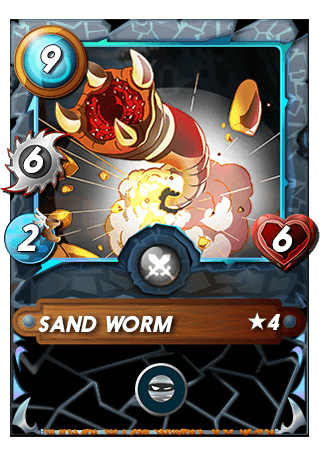
- As usual when you play full melee based comp you can not go without Sand Worm
- Even tho he costs a high 9 mana you do get an amazing heavy hitter
- Sneak - Targets the last Unit on the enemy Team instead of the first Unit
6th Position: Tenyii Striker
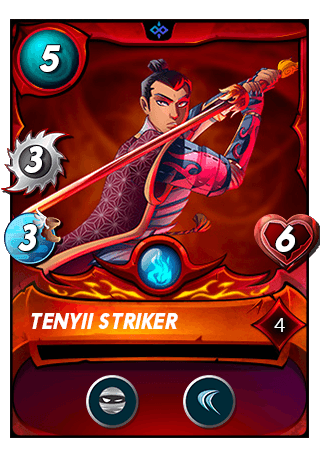
- Tenyii Striker was my backline tank for this team
- Also he has some quite amazing offensive stats
- The only reason I picked Tenyii Striker as my backline tank was his Dodge ability
- Sneak - Targets the last Unit on the enemy Team instead of the first Unit
- Dodge - +25% chance to evade physical attacks
Starting board
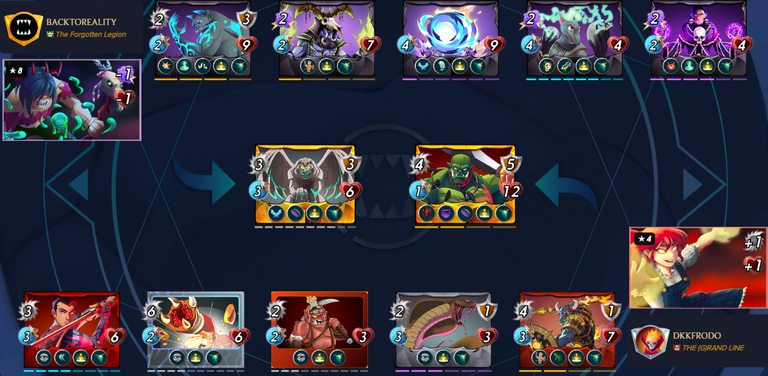
- After seeing the starting board I was quite scared as his team was much higher level
- Even tho my enemy missed half of his summoners debuffs he still had a Demoralize ability which meant my Tarsa +1 melee damage was totally countered and our summoners +1 hp and -1 hp also canceled each others out
- On my side I managed to play a great first tank with Void and void Armor as my enemy played four magic monsters who now were going to do 4 damage instead of 8
- All of the above combined I was sitting in a decent position but the level diff could still turn the battle into my enemies hands
- But my predictions could still be off by a mile so lets start the battle and have a look
Here's how the battle went
1st & 2nd Round
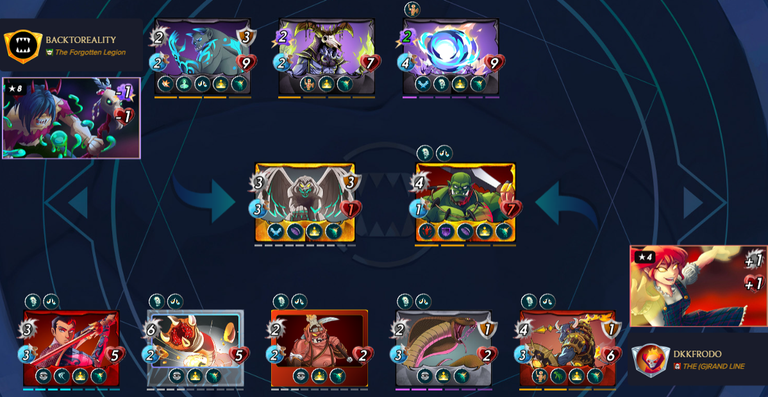
- The first two rounds very huge for me
- I had manage to take down two enemy monsters from his backline and his first position monster was on 1hp and 3 armor
- All of that while my team was still all intact
- But anything could still happen so lets keep watching
3rd Round
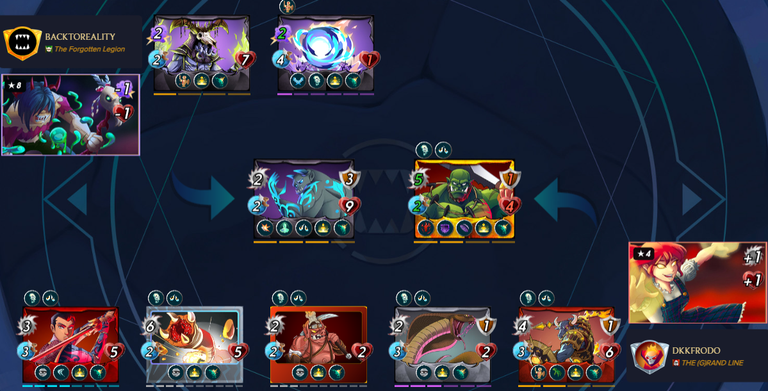
- After 3nd Round I had finally taken down his first position tank and the takedown fall onto my Grum Flameblade who got his Bloodlust stack from it
- The board was now looking amazingly good for me and I really did not see a way for my enemy to win this battle anymore
4th Round
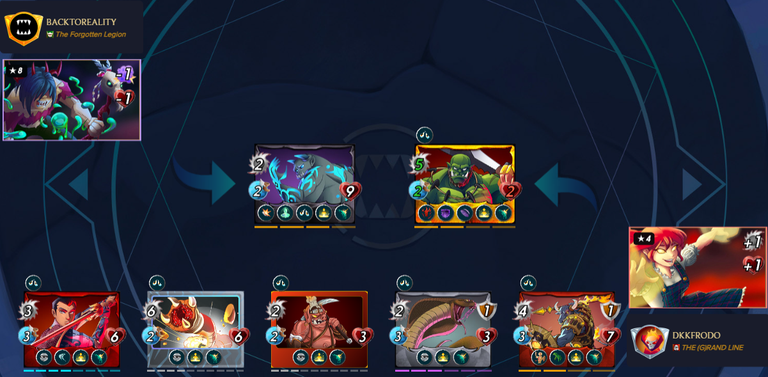
- 4th Round was a small cleanup round
- I managed to take down both of my enemies standing magic monsters which now left him with his last monster standing
- There now was absolutely no way my enemy could turn this battle to his favor and I just needed to wait till his last standing monster falls
5th & 6th Round

- It took me 2 turns to kill my enemies last standing monster
- After his Harklaw had fallen I took the victory
- Battle Replay Link
Summary
- This battle was quite scary in the beginning but ended heavily one sided
- I believe the battle came down to me having a Void + Void Armor front tank and super high backline damaging squad
- If you also would like to hop on the Splinterlands train feel free to use my Referral
Thanks for reading and thanks for all the upvotes, reblogs, comments and follows. And till the next challenge, KEEP BATTLING!
0
0
0.000
https://www.reddit.com/r/Splinterlands/comments/1iem0ut/splinterlands_battle_of_the_week_meleeing_myself/
The rewards earned on this comment will go directly to the people( @dkkfrodo ) sharing the post on Reddit as long as they are registered with @poshtoken. Sign up at https://hiveposh.com. Otherwise, rewards go to the author of the blog post.
I love the melee attackers from the Fire Splinter with Tarsa. Will really miss this tactic once Chaos Legion and thus Tarsa rotates out of Modern.
There is something satisfying in full melee + Tarsa build isn't there 😅 Luckily I am playing Wild format so if nothing better replaces this comp I will still be reppin it!!
Thanks for sharing! - @libertycrypto27

Congratulations @dkkfrodo! You have completed the following achievement on the Hive blockchain And have been rewarded with New badge(s)
Your next target is to reach 900 upvotes.
You can view your badges on your board and compare yourself to others in the Ranking
If you no longer want to receive notifications, reply to this comment with the word
STOPCheck out our last posts: