Crypt Beetle in 3D Quilling Technique [Eng-Esp]
Hello everyone... ✨
Hello to my dear Hivers and the dear community of artists #HiveDIY, as always very pleased and excited to be here again, showing you my work made with love and especially for you.
Greetings to the Splinterlands community, and everyone who lives there, I'm here to join the Splinterlands Art Contest
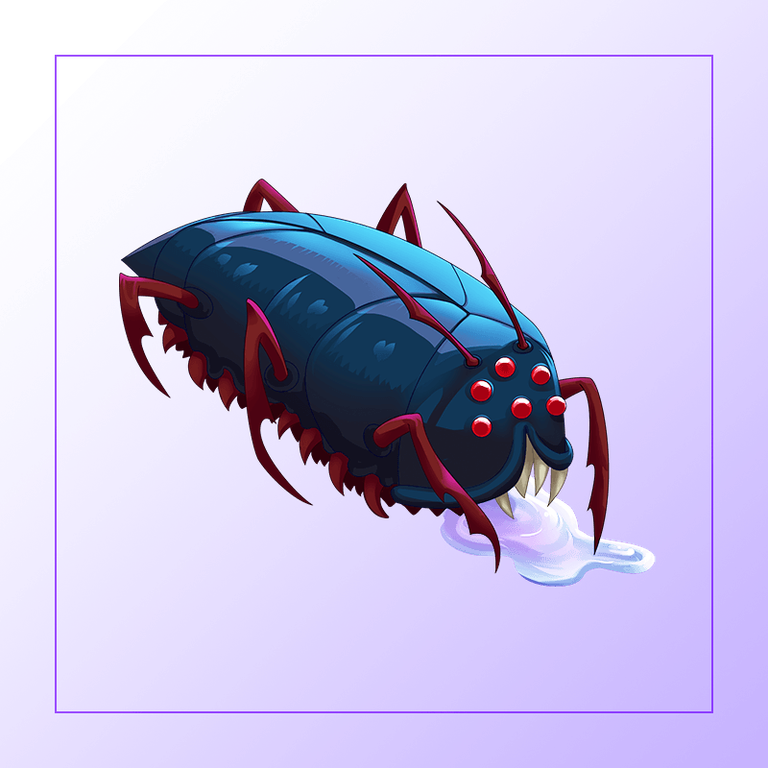
For this week I bring you a new work, in which I wanted to materialize a 3D decorative figure inspired by the letter Crypt Beetle in the quilling technique.
For this week's contest I decided to finish the set of accessories, materializing a pair of hanging tendrils with some elements of the same card.
If you want to know more about the game, I leave you my reference link to enter it and navigate through this wonderful world: https://splinterlands.com?ref=dayadam
Hoping you like my work, without further ado, I leave you with my creative process.
Let's start:😃

Hola a Todos...✨
Hola a mis queridos Hivers y a la querida comunidad de artistas #HiveDIY, como siempre muy complacida y emocionada de encontrarme por acá nuevamente, mostrándole mi trabajo hecho con mucho amor y especialmente para ustedes.
Un saludo para la comunidad de Splinterlands, y todos los que hacen vida por allí, estoy por acá para unirme al Splinterlands Art Contest.
Para esta semana les traigo un nuevo trabajo, en el cual quise materializar una figura decorativa en 3D inspirada en la carta Crypt Beetle en la técnica de quilling.
Si quieren saber más con respecto al juego les dejo mi enlace de referencia para que ingresen en él, y naveguen por este maravilloso mundo: https://splinterlands.com?ref=dayadam
Esperando les guste mi trabajo, sin más preámbulos, les dejo mi proceso creativo.
Comencemos:😃
 |
 |

• Cintas de quilling.
• Plantilla para moldear círculos.
• Lápices de colores.
• Cartulina.
• Pega blanca extra fuerte (de carpintería).
• Tijera.
• Pincel.
- Quilling ribbons.
- Template to mold circles.
- Colored pencils.
- Cardboard.
- Extra strong white glue (carpentry glue).
- Scissors.
- Brush.

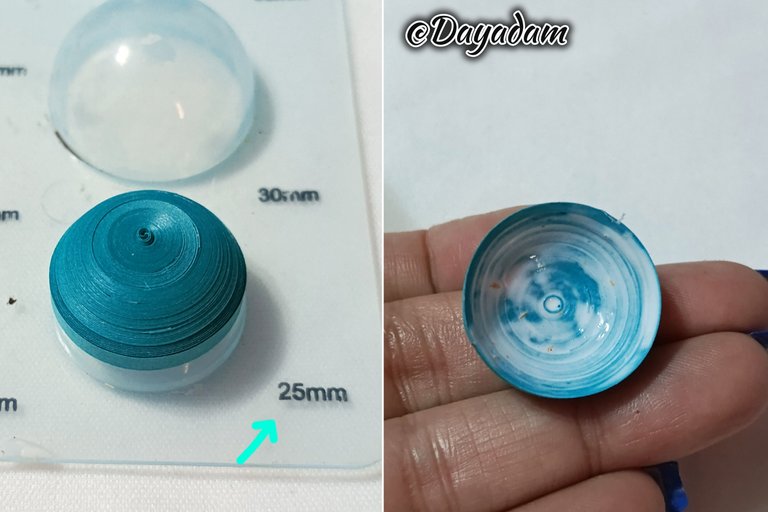
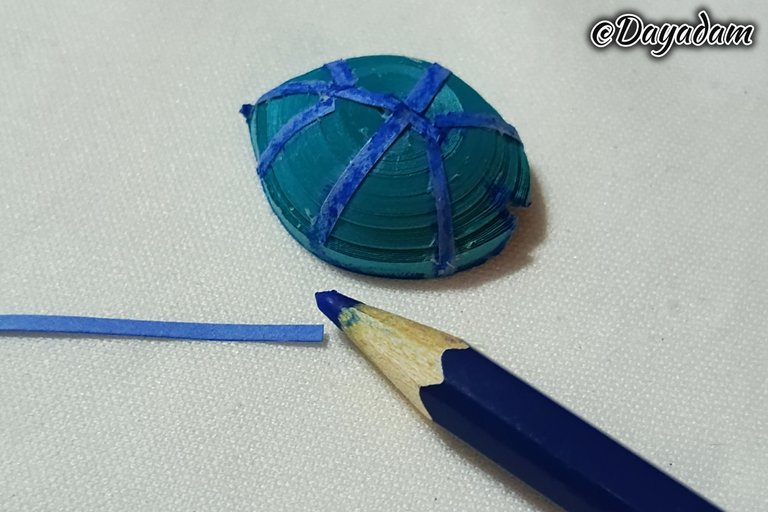
- We are going to start by taking 3 mm wide blue quilling tape, we are going to roll it with the needle until we reach the end of the tape, seal it with extra strong white glue, take it out of the needle, we will obtain a closed circle.
- We will mold the circle in the template in the measure number 25 mm, we take out of the template we apply extra strong white glue on the inside and let it dry very well, this to prevent the circle from deforming or moving.
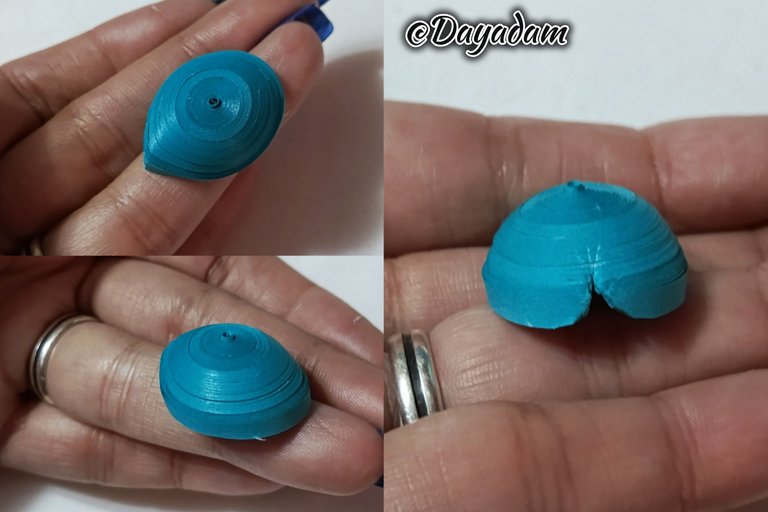
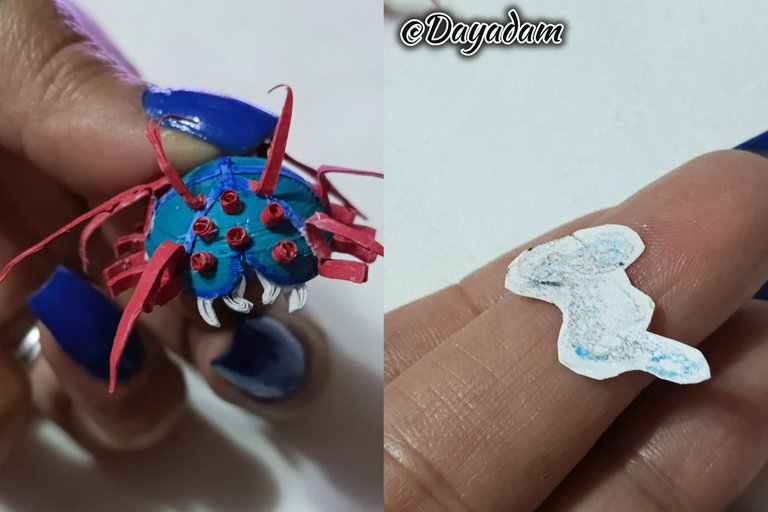
- Once the circle is dry I molded one of its tips by pinching it with my fingers, making a pointed shape.
- I took a scissors and made a small cut in the front part, as you can see in the picture.
- I took a ribbon of a more prominent blue, 1mm wide, I glued some pieces at various points of the figure, with a dark blue pencil I remarked the lines a little.

• Vamos a comenzar tomando cinta para quilling de 3 mm de ancho color azul, vamos a enrollar con la aguja hasta llegar al final de la cinta sellamos con pega blanca extra fuerte, sacamos de la aguja, obtendremos un círculo cerrado.
• Moldearemos el círculo en la plantilla en la medida número 25 mm, sacamos de la plantilla aplicamos pega blanca extra fuerte por la parte interna y dejamos secar muy bien, esto para evitar que el círculo se deforme o se mueva.
• Seco el círculo moldee una de sus puntas pellizcando con los dedos, haciéndole una forma puntiaguda.
• Tomé una tijera hice un pequeño corte en la parte del frente, tal como pueden ver en la imagen.
• Tomé una cinta de un azul más resaltante, de 1mm de ancho, pegué algunos trozos en varios puntos de la figura, con un lápiz de color azul oscuro remarqué un poco las líneas.
 |  |
 |  |
- We are going to start by taking 3 mm wide blue quilling tape, we are going to roll it with the needle until we reach the end of the tape, seal it with extra strong white glue, take it out of the needle, we will obtain a closed circle.
- We will mold the circle in the template in the measure number 25 mm, we take out of the template we apply extra strong white glue on the inside and let it dry very well, this to prevent the circle from deforming or moving.
- Once the circle is dry I molded one of its tips by pinching it with my fingers, making a pointed shape.
- I took a scissors and made a small cut in the front part, as you can see in the picture.
- I took a ribbon of a more prominent blue, 1mm wide, I glued some pieces at various points of the figure, with a dark blue pencil I remarked the lines a little.
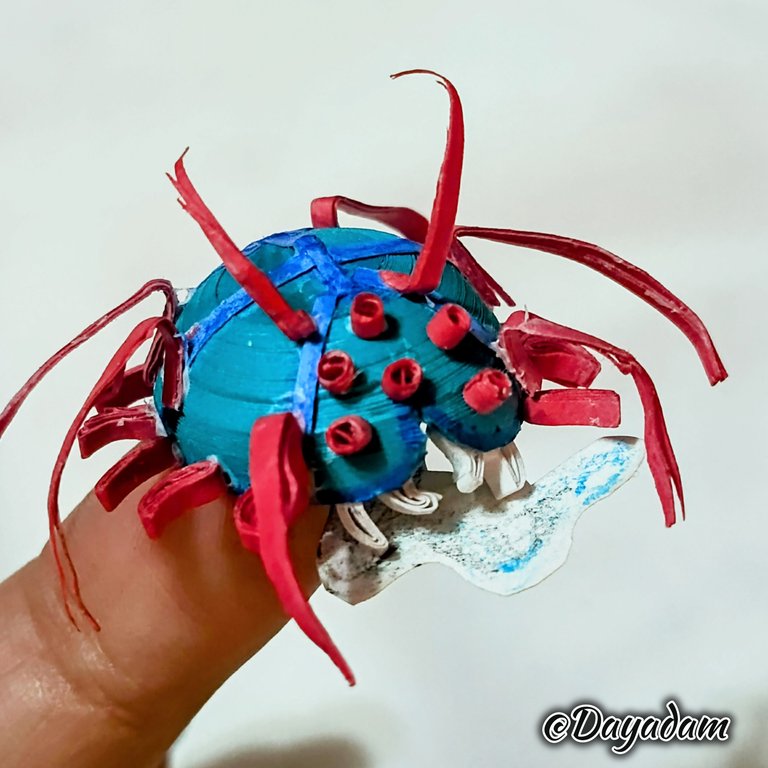
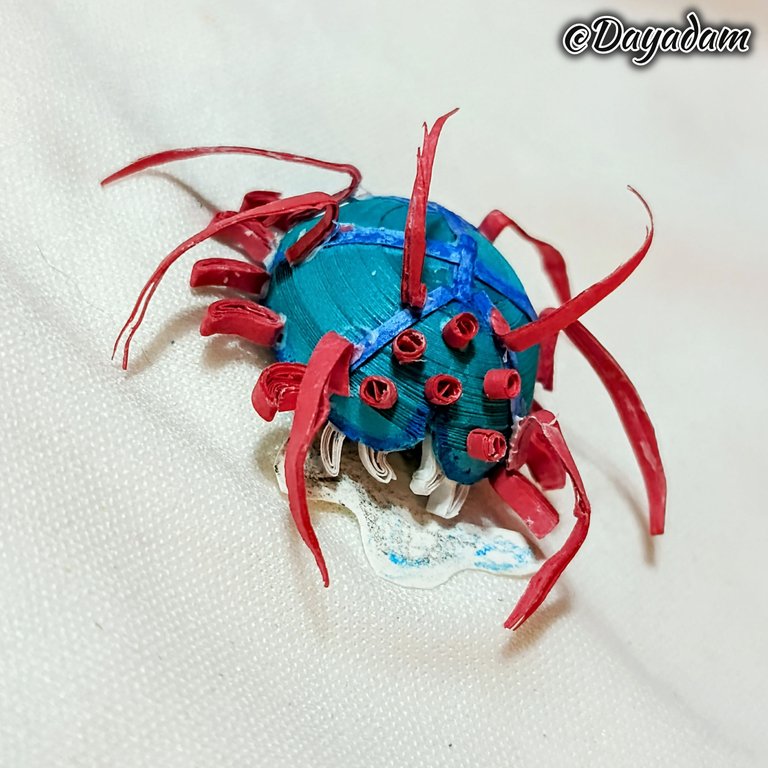
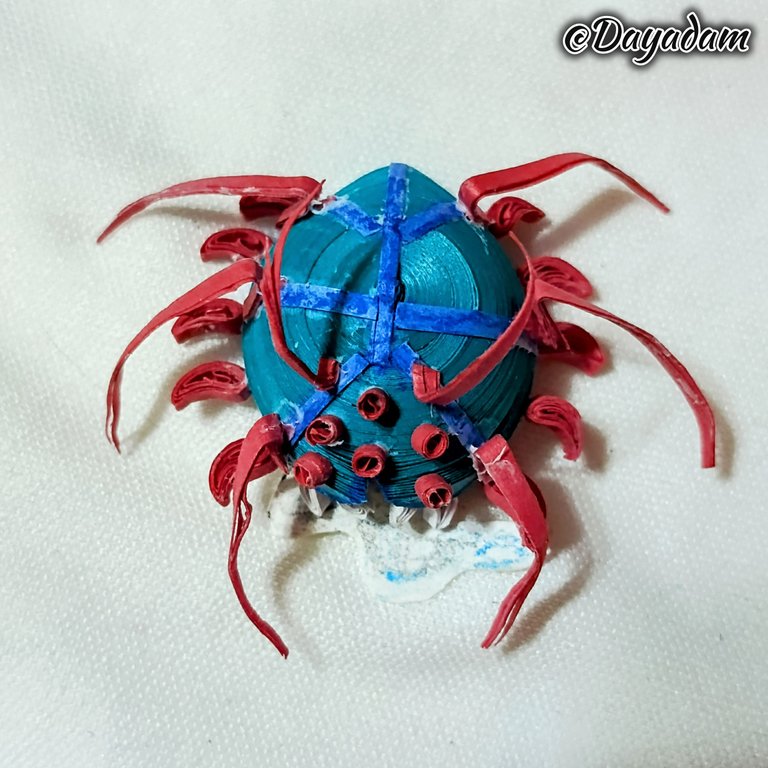
Thus we have ready this decorative figure in 3D, which materializes inspired by the card "Crypt Beetle".
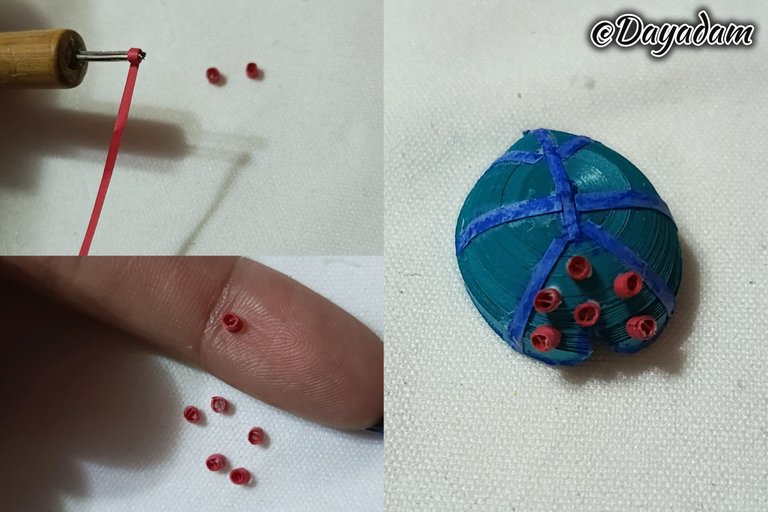
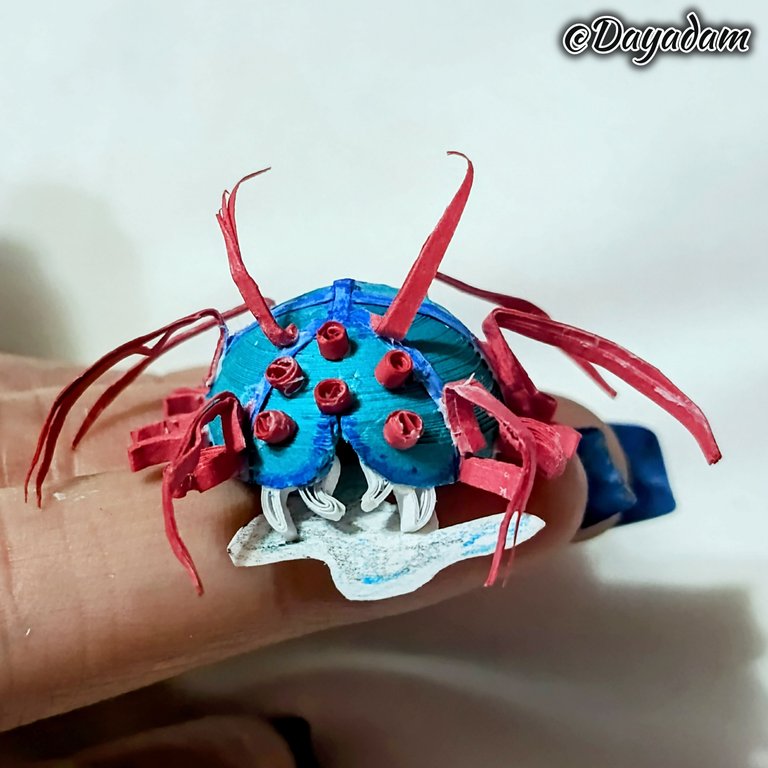
• Con cinta roja 1mm realicé pequeños círculos los cuales pegué en la parte del frente de la criatura.
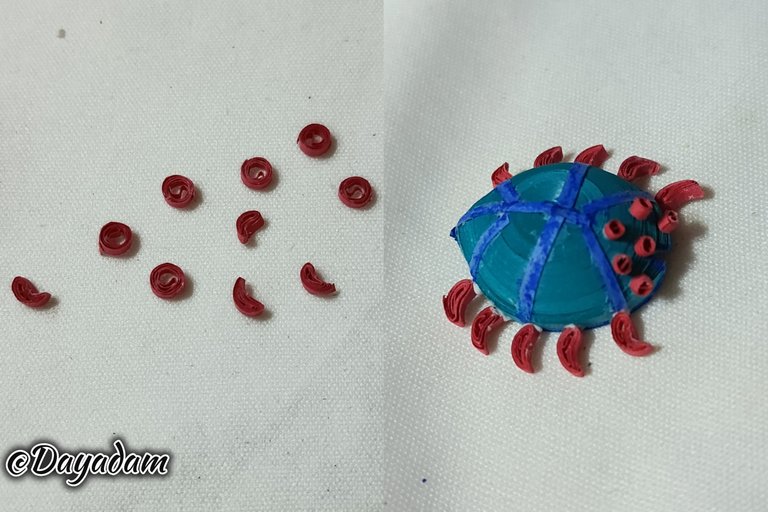
• Las patas las realicé también con cinta roja de 1mm de ancho, moldeando los pequeños círculos en forma de gota inclinada, pegué 5 de cada lado.
• Las antenas, y demás patas las realicé cortando cintas de color rojo de forma puntiaguda.
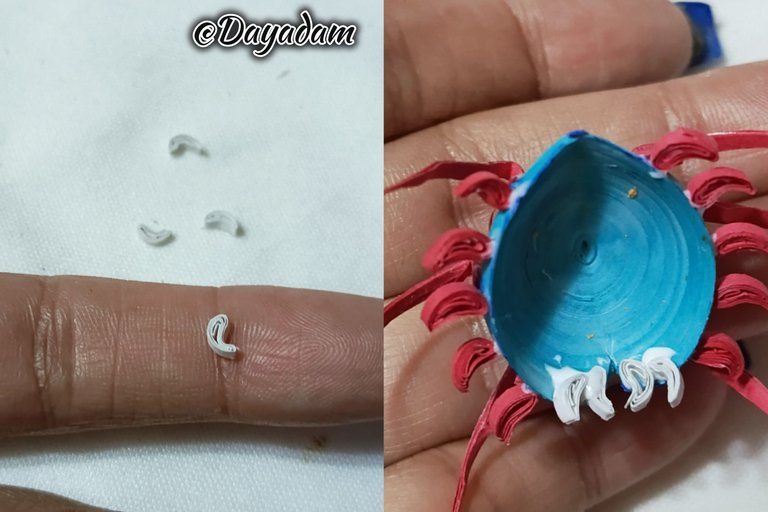
• Los dientes los realicé haciendo pequeñas gotas inclinadas de color blanco con cinta de 1mm de ancho, las pegué en la parte interna de la criatura.
• Para finalizar recorte de una cartulina blanca un trozo como pueden apreciar en la imagen, y pinte con lápices de colores unos sublimes reflejos.
De esta manera tenemos listo esta figura decorativa en 3D, que materialice inspirada en la carta "Crypt Beetle".
 |  |
 |  |  |

 |
|
 |  |
 |
 |
What did you think, did you like it?
I hope you did, I hope you liked my explanation, procedure and photos, I made them with love for you.
"Let out that muse that inspires you, and let your imagination fly".
Thank you all, see you next time.
¿Que les pareció, les gustó?
Espero que sí, que les haya gustado mi explicación, procedimiento y fotos, los hice con mucho cariño por y para ustedes.
"Deja salir esa musa que te inspira, y deja volar tu imaginación".
Gracias a todos, nos vemos en la próxima.
Banner y separador hecho por mí en Canva
Thank you @splinterboost ✨
La cucaracha, la cucaracha,
ya no puede caminar... 🎵
Yo le digo cucaracha, pero puede ser una garrapata o una de esas cosas marinas. Ahora ponlo en lugar alto y que sea fácil de reconocer, no vaya a ser que te de por pisarlo o aplasterlo pensando que es real. 😅
Es que no tenía ocuparse una cucaracha azul con ojos rojos, en la forma en el tamaño y en todo jajajaja.
Gracias por pasar, me gustó verte por aquí, siempre con tus comentarios tan tú 😂
!HUG
!PIZZA
@dayadam, sorry! You need more to stake more $PIZZA to use this command.
The minimum requirement is 20.0 PIZZA staked.
More $PIZZA is available from Hive-Engine or Tribaldex
The beetle looks unique and full of character, the striking combination of blue and red makes it immediately catch the eye💥
The character is really quite striking, the color combination is what attracts even more I'm so glad you liked the work.Thank you for your presence and for your constant appreciation of my work. Greetings...
!PIZZA
@dayadam, sorry! You need more to stake more $PIZZA to use this command.
The minimum requirement is 20.0 PIZZA staked.
More $PIZZA is available from Hive-Engine or Tribaldex
you deserve it dear. keep up the spirit of creating other beautiful works💪.
WOW! What an amazing and stunning piece of craft, each details leading to a wonderful result and I must say you are really good at what you do. Splendid work my friend and keep it up
Thank you so much, your words about my work are truly gratifying. It fills me with great pleasure to read them since these are the things that motivate us the most to continue improving.Thank you for stopping by for your appreciation and rating.
!PIZZA
@dayadam, sorry! You need more to stake more $PIZZA to use this command.
The minimum requirement is 20.0 PIZZA staked.
More $PIZZA is available from Hive-Engine or Tribaldex
Increíble cómo puedes recrear al personaje y esos pequeños detalles, perfectos.
Gracias mi linda, de verdad que siempre es un placer leer tus palabras hacia mi trabajo.
!LADY
your 3D quilled Crypt Beetle is impressive. A clever fusion of technique and creativity. Amazing work.
selected by @stevenson7
Thank you so much for your appreciation and kind words about my work. Greetings.
Thanks for sharing! - @isaria

Thank you for the support ✨
Mi querida @dayadam, este trabajo tiene una exquisita factura. Me ha encantado!!! Te quedó espectacular. Bravoooo
Muchísimas gracias mi bella, me complace realmente leer tu apreciación tan linda hacia mi trabajo.
Abrazos...
!LADY
Abrazos de luz!!! Sigue creando 💪🏻👌🏻👏🏻👏🏻👏🏻🌻🥰
Muy original. Me gustó
Muchísimas gracias 💖
Saludos @dayadam, que hermoso te quedó, como siempre un buen trabajo.
Gracias mi corazón por tus bonitas palabras, por tu constante valoración y apreciación a mi trabajo. Saludos 💕