How to use Reklah the Right Way
I have a very special battle for this week. Rules and Modifiers usually change the flow of battle. It changes how everyone should play and rewards or punishes anyone who followed and disobeyed the rules.
As a player, the battle mage, your role is to stand against the norm and do the battle on your own terms. In this battle, I will show you the true power of Archons and what would happen if you played your games smartly and correctly.
Thought Process:
Let's check each modifier in this battle in detail to Know wat we need to do.
https://splinterlands.com/battle/sl_3eba935b4c6da788de6b8b2bd3c9bfbd
Elements:

1. Life - Life Element units and archons have strong healing, decent magic and melee units. Their strategy is usually more on the defensive side.
2. Death - I consider this a counter-element. You have a lot of choices for Death units but its usually to enhance your team while debuffing the enemy.
3. Dragon - High mana, strong units. Flexible and can use Death and Life element in this battle.
Looking at these three available elements, ignoring the rules for now, it would be hard to determine what the enemy would use as a strategy so it's better to just focus on my own build and strategy for now.
Rules and Modifiers:

1. Melee Mayhem - This rule allows melee units to attack from any position. It's basically Charge which allows the melee unit to attack from front to back. This gives melee units flexibility. This also means players are more inclinde to use melee units.
2. Briar Patch - This rule gives all units Thorns, which inflict 2 melee damage to any melee unit that attacks another. It is a very simple rule that makes players not to want to use melee units in this battle for the fear of getting damage back everytime it attacks.
3. Counterspell - This rule gives everyone Magic Reflect which returns half of the magic attack the unit is done to another unit. Just like Briar Patch, this makes unit with magic attack less appealing. Players may still use units with magic attack but it's putting them at a disadvantage.
With these three rules in place, the only safe to use units are ranged units. The problem with that is they cannot attack from the front which forces you to use non-attacking units or range units with Close range as a tank to be safe from consequence. Death and Life Element doesn't have these units. Dragons have but I don't have Dragon archon for this battle. This means that you should expect you and your enemies to take some form of disadvantage in this battle but for your benefit, make sure that the disadvantages weigh less than the benefits.
Mana:

56 Mana:
The mana for this battle is fairly high. This means players are allowed to use stronger units and makes the battle more complicated.
These high mana battles though are the ones I like because it removes the limiter for players. As long as your strategy is solid, you can justify your use of high mana units.
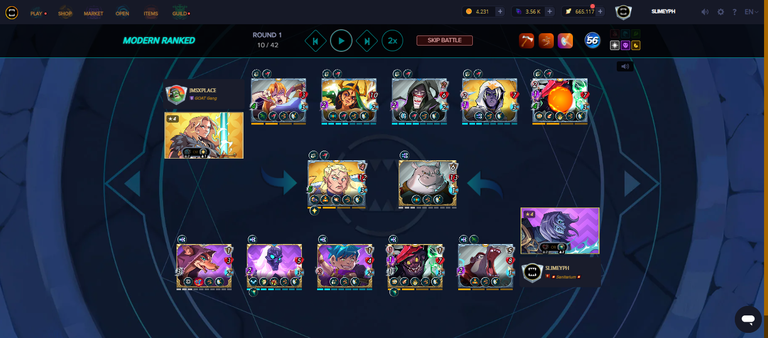
Lineup Choice:
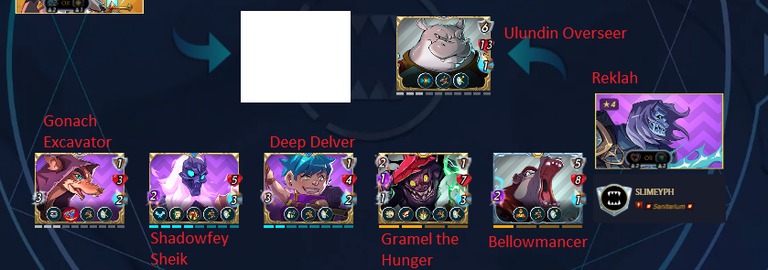
Reklah (archon): My archon for this battle. I used Reklah’s Deflect to protect my Gramel the Hunger and Shadowfey Sheik from indirect damage like Thorns, Magic Reflect, Blast, and Return Fire. For this match, I placed the Deflect specifically on Gramel the Hunger and Shadowfey Sheik so they could attack freely without worrying about hurting themselves. This choice gave me a safe foundation against the dangerous rules for this battle.
Ulundin Overseer (frontline): A strong wall with very high health and armor. His Flank ability (gives Reach to the next unit) is not useful here since the next unit does not have melee attack, but his main role was just to hold the line. He absorbs hits while the rest of the team deals the damage.
Bellowmancer (second tank): I picked him even if he gets damaged by Magic Reflect from Counterspell because I wanted his Taunt. This forced enemy attacks to focus on him, keeping the rest of my team safe and letting them keep attacking. His role was pure distraction and survival.
Gramel the Hunger (center): The main carry of this lineup. He has melee, range, and magic attacks, with Charge to attack from any position, Scattershot to bypass Taunt, and Relentless Strike to negate Shield/Void and deal +1 extra damage. This was very important because the main enemy tank Bera Dallin has Shield, which normally halves melee and range attacks. Thanks to Relentless Strike, Gramel cut through Bera Dallin’s defense and hit harder. Relentless Strike works on all of his attacks so he could get a +3 attack (one for each attack) if all of his attacks hit Bera Dallin.
Deep Delver: A 3 range attacker placed safely in the backline. His Rust removed 2 armor from every enemy, making them much easier targets for my melee and range attacks to finish. This single ability boosted the overall damage of my team.
Shadowfey Sheik: A 2-magic attacker with strong survival abilities. He has Life Leech to grow his health stronger with every hit, and Flying for higher dodge chance. He also interacted well with Gonach Excavator’s Reckless which when taking 1 damage from it, it triggers his Painforge, boosting his attack power. More damage from Reckless means more Life Leech due to higher attack. Shadowfey Sheik could recover health quickly and become stronger the longer the fight lasted.
Gonach Excavator (backline): Positioned last with his Sneak ability to pressure enemy backliners. His Reckless hurts nearby allies when he hits, but being at the very end limits that effect to only Shadowfey Sheik, who actually benefits from it because of Painforge. This placement turned a negative ability into a positive combo for the team.
Why This Match Was Special?
This match was special because everything worked exactly the way I wanted. Reklah’s Deflect made my team safe from all the indirect damage, so both Shadowfey Sheik and Gramel the Hunger could attack without worries. It felt like the perfect setup against the three rules, and my plan came together smoothly.
It was also special because I fully countered the danger from the rules. Other players might struggle with thorns or reflect, but my team did not take any of that damage. That clear advantage gave me control of the fight and a win that felt perfect.
Other News - My Frontier Mode Update
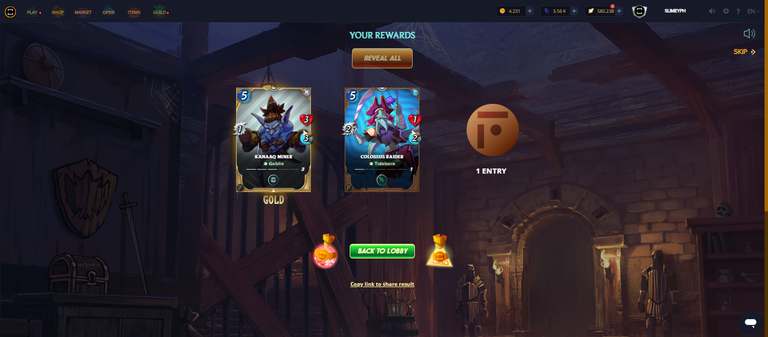
I've been playing a lot of Frontier Mode recently because I like the experience of getting the rewards fast. I'm also surprised that the daily rewards, the 5 wins reward, can actually give you Gold foils. Remember that these cards are not Soulbound so you can sell them if you want as you get them.
I won't though because I feel like I want to max them out which is useful as you can battle up to Silver level. The archons are also really good and reminds me a lot of Chaos Legion.

Hi, y'all. Slimey here, your jolly and gullible little blue slime. I got reincarnated to this world to better my art and join community challenges to get more practice and improve my skill.
Know more about me by checking out my introduction post
See funny vtuber clips and animations by checking out my youtube channel.
Support me by joining Splinterlands using my referral code.
Images are taken from Splinterlands, Drawn in Krita, Animated in Photoshop and Edited in Canva.
Thanks for sharing! - @mango-juice
