DIY; Espada de masa flexible inspirada en Silvershield Paladin ** DIY: Flexible dough sword inspired by Silvershield Paladin [Esp / Eng]

Saludos comunidad de @diyhub , les deseo un excelente fin de semana, en unión de sus seres queridos, hoy les comparto la elaboración de una espada que lleva el personaje Silvershield Paladin, como la mayoría de los proyectos que he realizado inspirado en este juego, esta elaborada con masa flexible, que es mi material favorito para moldear, la espada tiene los colores gris, negro, dorado y una gema de color verde, que adorna la parte de arriba de la empuñadura, les muestro el proceso de elaboración.
Greetings @diyhub community, I wish you an excellent weekend, together with your loved ones, today I share with you the making of a sword that the character Silvershield Paladin carries, like most of the projects I have done inspired by this game, it is made with flexible dough, which is my favorite material to mold, the sword has the colors gray, black, gold and a green gem, which adorns the top of the handle, I show you the manufacturing process.


Pintura al frío
Pegamento
Estecas
Crema para moldear
Masa flexible
Superficie plana para moldear
Cold paint
Glue
Cuttings
Modeling cream
Flexible dough
Flat surface for modeling

Iniciamos dividiendo la masa en pequeñas porciones, luego añadimos pintura y mezclamos hasta obtener el color deseado; para este proyecto emplearemos los colores gris, dorado, negro y verde, luego de mezclar las pinturas con la masa, formamos varias bolas, de acuerdo a los colores que usaremos, las aplanamos y a partir de allí las piezas de la espada, para hacer el mango que es de color negro, moldeamos un cilindro, lo pasamos varias veces por la superficie plana para alisar y con la estecas redondeamos los extremos, al momento de moldear es importante hacer un cálculo aproximado de la cantidad de masa que vamos a emplea, así solo usamos la cantidad necesaria y ahorramos la masa, algunos sobrantes se pierden, porque mientras vamos trabajando estos se van secando y ya no se pueden usar en nuevas esculturas.
We start by dividing the dough into small portions, then add paint and mix until you get the desired color; for this project we will use the colors gray, gold, black and green, after mixing the paints with the dough, we form several balls, according to the colors we will use, we flatten them and from there the pieces of the sword, to make the handle which is black, we mold a cylinder, we pass it several times on the flat surface to smooth it out and with the stakes we round the ends, when molding it is important to make an approximate calculation of the amount of dough that we are going to use, so we only use the necessary amount and save the dough, some leftovers are lost, because while we work these dry out and can no longer be used in new sculptures.


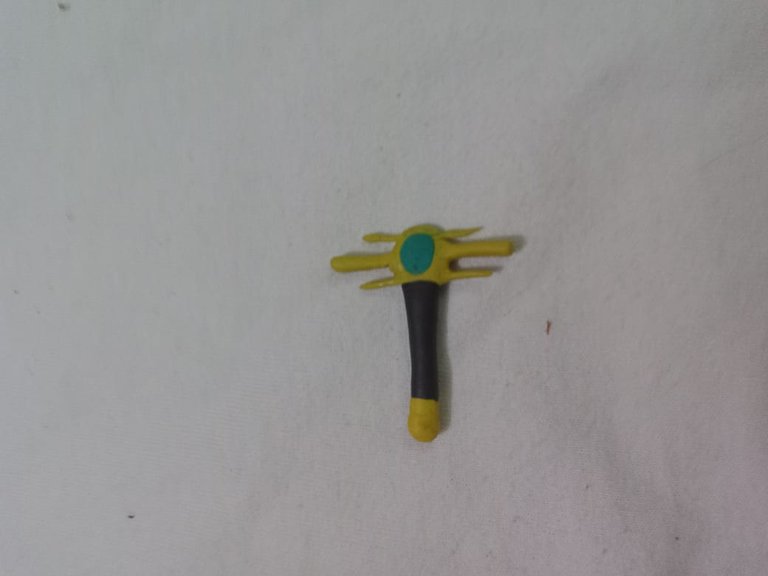
Utilizando masa dorada, colocamos los accesorios en el mango, aplanamos la masa lo más fino posible, aplicamos pegamento y cubrimos 2 o 3 centímetros de la parte inferior del mango, en la parte superior formamos la letra T, redondeamos la punta, aplanamos en la parte superior, también cubrimos y agregamos dos tiras, una de cada lado, más un pequeño rombo en la parte superior.
Using golden dough, we place the accessories on the handle, flatten the dough as thin as possible, apply glue and cover 2 or 3 centimeters of the bottom of the handle, at the top we form the letter T, round the tip, flatten at the top, also cover and add two strips, one on each side, plus a small diamond at the top.

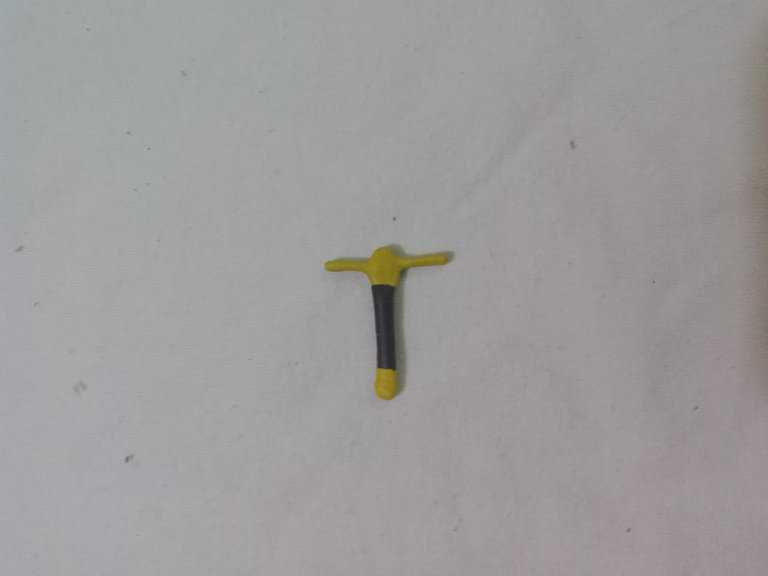
Continuamos trabajando con la masa dorada y agregamos cuatro tiras a la empuñadura, moldeamos un cilindro delgado de aproximadamente 18 centímetros de largo, cortamos las tiras, con ayuda de las estecas afilamos los extremos colocamos pegamento y unimos ariba y abajo de los cilindros del paso anterior; con la mano y una esteca circular aplanamos el rombo, así se expande y tendremos un espacio para colocar la gema.
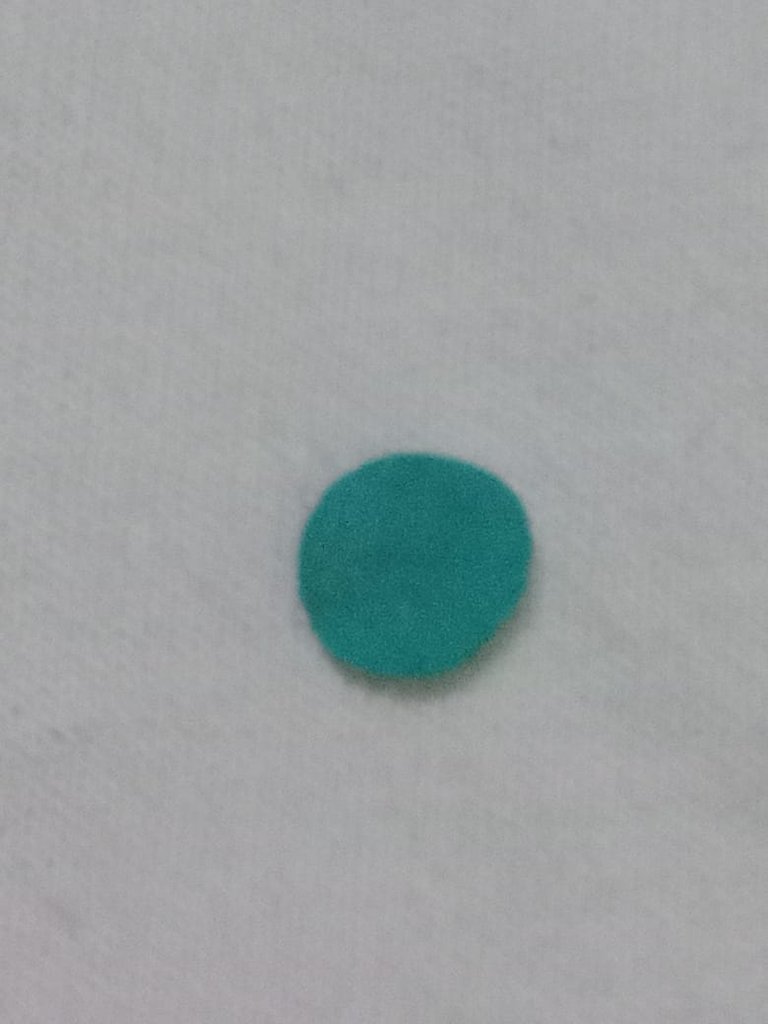
Con la masa verde, hacemos la gema, un pequeño círculo, luego de moldearlo y alisar los bordes, haremos un orificio, en la parte central de color dorado, ponemos pegamento y unimos la gema, dejamos secar 20 o 30 minutos, al ser piezas pequeñas y delgadas, necesitamos pegar bien, así evitamos que se rompan.
En este paso es importante agregar suficiente pegamento a las piezas pequeñas y unirlas con cuidado dejando espacio entre ellas para que compacten y queden firmes y fuertes, el tiempo de secado es también importante para un buen resultado.
We continue working with the gold dough and add four strips to the handle. We mold a thin cylinder approximately 18 centimeters long. We cut the strips, sharpen the ends with the help of the stakes, apply glue, and join the top and bottom of the cylinders from the previous step. With our hand and a circular stake, we flatten the rhombus, so it expands and we will have a space to place the gem.
With the green dough, we make the gem, a small circle. After shaping it and smoothing the edges, we make a hole in the center, colored in gold, apply glue, and attach the gem. Let it dry for 20 or 30 minutes. Since the pieces are small and thin, we need to glue them well to prevent them from breaking.
In this step, it's important to add enough glue to the small pieces and carefully join them together, leaving space between them so they compact and remain firm and strong. Drying time is also important for a good result.

To make the sword blade, add two or three drops of silver paint to the gray dough, this adds a shiny effect that simulates metal, mix until integrated and obtain the desired shine, flatten the dough and form a strip, with the stakes cut the top and form a triangle, continue using the cutting stake and sharpen the tip, with your hands smooth the edges of the sword blade, flatten the bottom, place glue and join it to the handle, to give it more support, stretch some gray dough until it is very thin, add glue again and cover the base of the blade, press gently with the ceramic and let it dry, thus a beautiful sword inspired by Splinterlands is finished.
Para hacer la hoja de la espada, añadimos dos o tres gotas de pintura plateada a la masa gris, esta añade un efecto brillante que simula el metal, mezclamos hasta integrar y obtener el brillo deseado, aplanamos la masa y formamos una tira, con las estecas cortamos la parte de arriba y formamos un triángulo, seguimos usando la esteca cortadora y afilamos la punta, con las manos alisamos los bordes de la hoja de la espada, aplanamos la parte de abajo colocamos pegamento y la unimos a la empuñadura, para darle mayor soporte, estiramos un poco de masa gris que quede muy delgada, le agregamos nuevamete pegamento y cubrimos la base de la hoja, presionamos suave con la cerámica y dejamos secar, así está terminada una hermosa espada inspirada en Splinterlands.

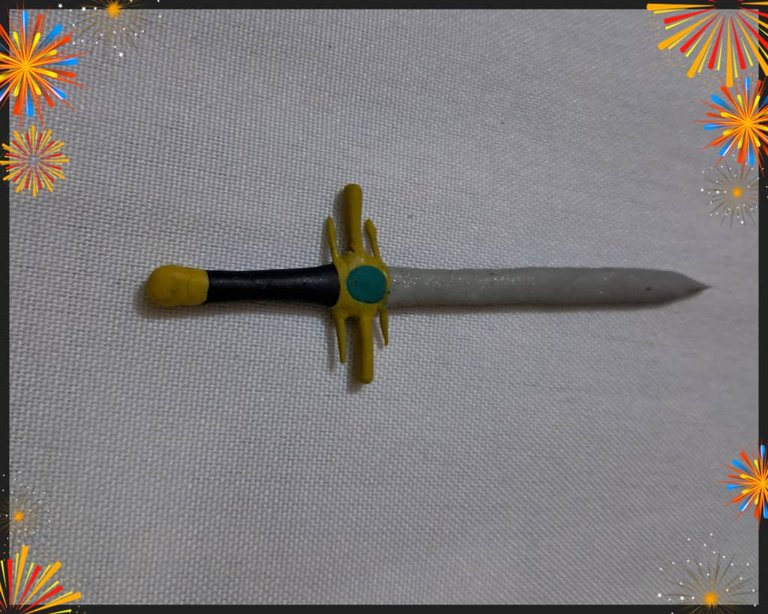
Les muestro el resultado
I show you the result
Gracias por Leer.
Thank you for reading.
Hasta Luego!
See you later!
Translated with https://www.deepl.com/translator
    All images are of my authorship captured with an Alcatel phone.


      Todas las imágenes son de mi autoría capturadas con un teléfono Alcatel.
Thank you so much
Thanks for sharing! - @cieliss

Thank you so much!