DIY: Cetro inspirado en Tyrus Paladium ** DIY: Scepter inspired by Tyrus Paladium [ESP / ENG]
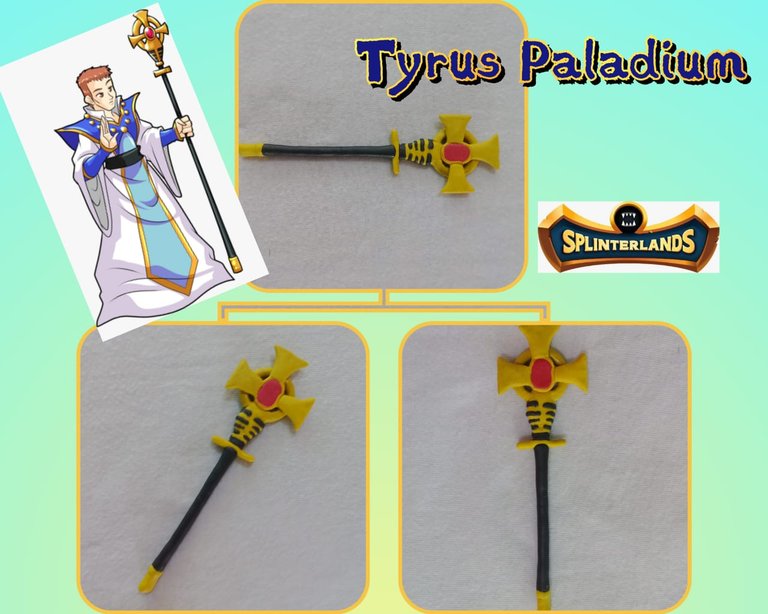
Saludos comunidad de @diyhub, les deseo una excelente semana, en unión de sus seres queridos, me siento feliz de compartir un nuevo proyecto de moldeado inspirado en los personajes de Splinterlands, se trata del cetro que lleva en la mano Tyrus Paladium, es muy llamativo por su forma y colores, lo cual me recuerda a las figuras y dioses de Egipto, lleva los colores negro en la base, dorado en la partye suprior y una gema de color rojo en el centro, su diseño es muy diferente a los cetros que comunmente usan los reyes. Les muestro el proceso de elaboración.
Greetings @diyhub community, I wish you an excellent week, together with your loved ones, I am happy to share a new molding project inspired by the characters of Splinterlands, it is the scepter that Tyrus Paladium carries in his hand, it is very striking for its shape and colors, which reminds me of the figures and gods of Egypt, it has black colors at the base, gold on the top and a red gem in the center, its design is very different from the scepters that kings commonly use. I show you the manufacturing process.


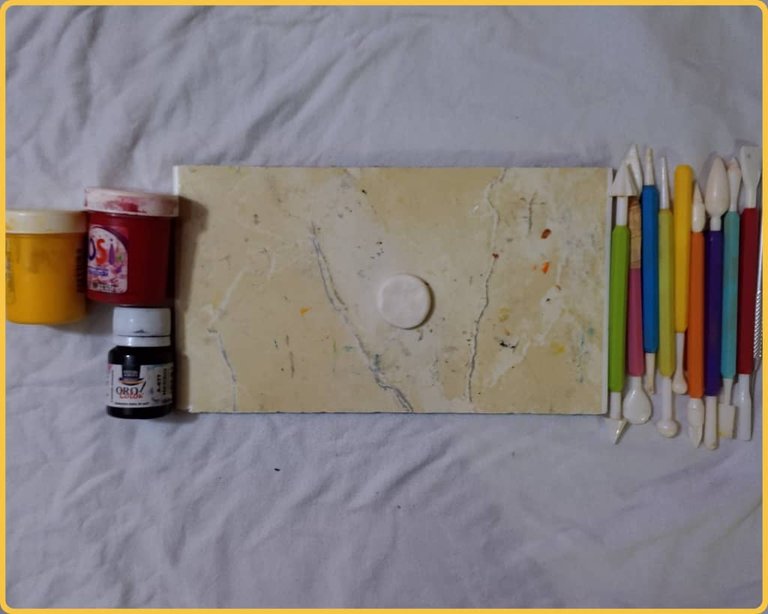
Pintura al frío
Estecas
Crema para moldear
Pegamento
Masa flexible
Superficie plana para moldear
Cold paint
Cuttings
Modeling cream
Glue
Flexible compound
Flat surface for modeling
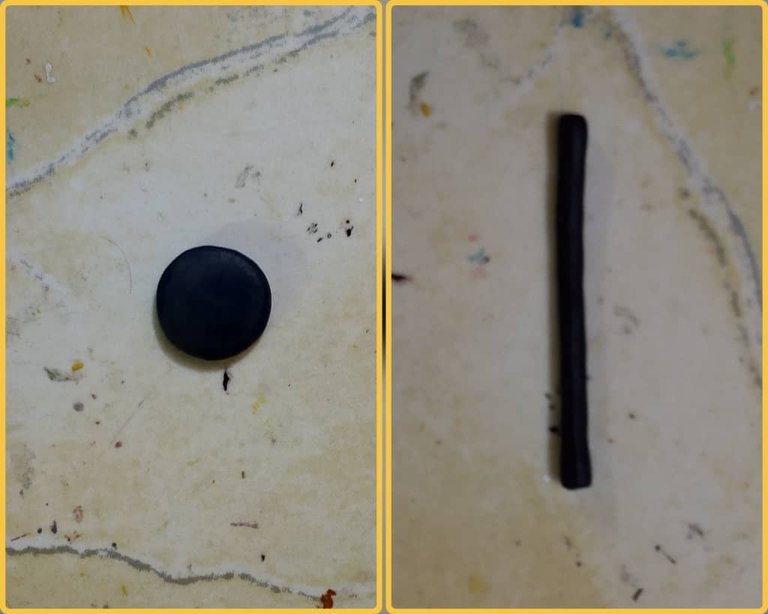
Iniciamos dividiendo la masa en pequeñas porciones, luego añadimos pintura y mezclamos hasta obtener el color deseado, necesitaremos masa en los colores dorado, negro y rojo, formamos varias bolas una de cada color que usaremos, las aplanamos y a partir de allí haremos la base que es de color negro, moldeamos un cilindro y con la esteca aplanamos los extremos y daremos forma cuadrada.
We start by dividing the dough into small portions, then we add paint and mix until we get the desired color, we will need dough in the colors gold, black and red, we form several balls, one of each color that we will use, we flatten them and from there we will make the base which is black, we mold a cylinder and with the tool we flatten the ends and we will give it a square shape.
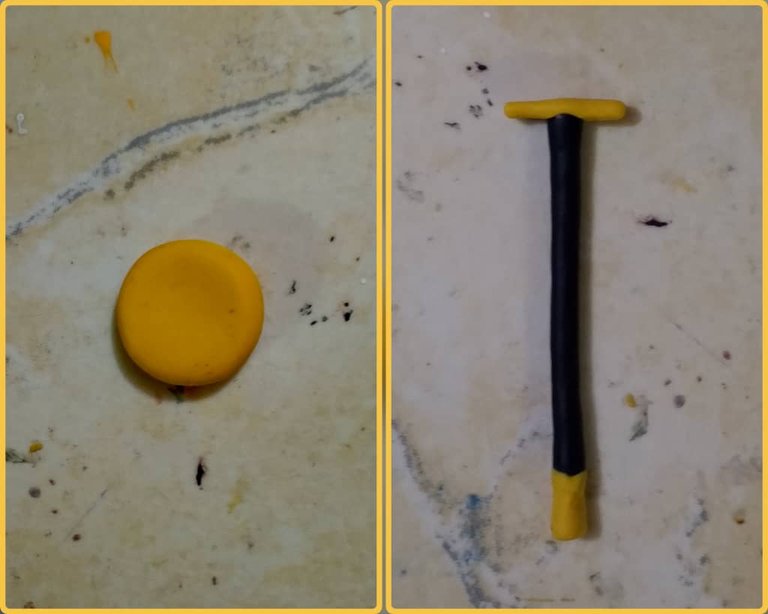
Con la masa dorada formamos un cilindro delgado y lo pegamos en la parte de arriba de la base, esta servirá de soporte a la cruz y gema, agregamos pegamento y dejamos secar, luego tomamos una porción pequeña de masa dorada, aplanamos lo más delgado que podamos, añadimos pegamento con ayuda del pincel y cubrimos aproximadamente 3 centímetros en la parte de abajo, con cuidado pegamos la capa de masa dorada y dejamos secar.
With the golden dough we form a thin cylinder and glue it to the top of the base, this will serve as a support for the cross and gem, add glue and let it dry, then take a small portion of golden dough, flatten it as thin as possible, add glue with the help of the brush and cover approximately 3 centimeters on the bottom, carefully glue the layer of golden dough and let it dry.
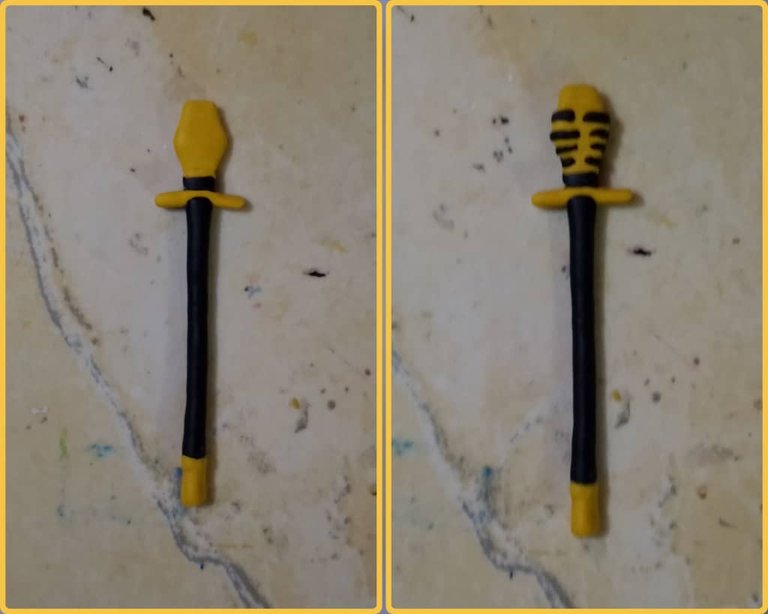
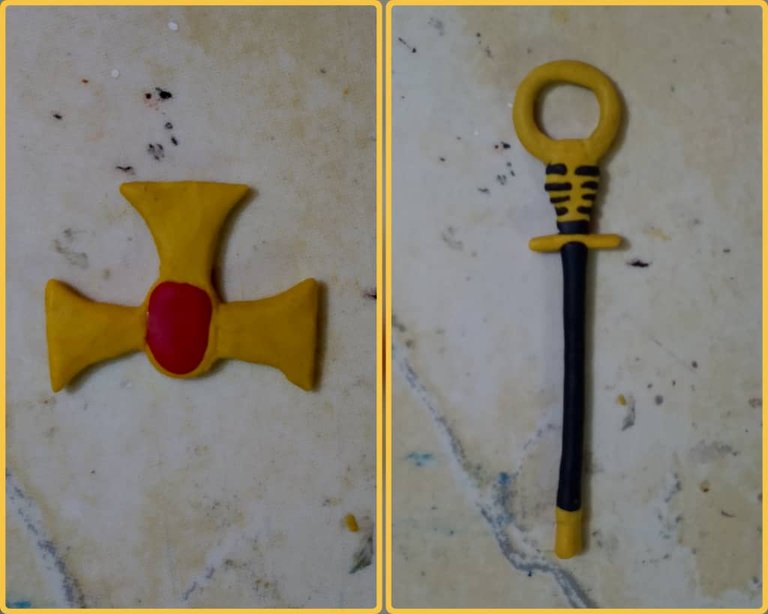
Continuamos usando la masa dorada y moldeamos un hexágono que nos quede alargado en la parte de arriba y abajo, prestando especial atención a los detalles de los lados que queden muy parecidos a un ángulo, agregamos pegamento y lo unimos a la base del cetro que quede exactamente encima del cilindro que colocamos en el paso anterior.
Con la masa negra moldeamos tiras muy delgadas y con ayuda de la esteca iremos pegando en el hexágono, este paso es un tanto difícil por lo delgado de las tiras, pero para ello nos ayudamos con las estecas, trazamos líneas en el hexágono, agregamos pegamento en las tiras y con la esteca de punta fina vamos colocando cada una en su lugar y dejamos secar para que compacte muy bien.
We continue using the gold dough and mold a hexagon that is elongated at the top and bottom, paying special attention to the details of the sides so that they resemble an angle. We add glue and attach it to the base of the scepter, which sits exactly on top of the cylinder we placed in the previous step.
With the black dough, we mold very thin strips and, using the tool, we glue them onto the hexagon. This step is somewhat difficult due to the thinness of the strips, but to do so, we use the tools to help us. We draw lines on the hexagon, add glue to the strips, and with the fine-pointed tool, we place each one in its place and let it dry so that it compacts well.
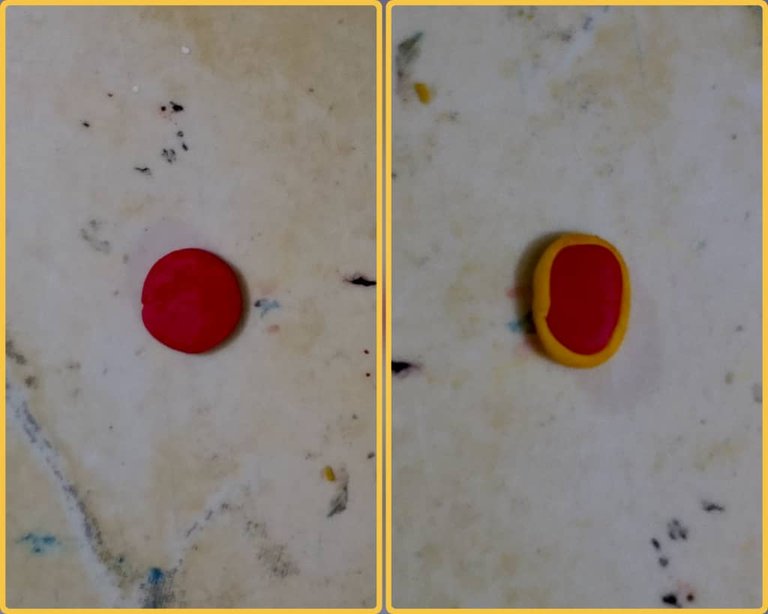
Luego moldearemos la gema, iniciamos con un círculo queiremos aplanando hasta obtener la forma de óvalo, seguidamente tomamos masa dorada, esriramos y aplanamos una tira lo más delgado posible y le agregamos pegamento, con esta tira vamos a decorar el borde de la gema poco a poco, vamos pegando la tira en la gema de tal forma que la cubra por completo, revisamos que haya pegamento en toda la tira y dejamos secar.
Then we will shape the gem, we start with a circle that we will flatten until obtaining the oval shape, then we take gold dough, stretch and flatten a strip as thin as possible and add glue, with this strip we will decorate the edge of the gem little by little, we will stick the strip on the gem in such a way that it covers it completely, we check that there is glue on the entire strip and let it dry.
Luego moldeamos una cruz, la cual tiene los lados en forma de arco y las esquinas afiladas, en el centro colocamos suficiente pegamento y pegaremos la gema, dejamos secar por un tiempo prolongado porque ambas piezas son pesadas y gruesas, necesitan pegar muy bien para que la pieza no se rompa.
Tomando la masa dorada nuevamente moldeamos un círculo, este lo pegamos encima del trapecio y luego uniremos al círculo cruz con la gema, colocamos pegamento por todo el círculo y en la parte de atrás de la cruz, unimos estas piezas y al igual que en el paso anterior dejamos secar para que peguen bien y queden fuertes.
Next, we mold a cross, which has arched sides and sharp corners. In the center, we place enough glue and glue the gem. We let it dry for a long time because both pieces are heavy and thick; they need to stick together very well so the piece doesn't break.
Taking the golden dough again, we mold a circle. We glue this on top of the trapezoid. Then, we join the cross and the gem to the circle. We apply glue all over the circle and on the back of the cross, we join these pieces together, and just like in the previous step, we let it dry so they stick together well and remain strong.
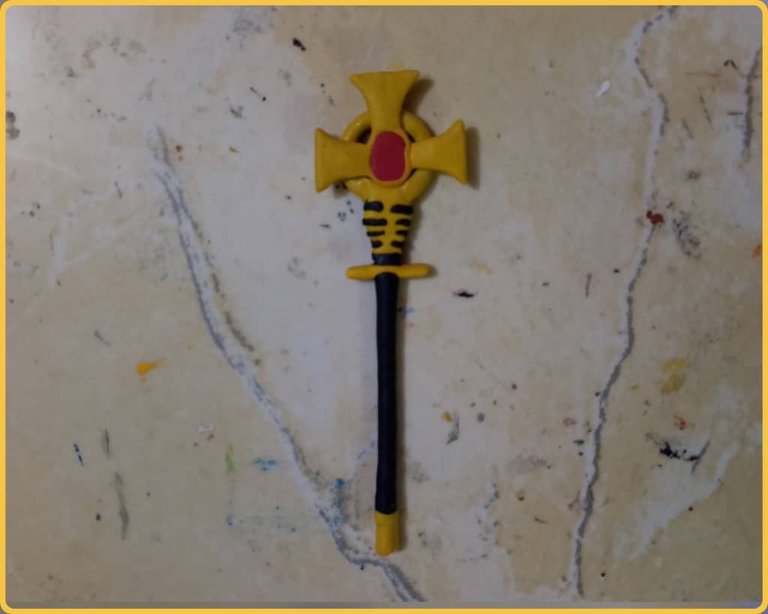
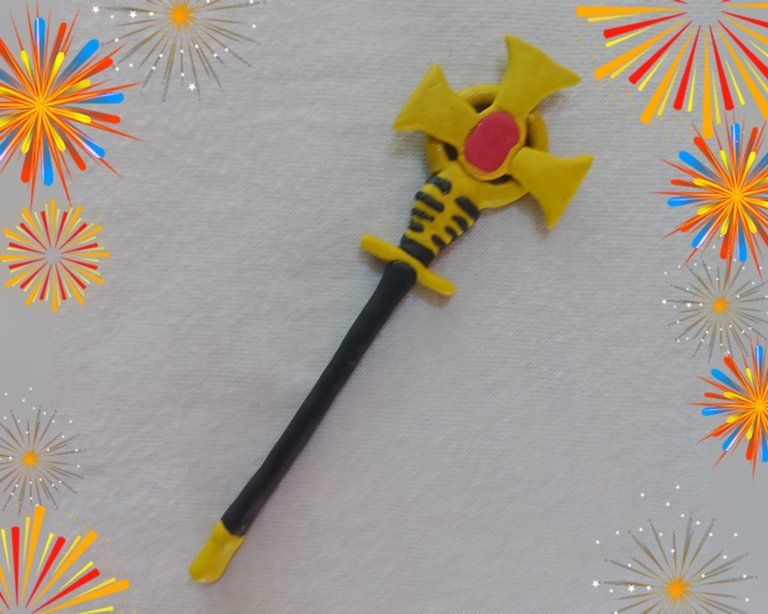
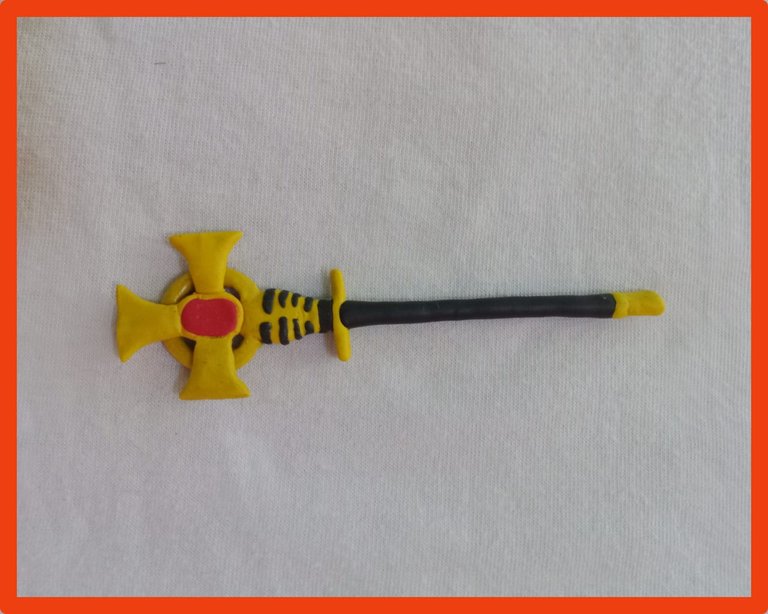
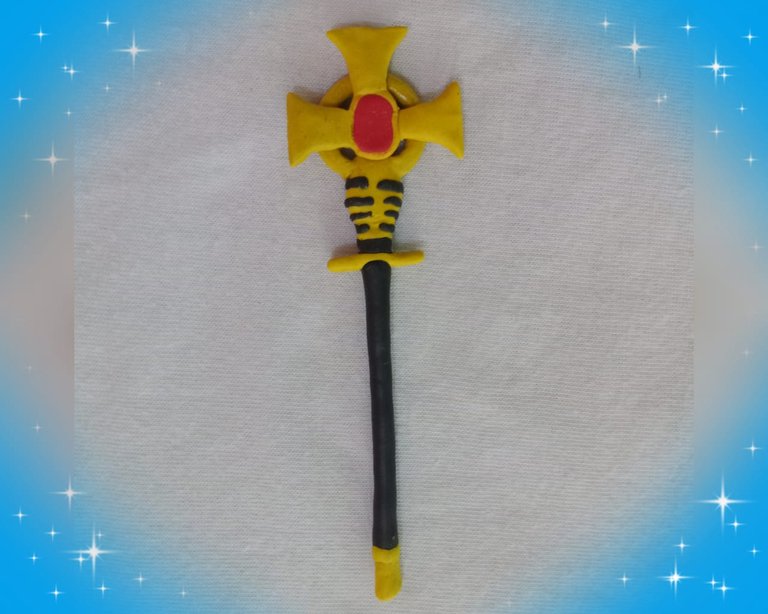
Les muestro el resultado, este cetro me gustó por su forma y colores.
I show you the result, I liked this scepter for its shape and colors.
Gracias por Leer.
Thank you for reading.
See you later!
Translated with https://www.deepl.com/translator
    All images are of my authorship captured with an Alcatel phone.


      Todas las imágenes son de mi autoría capturadas con un teléfono Alcatel. .
Thank you very much.
Impressive work. Not only does the scepter look realistic, it also looks a replica of the character. Bravo
selected by @stevenson7
Hello @diyhub and @stevenson7, I like the result, it looks great, and the design is eye-catching and unusual.
Best regards!
This is so creative and amazing
Greetings @praiselove, thank you for your visit and support.
Have a great week!
Congratulations @samuell12! You have completed the following achievement on the Hive blockchain And have been rewarded with New badge(s)
Your next target is to reach 800 replies.
You can view your badges on your board and compare yourself to others in the Ranking
If you no longer want to receive notifications, reply to this comment with the word
STOPThank you very much @hivebuzz
That's great @samuell12! We're thrilled with your progress on Hive! Don't stop before achieving this new goal!
quedo genial, igualito a la referencia jeje, buen trabajo
It looked great, just like the reference hehe, good job
Saludos amiga, me alegra que te haya gustado, hacer las líneas negras tomó bastante tiempo, me encantó el resultado.
Thanks for sharing! - @cieliss

Thank you
This is new for me but its really amazing
Thank you for your visit, I'm glad you liked it.