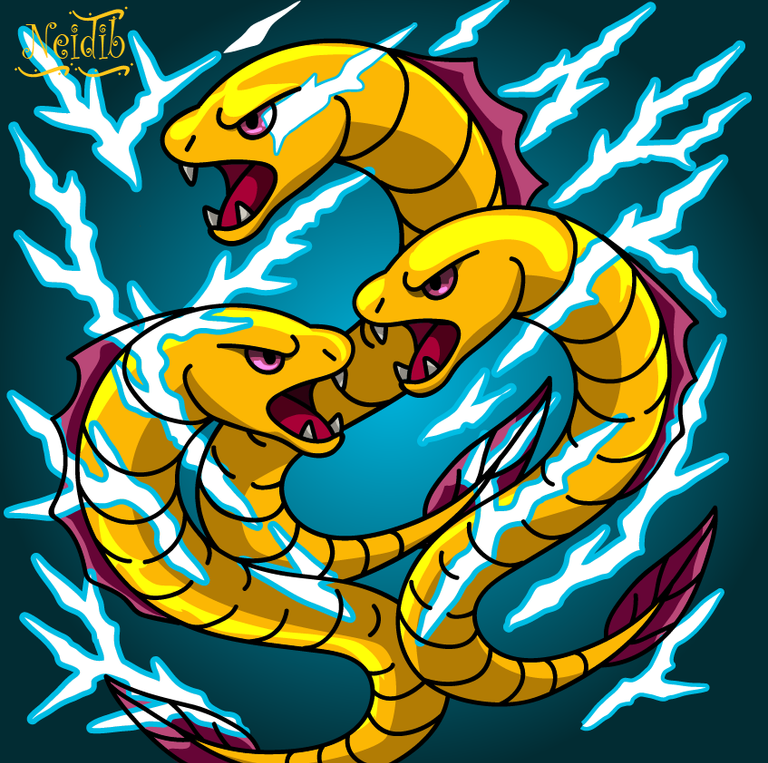
Electric Eels - Splinterlands Art Contest Week 348
¡Hola a todos!
Espero que estén disfrutando de un día maravilloso. Mi nombre es Neidibert y me siento muy emocionada de ser parte de este concurso, que semana tras semana nos brinda la oportunidad de expresar nuestra creatividad de manera única y sorprendente.
En esta ocasión, estoy emocionada de presentar mi participación en la edición número 348, y me complace compartir que he creado una ilustración de ELECTRIC EELS. Estoy ansiosa por recibir sus comentarios y ver las increíbles obras que todos ustedes han preparado.
¡Gracias por ser parte de esta maravillosa comunidad!
Hello everyone!
I hope you're having a wonderful day. My name is Neidibert, and I'm very excited to be part of this contest, which week after week gives us the opportunity to express our creativity in unique and surprising ways.
This time, I'm thrilled to present my entry in the 348th edition, and I'm happy to share that I've created a ELECTRIC EELS illustration. I look forward to hearing your feedback and seeing the amazing works you've all prepared.
Thank you for being part of this wonderful community!

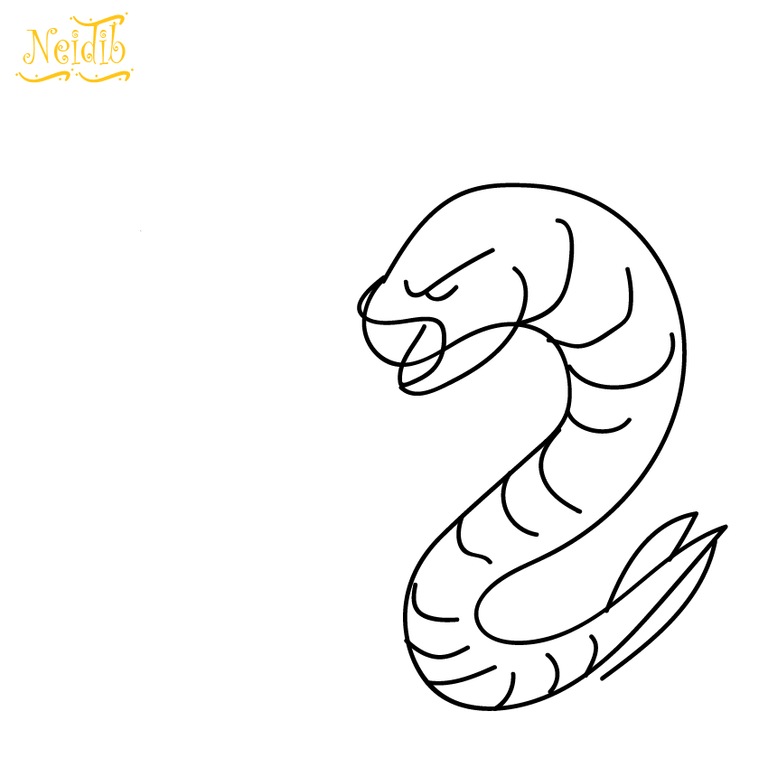
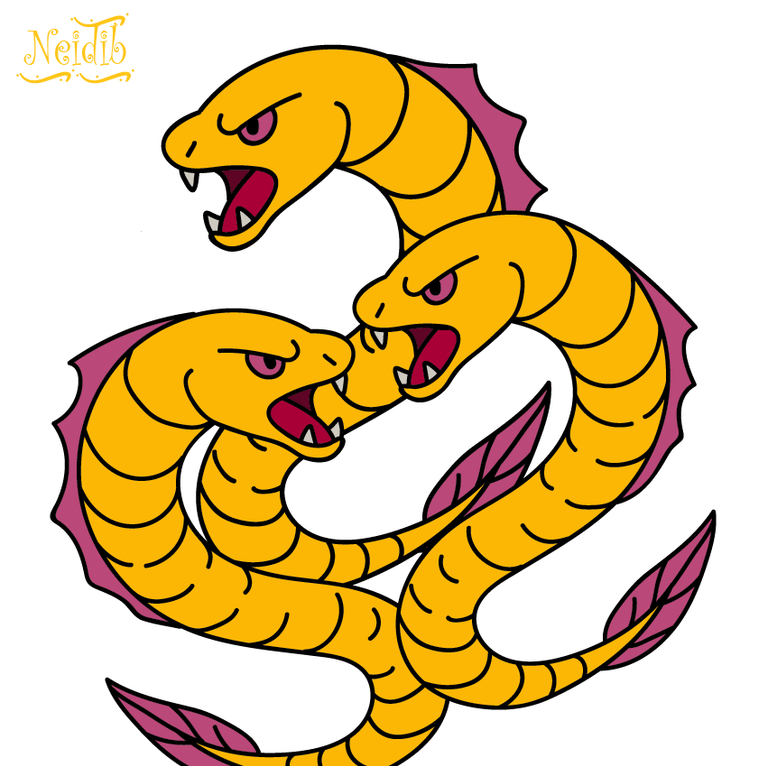
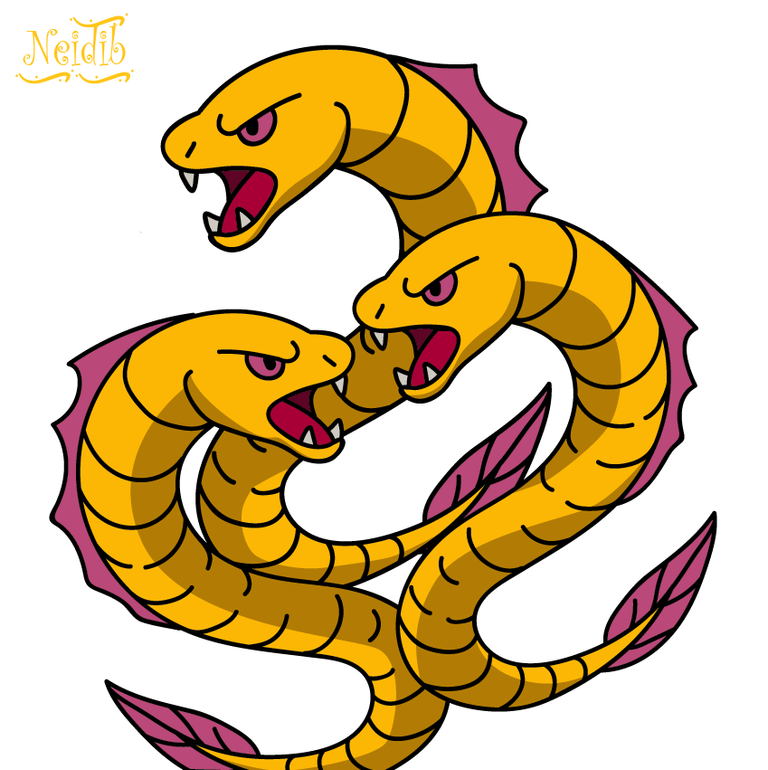
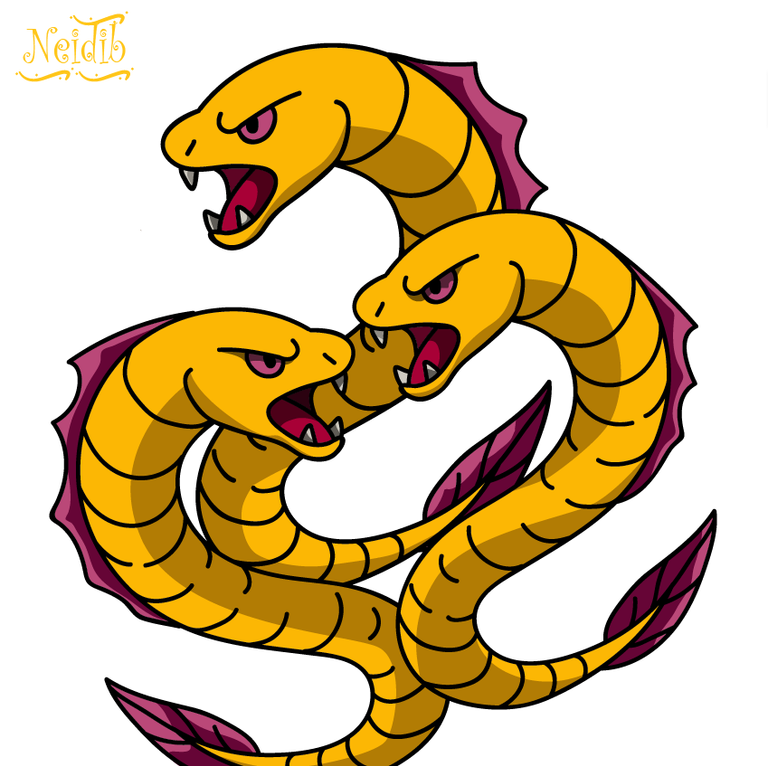
Proceso del Dibujo/ Drawing Stages
Proceso Creativo
¡Hola a todos! Me gustaría compartir con ustedes el emocionante viaje que me llevó a crear este proyecto: mi dibujo de ELECTRIC ELS. Utilicé Photoshop como mi herramienta principal para llevar a cabo esta obra. Primero, abrí un nuevo archivo y comencé a realizar los primeros trazos y bocetos usando la herramienta pluma. Este paso inicial fue fundamental, ya que me permitió delinear rápidamente la figura de ELECTRIC ELS antes de avanzar a la fase de delineado más detallado.
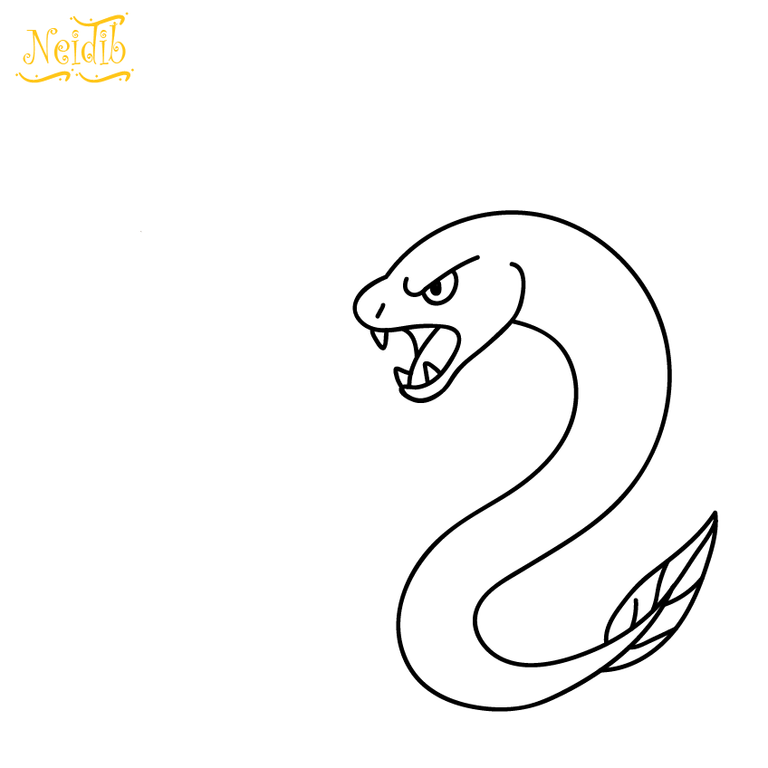
Delineado y Aplicación de Color
Una vez que estuve satisfecho con el boceto, procedí a dibujar el arte lineal. En esta etapa, me aseguré de que cada detalle estuviera bien definido para capturar la esencia del personaje. Con el delineado completo, comencé a aplicar color a la ilustración, eligiendo cuidadosamente los tonos que se alinearan con la estética y personalidad de ELECTRIC ELS.
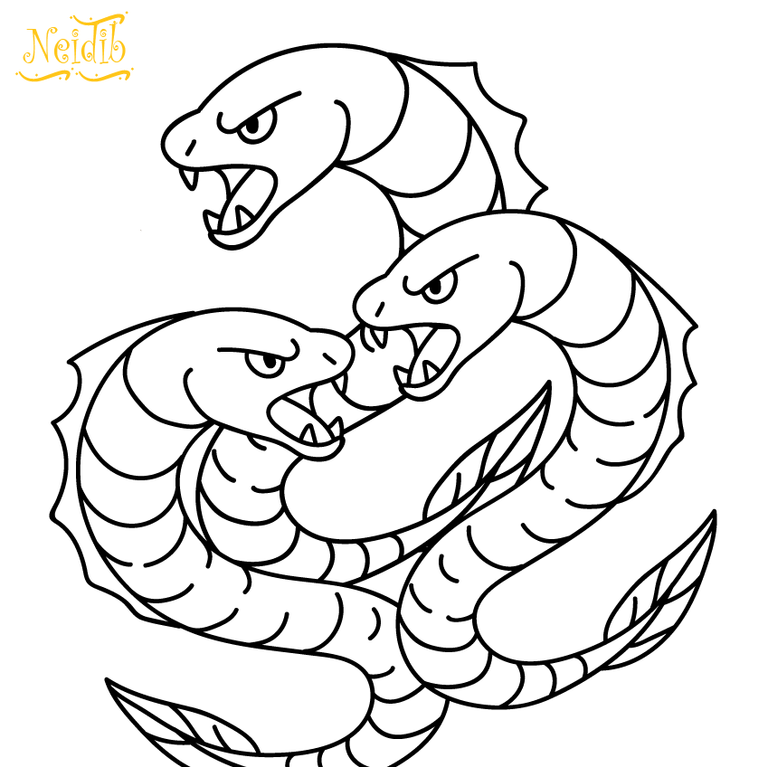
Sombras y Luces
Para darle más profundidad a la imagen, añadí una capa de color para las sombras. Esta técnica ayudó a resaltar los contornos y a crear un efecto tridimensional. Luego, apliqué otra capa de color para las luces, lo que aportó un brillo especial a la ilustración y, en última instancia, infundió a su entorno una sensación de descarga eléctrica.
Estoy muy emocionado con el resultado final y espero que a ustedes también les guste. ¡Gracias por acompañarme en este proceso creativo! Estoy ansioso por escuchar sus comentarios y compartir más sobre mis futuras obras.
Creative Process
Hello everyone! I'd like to share with you the exciting journey that led me to create this project: my drawing of ELECTRIC ELS. I used Photoshop as my primary tool to complete this work. First, I opened a new file and began making the first strokes and sketches using the pen tool. This initial step was crucial, as it allowed me to quickly outline ELECTRIC ELS's figure before moving on to the more detailed linework phase.
Outlining and Color Application
Once I was satisfied with the sketch, I proceeded to draw the line art. At this stage, I made sure every detail was well-defined to capture the essence of the character. With the outlining complete, I began applying color to the illustration, carefully choosing tones that aligned with ELECTRIC ELS's aesthetic and personality.
Shadows and Highlights
To give the image more depth, I added a layer of color for the shadows. This technique helped highlight the contours and create a three-dimensional effect. Then, I applied another layer of color for the highlights, which gave the illustration a special glow and ultimately gave its surroundings a sense of electric shock.
I'm very excited about the final result and hope you like it too. Thank you for joining me in this creative process! I look forward to hearing your feedback and sharing more about my future works.


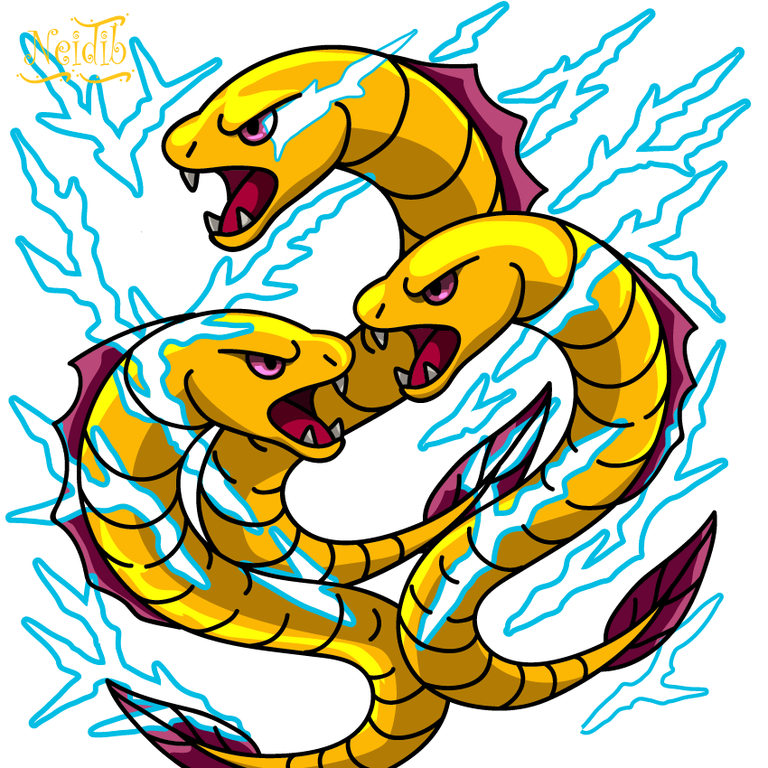
Trabajo final/ Final work
Recursos empleados para este trabajo:
Concurso:
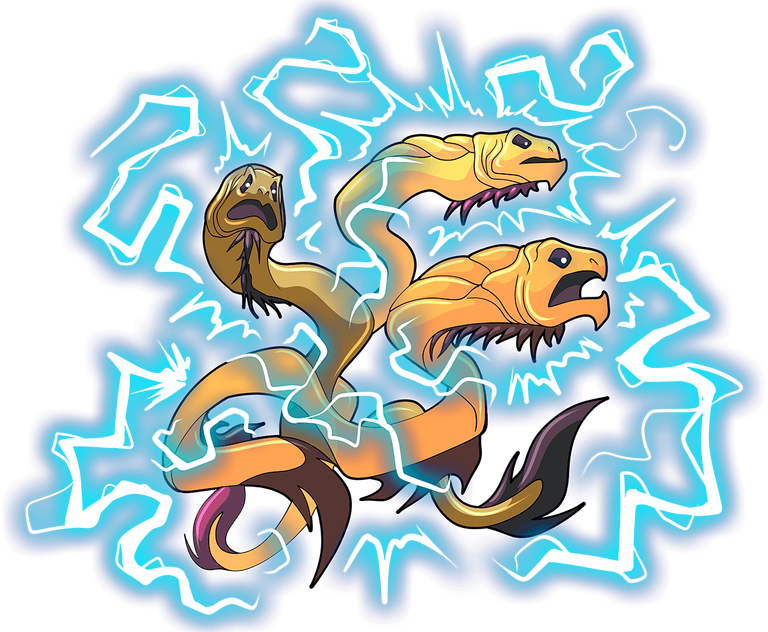
Imagen de Referencia: Source
Software: Photoshop
¡Hola a todos!
Espero que estén disfrutando de un día maravilloso. Mi nombre es Neidibert y me siento muy emocionada de ser parte de este concurso, que semana tras semana nos brinda la oportunidad de expresar nuestra creatividad de manera única y sorprendente.
En esta ocasión, estoy emocionada de presentar mi participación en la edición número 348, y me complace compartir que he creado una ilustración de ELECTRIC EELS. Estoy ansiosa por recibir sus comentarios y ver las increíbles obras que todos ustedes han preparado.
¡Gracias por ser parte de esta maravillosa comunidad!
Hello everyone!
I hope you're having a wonderful day. My name is Neidibert, and I'm very excited to be part of this contest, which week after week gives us the opportunity to express our creativity in unique and surprising ways.
This time, I'm thrilled to present my entry in the 348th edition, and I'm happy to share that I've created a ELECTRIC EELS illustration. I look forward to hearing your feedback and seeing the amazing works you've all prepared.
Thank you for being part of this wonderful community!
Proceso del Dibujo/ Drawing Stages
Proceso Creativo
¡Hola a todos! Me gustaría compartir con ustedes el emocionante viaje que me llevó a crear este proyecto: mi dibujo de ELECTRIC ELS. Utilicé Photoshop como mi herramienta principal para llevar a cabo esta obra. Primero, abrí un nuevo archivo y comencé a realizar los primeros trazos y bocetos usando la herramienta pluma. Este paso inicial fue fundamental, ya que me permitió delinear rápidamente la figura de ELECTRIC ELS antes de avanzar a la fase de delineado más detallado.
Delineado y Aplicación de Color
Una vez que estuve satisfecho con el boceto, procedí a dibujar el arte lineal. En esta etapa, me aseguré de que cada detalle estuviera bien definido para capturar la esencia del personaje. Con el delineado completo, comencé a aplicar color a la ilustración, eligiendo cuidadosamente los tonos que se alinearan con la estética y personalidad de ELECTRIC ELS.
Sombras y Luces
Para darle más profundidad a la imagen, añadí una capa de color para las sombras. Esta técnica ayudó a resaltar los contornos y a crear un efecto tridimensional. Luego, apliqué otra capa de color para las luces, lo que aportó un brillo especial a la ilustración y, en última instancia, infundió a su entorno una sensación de descarga eléctrica.
Estoy muy emocionado con el resultado final y espero que a ustedes también les guste. ¡Gracias por acompañarme en este proceso creativo! Estoy ansioso por escuchar sus comentarios y compartir más sobre mis futuras obras.
Creative Process
Hello everyone! I'd like to share with you the exciting journey that led me to create this project: my drawing of ELECTRIC ELS. I used Photoshop as my primary tool to complete this work. First, I opened a new file and began making the first strokes and sketches using the pen tool. This initial step was crucial, as it allowed me to quickly outline ELECTRIC ELS's figure before moving on to the more detailed linework phase.
Outlining and Color Application
Once I was satisfied with the sketch, I proceeded to draw the line art. At this stage, I made sure every detail was well-defined to capture the essence of the character. With the outlining complete, I began applying color to the illustration, carefully choosing tones that aligned with ELECTRIC ELS's aesthetic and personality.
Shadows and Highlights
To give the image more depth, I added a layer of color for the shadows. This technique helped highlight the contours and create a three-dimensional effect. Then, I applied another layer of color for the highlights, which gave the illustration a special glow and ultimately gave its surroundings a sense of electric shock.
I'm very excited about the final result and hope you like it too. Thank you for joining me in this creative process! I look forward to hearing your feedback and sharing more about my future works.
Recursos empleados para este trabajo:
Concurso:
Software: Photoshop
Redes Sociales/ Social Networks

Sigueme en/ Follow me in:
Facebook: alondradelpaisaje
Have you heard about the new Splinterlands Community PRAETORIA?
Give it a tour and check out the community for real Splinterlands conversation, ideas, feedback & creativity from Praetoria’s citizens.