Beautiful REALISTIC E-girl hand drawn with SCHOOL COLORS !!🥰(Process)🥰 - Hermosa E-girl REALISTA dibujada a mano con COLORES ESCOLARES!!🥰(Proceso)🥰 [ EGN-ESPÑ]
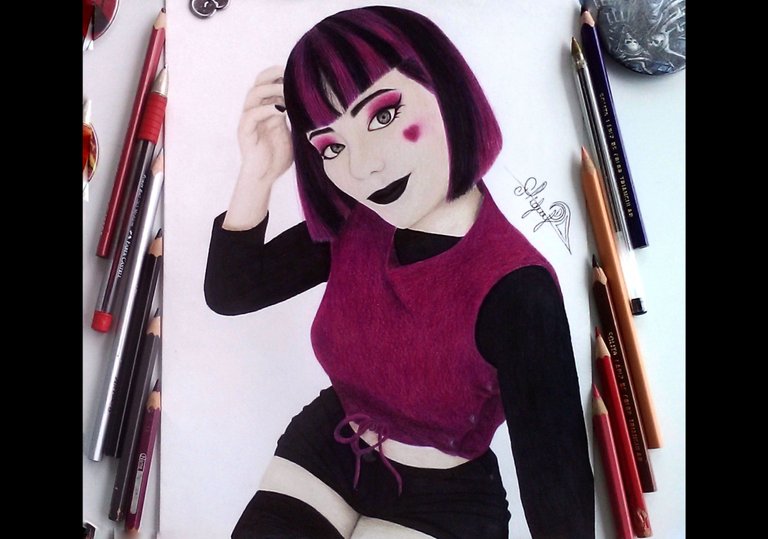
For a while since I wanted to draw an E-girl, however I could not find any reference or image that interested or inspired me enough, so I stopped my craving for a while until I met a beautiful girl named Willianny (Anny), Not only did she look beautiful to me physically, but she is a very funny, intelligent, entertaining person with an enigmatic expression, and I automatically knew that I would find my inspiration in her and that what I could create would be satisfying. I will stay short talking about it since I intend to explain the process of drawing and I do not want to extend too much
Hacia un tiempo desde que quise dibujar a una E-girl, sin embargo no encontraba alguna referencia o imagen que me interesara o inspirara lo suficiente, asi que frene mis ansias por un tiempo hasta que conocí a una linda chica llamada Willianny (Anny), no solo me pareció hermosa físicamente, sino que es una persona muy graciosa, inteligente, entretenida y con una expresión enigmática, y automáticamente supe que encontraría mi inspiración en ella y que lo que podría crear seria satisfactorio. Me quedare corto hablando sobre ella ya que pretendo explicar el proceso del dibujo y no quiero extenderme demasiado
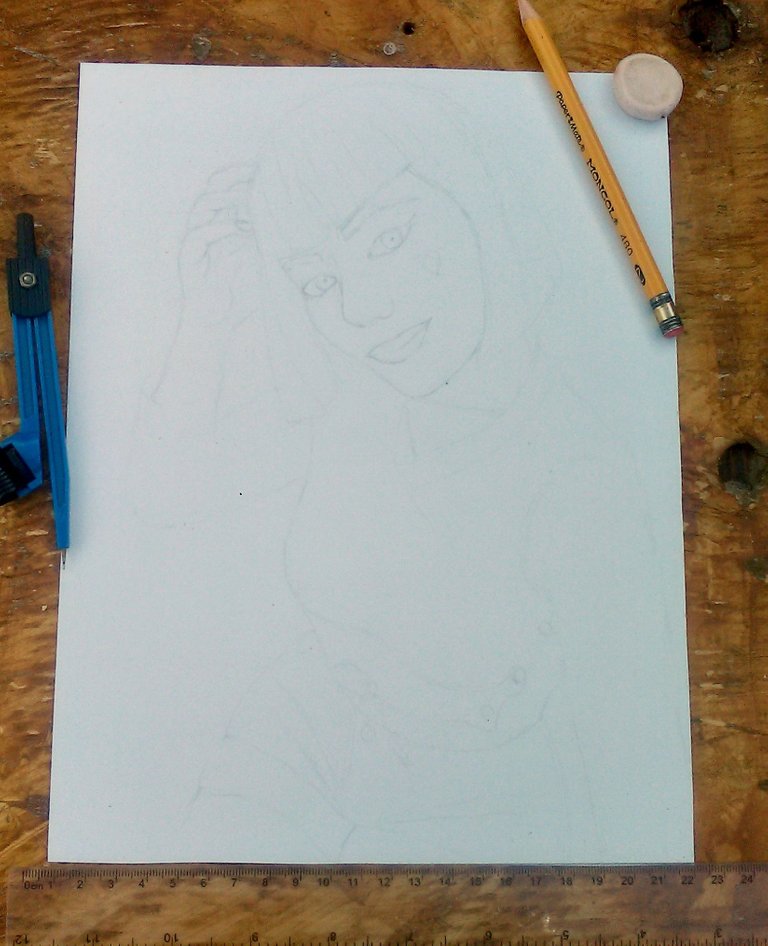
first step – sketch.
Use the loomis method, and start with the circle then a rectangle to correctly locate the elements of the face, then the hair frame, then very gently and subtly make the frame of the jaw, continuing with the eyes, nose, lips, neck , torso, left and right arm, hips and mini shorts, and legs to finish.
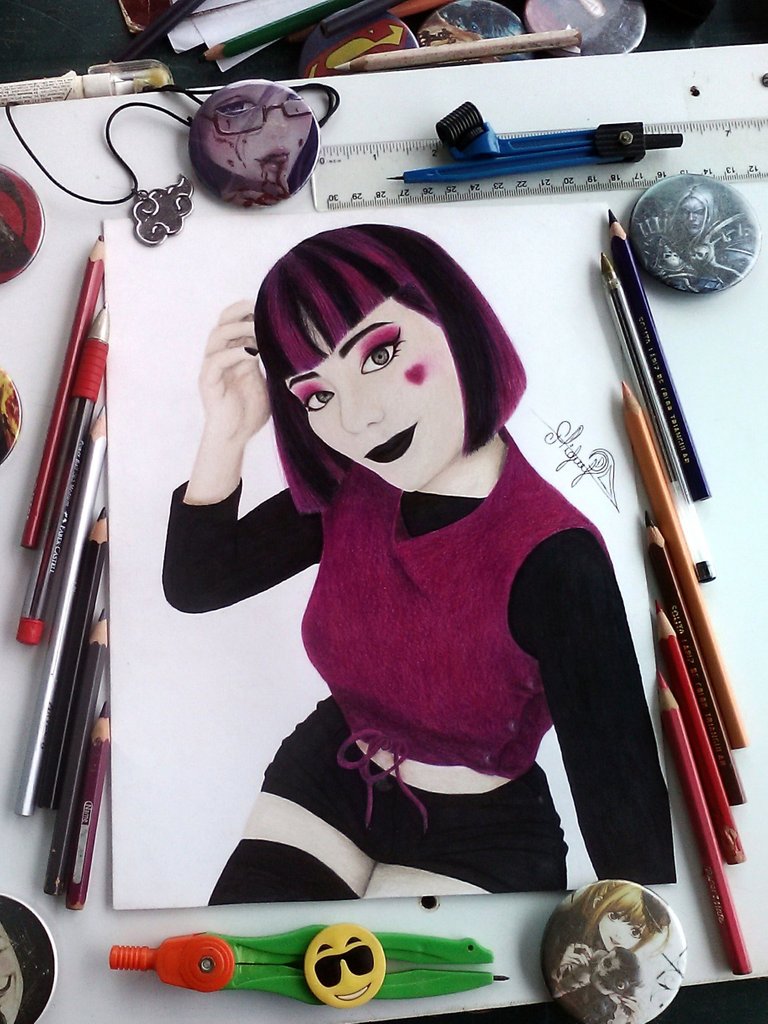
I did it with a simple MONGOL Paper Mate graphite pencil, which is the most common and inexpensive pencil in my area, although I personally recommend using mechanical pencils for the sketches, since the lead will always be finite and thus avoid making dark spots on the sketch and you can draw on it freely if you make it very clear.
primer paso – Boceto.
Utilice el método loomis, y un empecé por el circulo luego un rectángulo para ubicar bien los elementos del rostro, luego el marco del cabello, luego con mucha suavidad y sutileza realice el marco de la mandíbula, continuando con los ojos, nariz, labios cuello, torso, brazo izquierdo, derecho, caderas y mini short, y piernas para finalizar.
Lo realice con un simple Lápiz de grafito MONGOL Paper Mate que es el lápiz mas común y económico en mi localidad, aunque personalmente les recomiendo usar portaminas para los bocetos, ya que la mina siempre va a ser finita y así evitaran hacer manchas oscuras en el boceto y pueden dibujar sobre ella libremente si lo hacen muy claro.
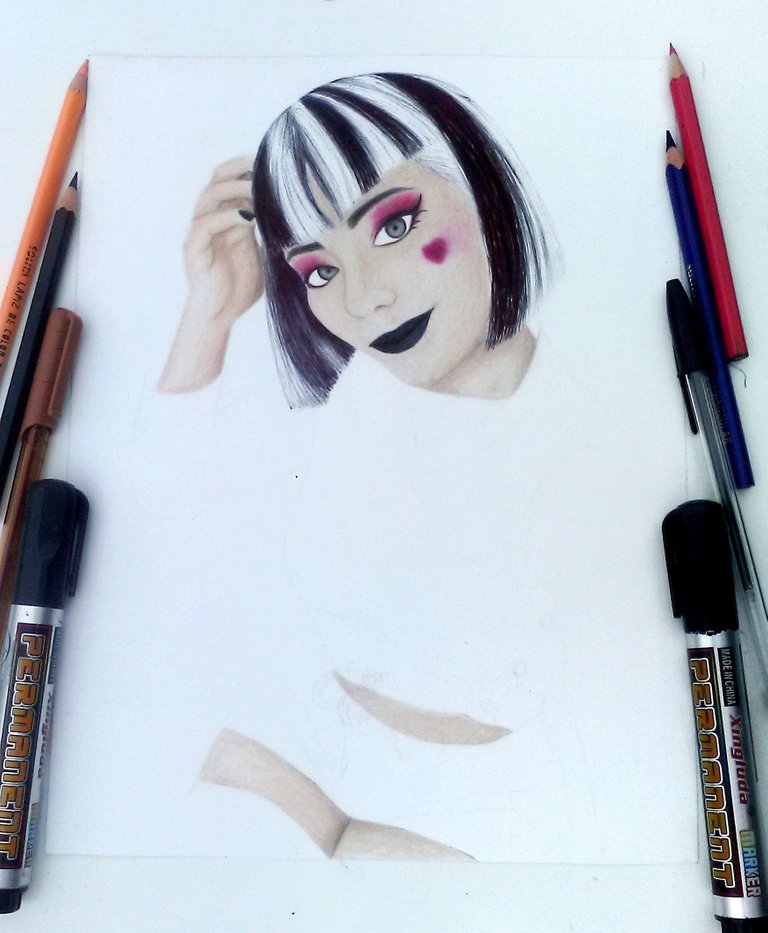
Second step - elements of the face and skin.
Actually it is like a second and third step, only I forgot to take a photo before doing the skin, but anyway, the procedure was as follows:
1- eyes: through the pupil directly with the black color, then the circle of the iris followed by the frame of the eyes and eyelashes with this same color, then the iris, using white as the base color, followed by silver, followed by gray and a little in black. The sclera in white and subtly yellow and light blue, then white again to soften, then you can draw the tear duct with brown and pink, and the veins only and subtly with pink.
2- nose: I made it based on circles and guided by the central line of the loomis method.
3- lips: start with the line between the two, then the upper one and then the lower one, without a specific technique
4 SKIN: although for many it seems very complex or made of specific materials, the skin is made with only three colors (Coffee, pink, and pink many know as skin color) and obviously, school colors from the 12 Paper Mate box. The process was as follows; With the Pink apply a first layer gently marking the shadows and blurring, then the coffee doing the same, and more gently as many times as necessary to obtain the result close to expected, once you have a result close to the expected only with these Two colors, you apply especially the lighter pink (skin) and thus you will compact everything, if it is to your liking you could also use the white color above all, but it is optional, the makeup on the skin was applying simple gradients with red and purple color .
Segundo paso – elementos del rostro y piel.
En realidad es como un segundo y tercer paso, solo que olvide tomar foto antes de hacer la piel, pero en fin, el procedimiento fue el siguiente:
1- ojos: por la pupila directamente con el color negro, luego el circulo del iris seguido del marco del ojos y pestañas con este mismos color, luego el iris, usando color blanco de base, seguido de plateado, seguido de gris y un poco de negro. La esclerótica en blanco y sutilmente amarillo y azul claro, luego blanco nuevamente para suavizar, luego puedes dibujar el lagrimal con café y rosa, y las venitas solo y sutilmente con el rosa.
2- nariz: la hice a base de círculos y guiándome por la línea central del método loomis.
3- labios: inicie por la línea entre medio de ambos, luego el superior y luego el inferior, sin una técnica en específico.
4 PIEL: aunque para muchos parezca muy complejo o de materiales específicos la piel la realice con solo tres colores (Café, rosa, y el rosa muchos conocen como color piel) y obvio, colores escolares de la caja de 12 Unidades Paper Mate. El proceso fue el siguiente; con el Rosa aplica una primera capa con suavidad marcando las sombras y difuminando, luego el café haciendo lo mismo, y con más suavidad las veces que sea necesario para obtener el resultado cerca esperado, una vez que tengas un resultado cerca del esperado solo con estos dos colores, aplicas sobre todo el rosa más claro (piel) y así compactaras todo, si es de tu agrado también podrías usar el color blanco sobre todo, pero es opcional, el maquillaje en la piel fue aplicando degradados simples con color rojo y purpura.
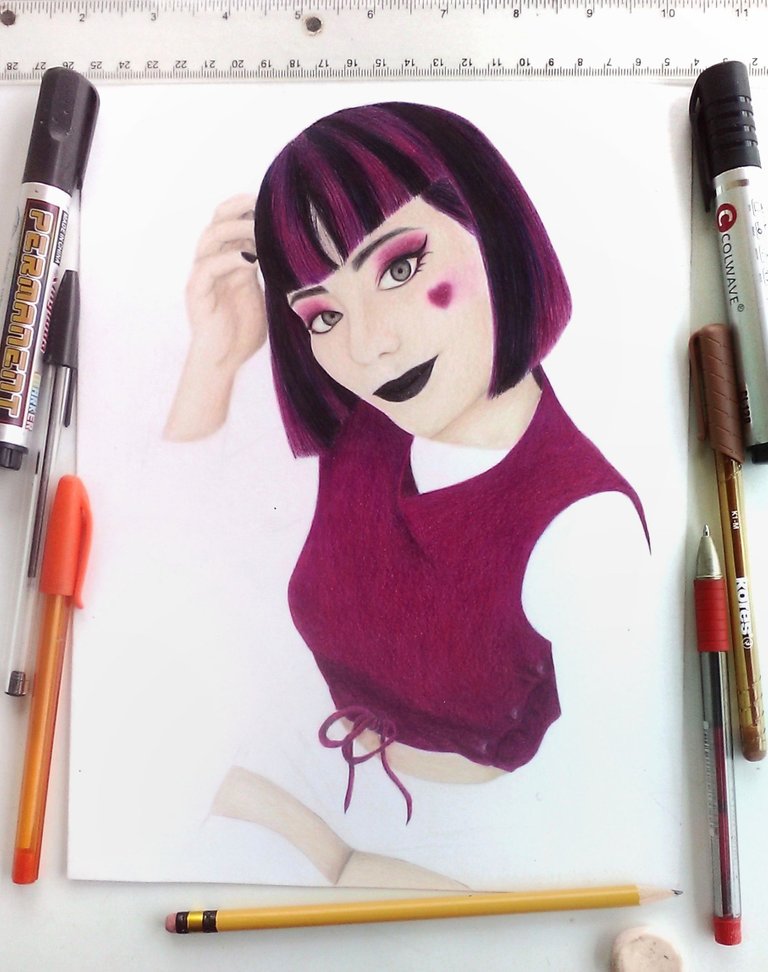
third step - Hair and Shirt.
1- Hair: I made the Black strands with a marker and pen base, (any brand works and if you want to do it only with colors it may be better but I have little black color left so I had to use that) then on this, you apply a little black pain and voila. In the Purple strands I made a base of long lines with the Purple on this in the darkest parts the Dark Blue, then the same Purple as the last layer the Red
1- Shirt: Apply the same process method and layers as in the purple strands of the hair, (I advise softer layers and blend after each one except for the last one).
tercer paso – Cabello y Camisa.
1- Cabello: los mechones Negros los hice con una base de marcador y pluma, (cualquier marca sirve y si lo quieres hacer solo con colores puede quedar mejor pero me queda poco color negro asi que tuve que usar eso) luego sobre esto, aplicas un poco de dolor negro y listo. En los mechones Purpuras hice una base de líneas largas con el Purpura sobre esta en las partes mas oscuras el Azul oscuro, luego el mismo Purpura como última capa el Rojo.
1- Camisa: Aplique el mismo método proceso y capas que en los mechones purpuras del cabello, (aconsejo capas mas suaves y difuminar después de cada una a excepción de la última).
Fourth and last step - Black clothes and last details.
Use a Shearpi marker (any other works, in fact this is the cheapest one in my town) on this in the darkest areas and seam lines the Color Black and in the lines. If it is among your possibilities, do it only with Black and Dark Gray, I did not do it because I do not have enough black for everything.
Last details!
It is very important to give it a retouch at the end, or the next day, to cover white points or modify something that does not seem convincing, in my case it was more layers in the clothes, the eyes and the hair which I could not correct at all because the blade tears a bit when the tip is very fine, I recommend individual opaline.
Cuarto y ultimo paso – Ropa Negra y ultimos detalles.
Utilice un marcador Shearpi (cualquier otro sirve, de hecho este es el mas económico de mi localidad) sobre este en las zonas mas oscuras y líneas de costura el Color Negro y en las líneas. Si esta entre tus posibilidades hazlo solo con color Negro y Gris oscuro, yo no lo hice porque no poseo suficiente color negro para todo.
!Ultimos detalles!
es muy importante darle una retocada al final, o al dia siguiente, para tapar puntos blancos o modificar algo que no nos parezca convincente, en mi caso fueron mas capas en la ropa los ojos y el cabello los cuales no pude corregir del todo porque la hoja se desgarra un poco cuando la punta es muy fina, recomiendo opalinas individuales.
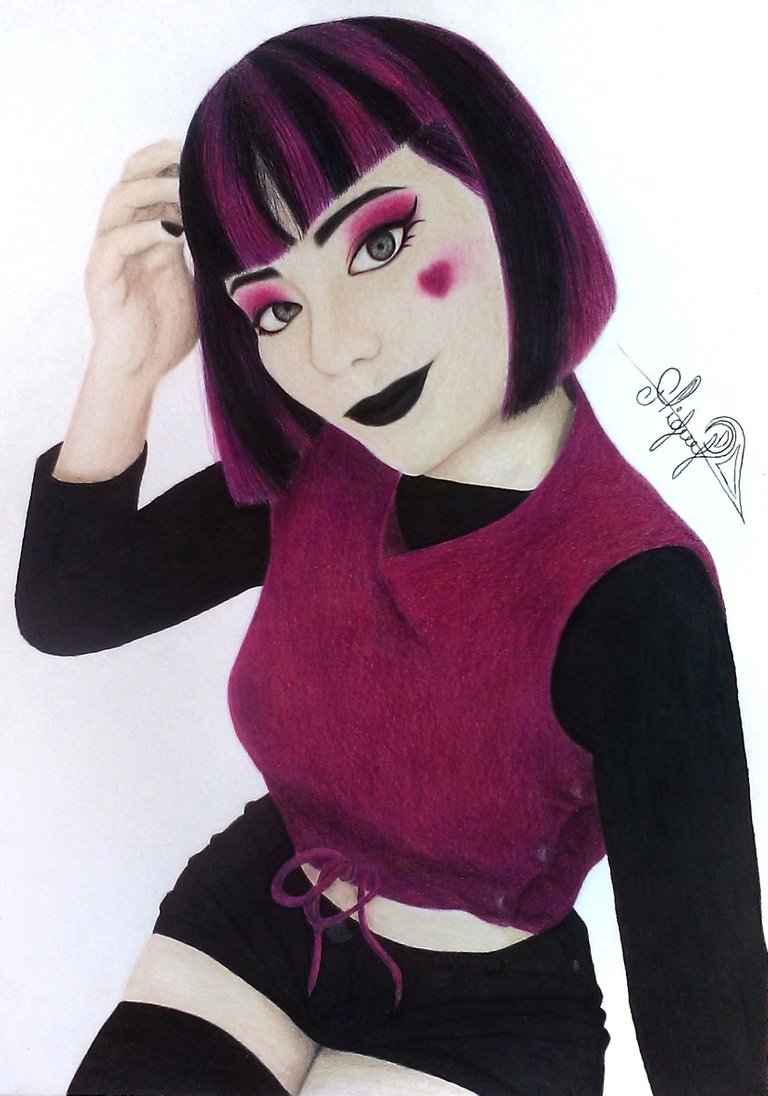
AND READY! A semi-realistic portrait of a Beautiful E-girl made with 12 Units SCHOOL Colors, a simple OFFICE marker and an opaline from a Flocon blog (as I said I recommend the individual ones or another blog, in this one the color comes off a little and therefore there are white dots).
I know that the explanation is not so easy, but if you wish I can upload tutorials (either in images or videos) on how to make each part of the face, and how to mix colors step by step, as well as some tricks that will surely serve you wonderfully.
¡Y LISTO! Un retrato semi realista de una Hermosa E-girl hecho con Colores ESCOLARES de 12 Unidades, un simple marcador de OFICINA y una opalina de un blog Flocon (como ya dije recomiendo las individuales u otro blog, en este el color se desprende un poco y por ende quedan puntos blancos).
Se que la explicación no es tan fácil, pero si lo desean puedo subir tutoriales (ya sea en imágenes o videos) de cómo realizar cada parte del rostro, y como mezclar colores paso a paso, además de algunos trucos que seguro les servirá de maravilla.
WAIT READ THIS!
My next posts will be about tutorials for those who need and are interested in learning how to draw eyes, clothes, hair, skin, etc.
So if you are interested in learning don't forget to follow me and if you want to support me with a vote :D
Remember to put in the comments what you want the first tutorial to be. GREETINGS!
!ESPERA LEE ESTO! Mis siguientes posts serán sobre tutoriales para los que necesiten y estén interesados en apreder como dibujar ojos, ropa, cabello, piel etc.
Asi que si estas interesado en aprender no olvides seguirme y si quieres apoyarme con un voto :D
Recuerda poner en los comentarios sobre que quieres que sea el primer tutorial ¡SALUDOS!
Your content has been voted as a part of Encouragement program. Keep up the good work!
Use Ecency daily to boost your growth on platform!
Support Ecency
Vote for new Proposal
Delegate HP and earn more
Congratulations @miguelartaleman! You have completed the following achievement on the Hive blockchain and have been rewarded with new badge(s):
Your next target is to reach 700 upvotes.
You can view your badges on your board and compare yourself to others in the Ranking
If you no longer want to receive notifications, reply to this comment with the word
STOPCheck out the last post from @hivebuzz:
Support the HiveBuzz project. Vote for our proposal!