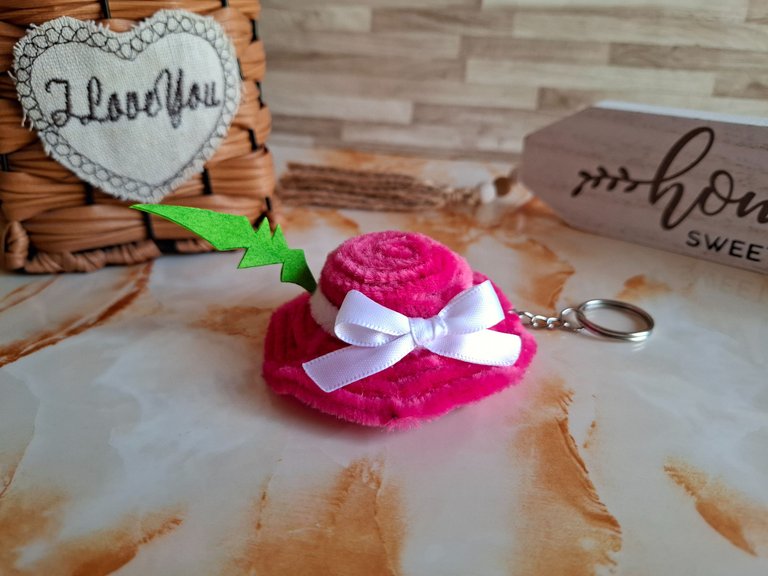
Sombrero inspirado en Silvershield Bard, concurso de arte Splinterlands semana 359. / Silvershield Bard Inspired Hat, Splinterlands Art Contest Week 359.

Muy feliz y bendecido domingo queridos amigos de Hive, sean bienvenidos a mi blog, saludos a todos aquellos que hacen parte de este espacio creativo, quiero desearles que esta nueva semana sea positiva y de cosas buenas para cada uno, hoy el día ha estado muy nublado al parecer en cualquier momento vuelve a llover y solo quedan ganas de quedarse en casa jaja. Por otra parte hoy paso por la comunidad para compartir mi participación en el concurso de arte Splinterlands semanal.
A very happy and blessed Sunday, dear friends of Hive! Welcome to my blog. Greetings to all who are part of this creative space. I want to wish you a positive new week filled with good things for everyone. Today has been a very cloudy day, with the feeling it could rain again at any moment, and all I want to do is stay home, haha. On a separate note, today I'm stopping by the community to share my participation in the weekly Splinterlands art contest.
Les comparto mi participación en el concurso de arte Splinterlands semana 359, en esta ocasión busqué una carta en dónde me pudiera inspirar y aplicar el arte de las manualidades en limpiapipas, así que encontré a Silvershield Bard, al observar esta carta me encanta su vestimenta y accesorios que lleva consigo, el sombrero es mi favorito así que decidí realizarlo, y queda perfecto para llavero.
I share with you my participation in the Splinterlands art contest week 359, this time I looked for a card where I could get inspiration and apply the art of pipe cleaner crafts, so I found Silvershield Bard, when I looked at this card I loved his clothing and accessories that he carries with him, the hat is my favorite so I decided to make it, and it is perfect for a keychain.

Silvershield Bard
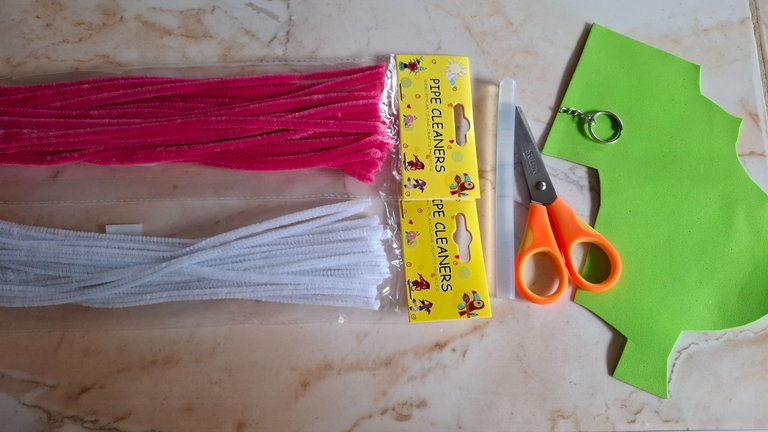
Esta figura la realicé en limpiapipas, también puedes realizarlo en foami pero me parece que con los limpiapipas queda suavecito y es llamativo para algunas personas, a continuación les muestro los materiales y el paso paso, no les llevará mucho tiempo ya que es súper fácil.
I made this figure with pipe cleaners. You can also make it with foam, but I think that with pipe cleaners it comes out soft and is eye-catching for some people. Below I show you the materials and the step-by-step instructions. It won't take you long since it's super easy.
| Materiales | Materials |
|---|---|
| Limpiapipas fucsia | Fuchsia pipe cleaners |
| Limpiapipas blanco | white pipe cleaner |
| Foami verde | Green foam |
| Tijera | Scissors |
| Cinta blanca | white tape |
| Silicón | Silicone |
| Aro de llavero | Keychain ring |
| Marcador verde | green marker |
Paso a paso / Step by step
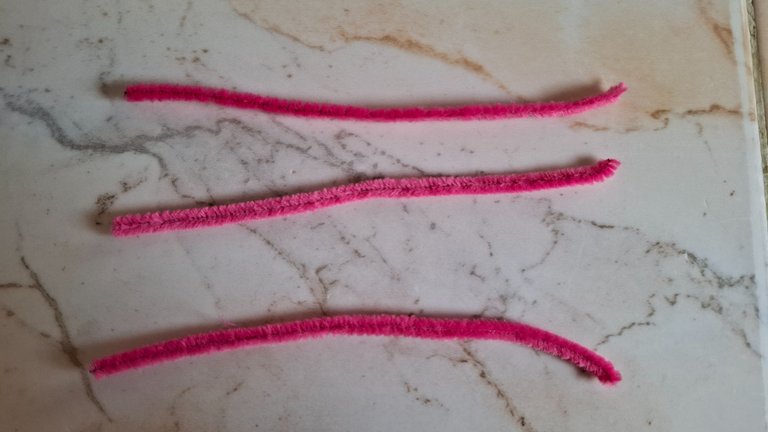
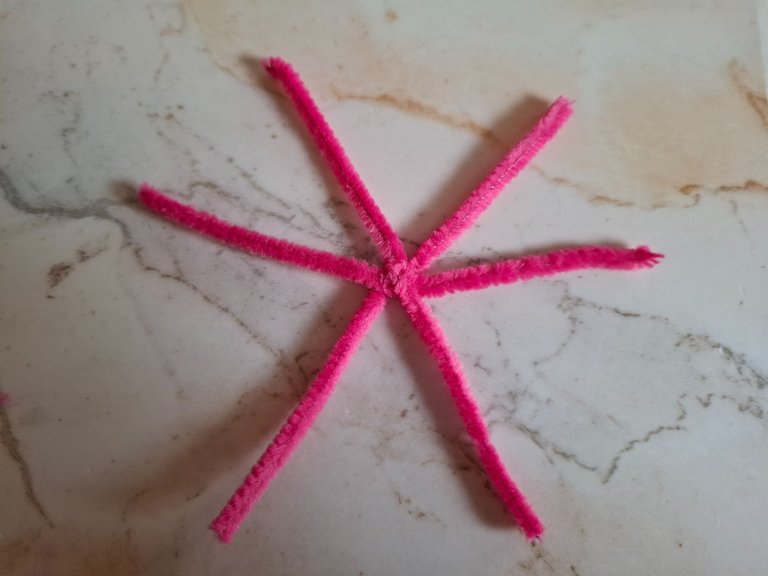
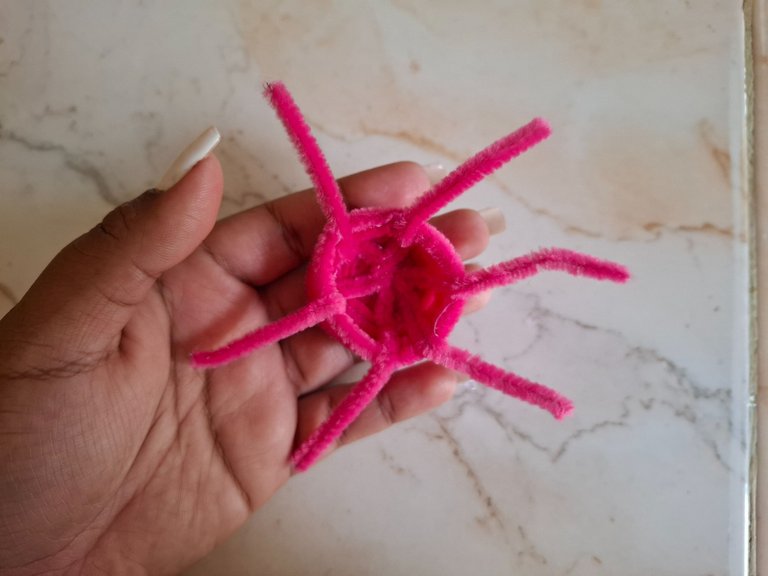
El primer paso que voy a realizar será cortar dos limpiapipas color fucsia en la mitad, voy a tomar solo tres partes doblamos en la mitad y unimos, en esta ocasión no voy a utilizar la técnica de enrollar el limpiapipas pero si deseas puedes realizar así para dar la textura de peluche.
The first step I'm going to take is to cut two fuchsia-colored pipe cleaners in half. I'm going to take only three parts, fold them in half, and join them together. This time I'm not going to use the technique of rolling the pipe cleaner, but if you want, you can do it this way to give it a plush texture.
 |  |  |
|---|
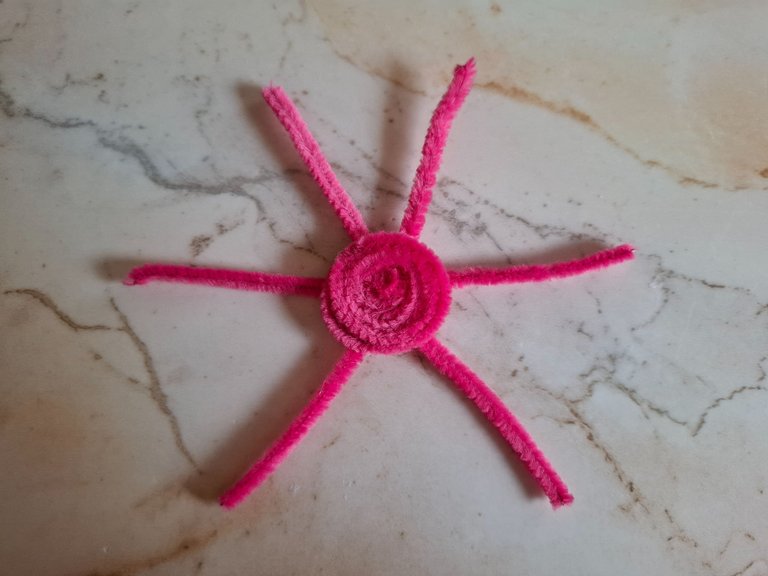
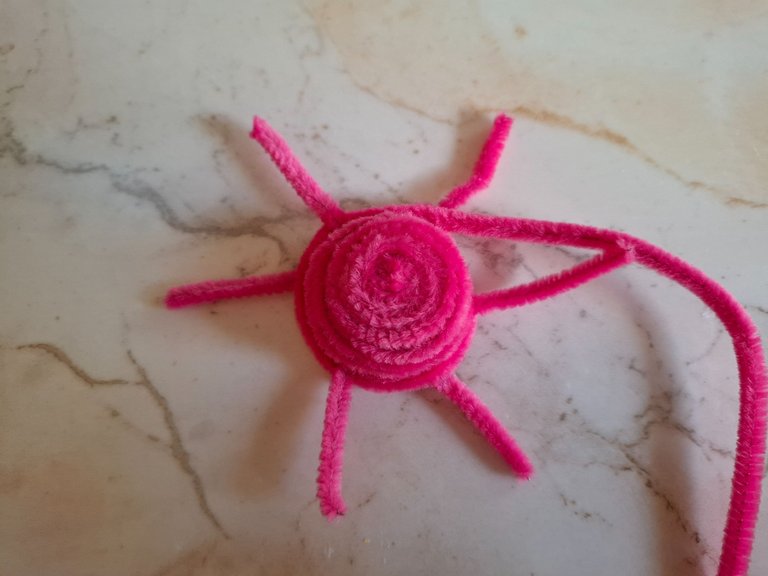
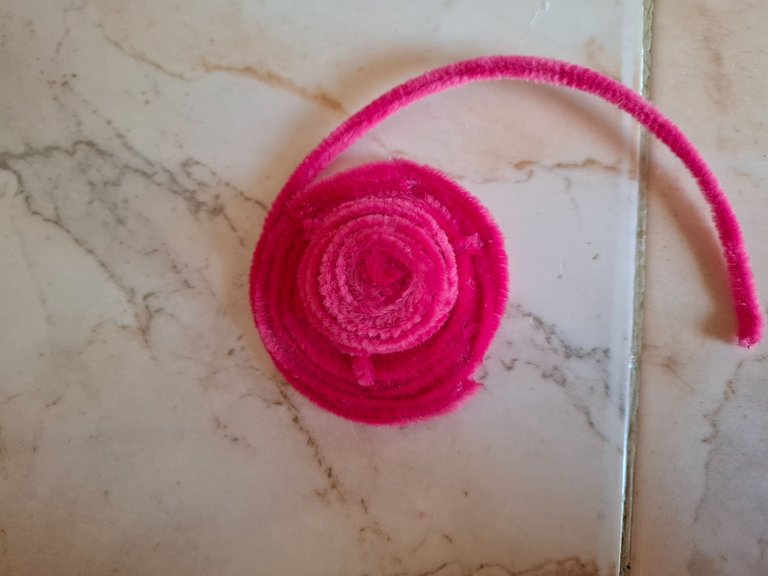
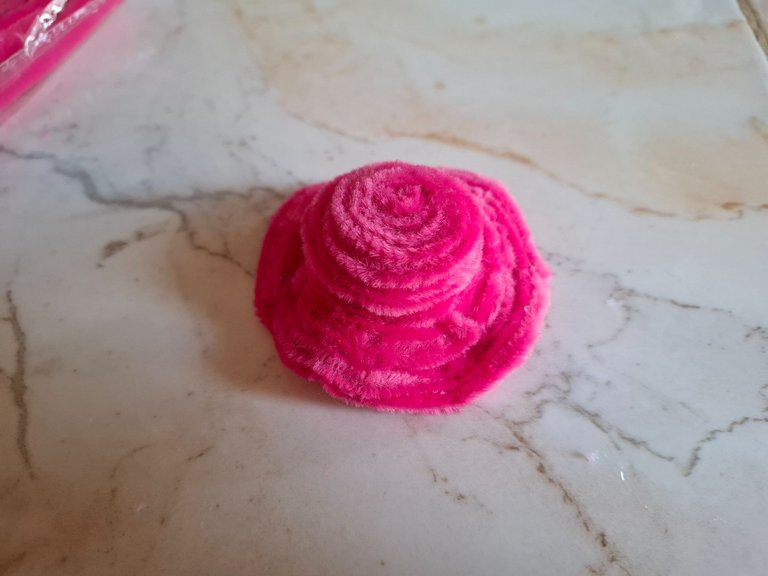
Luego voy a tomar un limpiapipas fucsia y doblamos en forma de espiral formando un círculo cerrado, lo pegamos con silicón caliente en el centro de la parte que acabamos de armar. Ahora vamos a doblar las puntas hacia abajo.
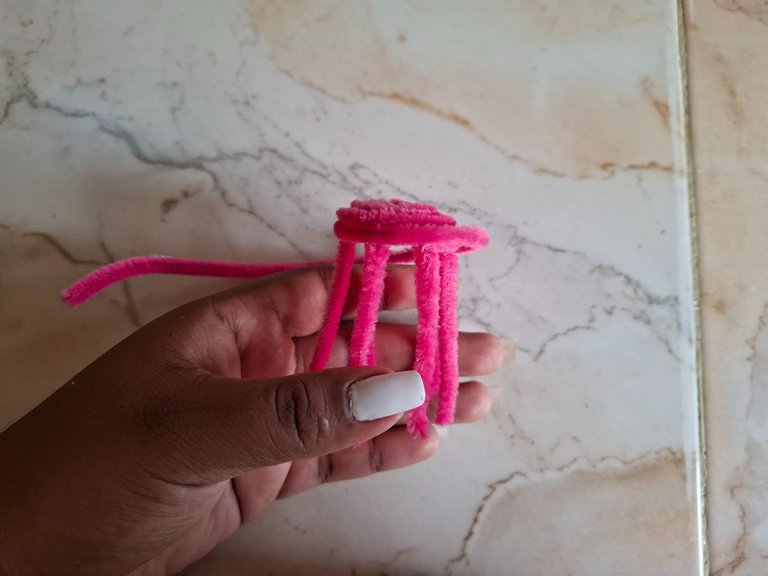
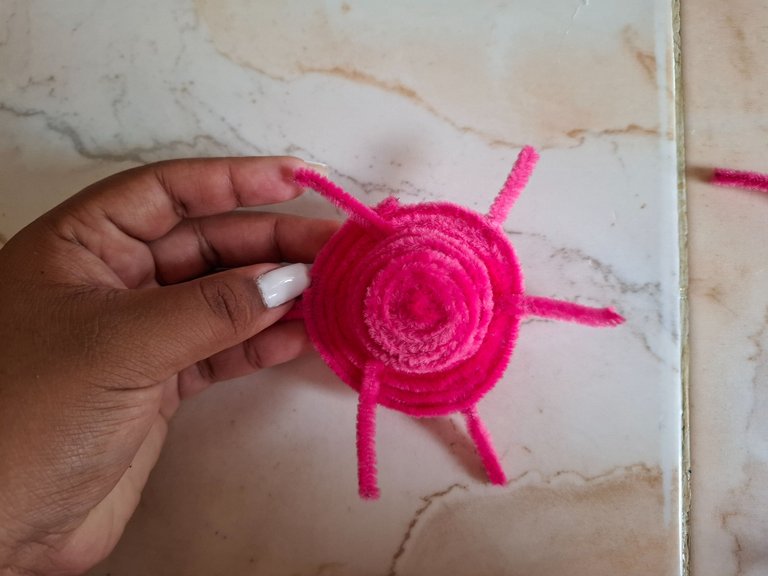
Voy a pegar dos a tres limpiapipas al rededor del limpiapipas verás como se va formando la parte principal del sombrero, una vez que terminemos de pegar los tres limpiapipas, voy a comenzar a pegar en la parte inferior, colocamos varios para dar forma al sombrero. El grosor va a depender de cuántos coloques, trata de que no queden espacios vacíos.
Next, I'm going to take a fuchsia pipe cleaner and bend it into a spiral, forming a closed circle. Glue it with hot glue to the center of the part we just assembled. Now, we're going to fold the tips down.
I'm going to glue two or three pipe cleaners around the pipe cleaner. You'll see how the main part of the hat is forming. Once we finish gluing the three pipe cleaners, I'm going to start gluing the bottom part. We'll place several of them to shape the hat. The thickness will depend on how many you place; try not to leave any empty spaces.
 |  |  |
|---|
 |  |
|---|
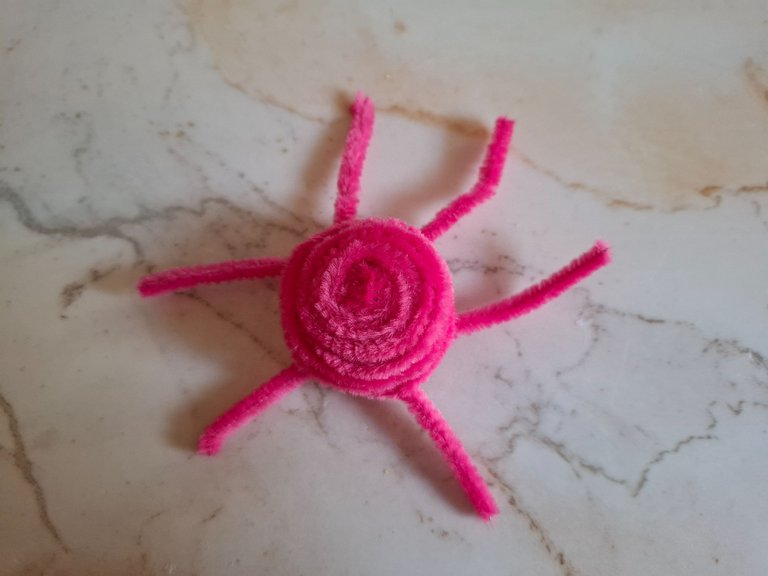
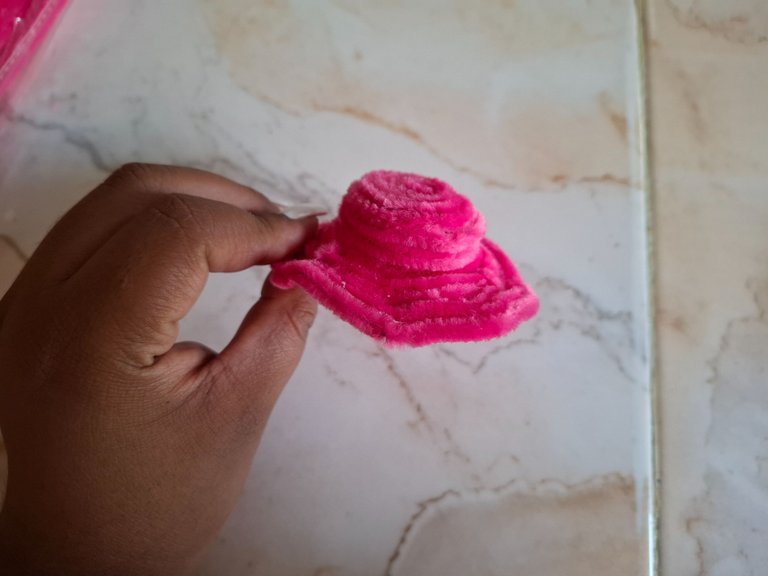
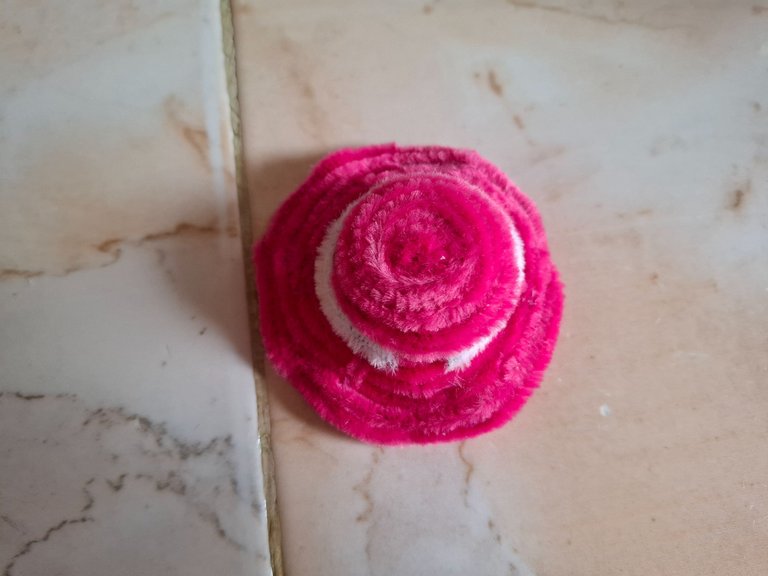
Las puntas las puedes esconder hacia dentro, y con ayuda de los dedos puedes doblar un poco las puntas hacia dentro y fuera, hasta lograr la forma deseada, ahora voy a colocar el limpiapipas blanco al rededor de la parte superior del gorro.
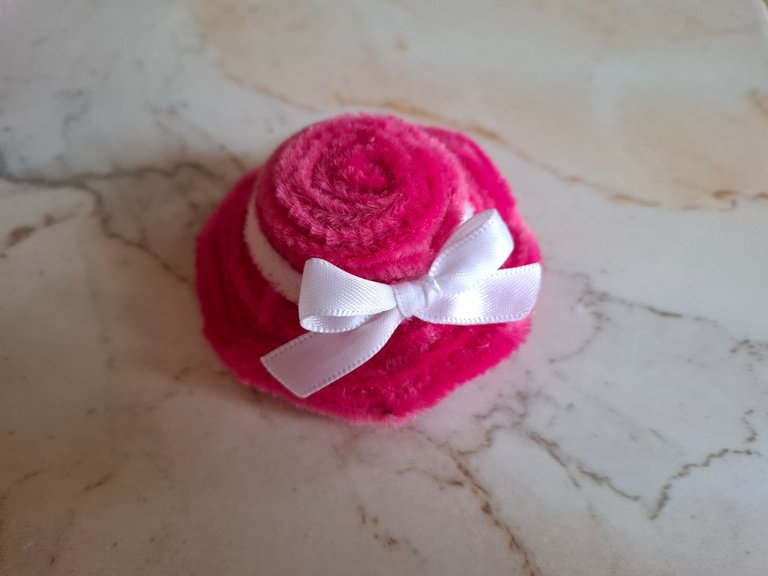
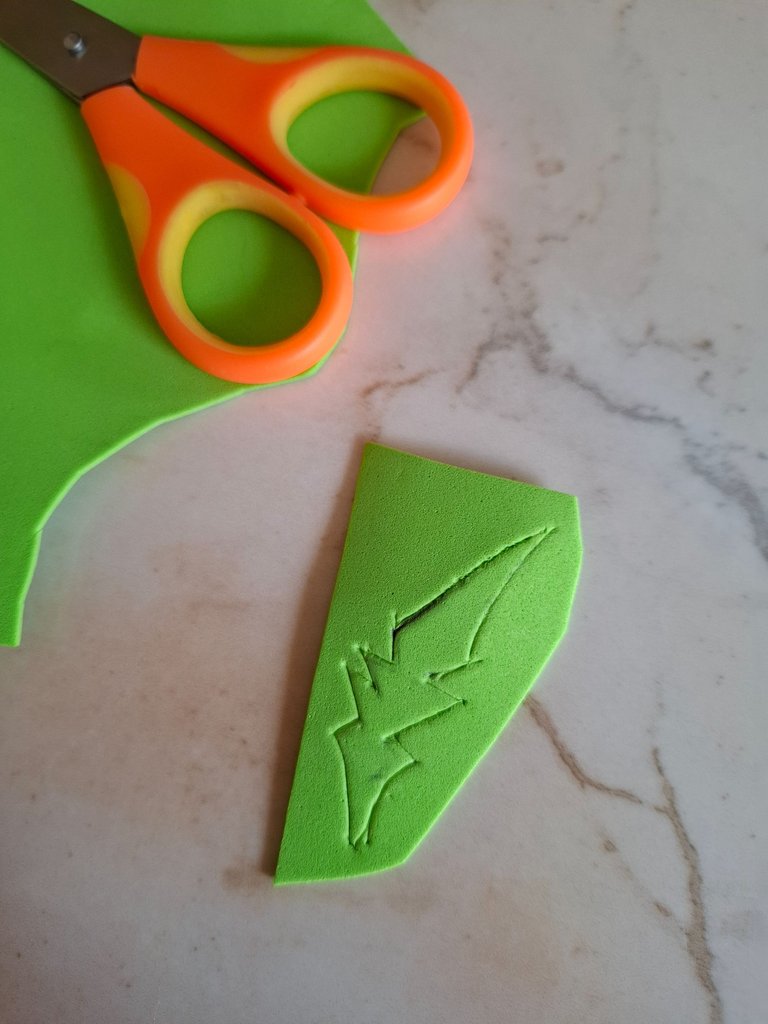
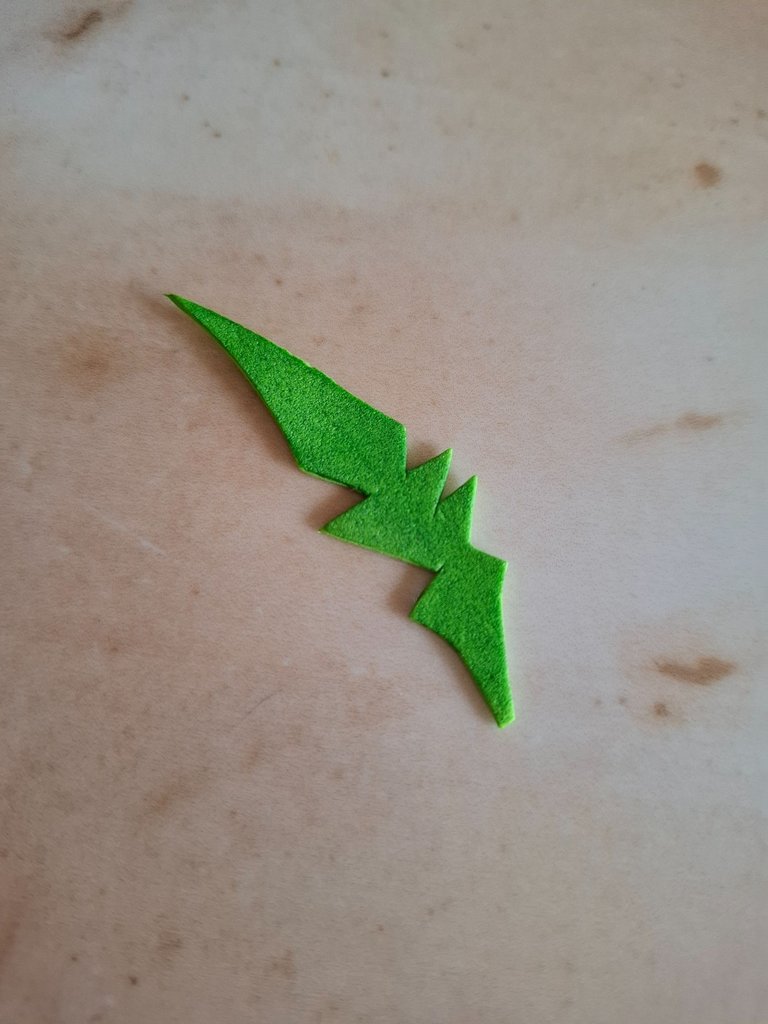
Realicé un lazo blanco con cinta y lo pegué, aunque ena imagen principal no lo lleva quise colocarlo ya que quería darle un toque coqueto, ahora en foami verde claro voy a dibujar la pluma que lleva en el sombrero, le agregamos marcador verde para intensificar el color.
You can tuck the tips inward, and with your fingers, you can bend them slightly inward and outward until you achieve the desired shape. Now I'm going to place the white pipe cleaner around the top of the hat.
I made a white bow with ribbon and glued it on. Although the main image doesn't have one, I wanted to add it because I wanted to give it a flirty touch. Now, using light green foam, I'm going to draw the feather on the hat. I added a green marker to intensify the color.
 |  |  |
|---|
 |  |
|---|
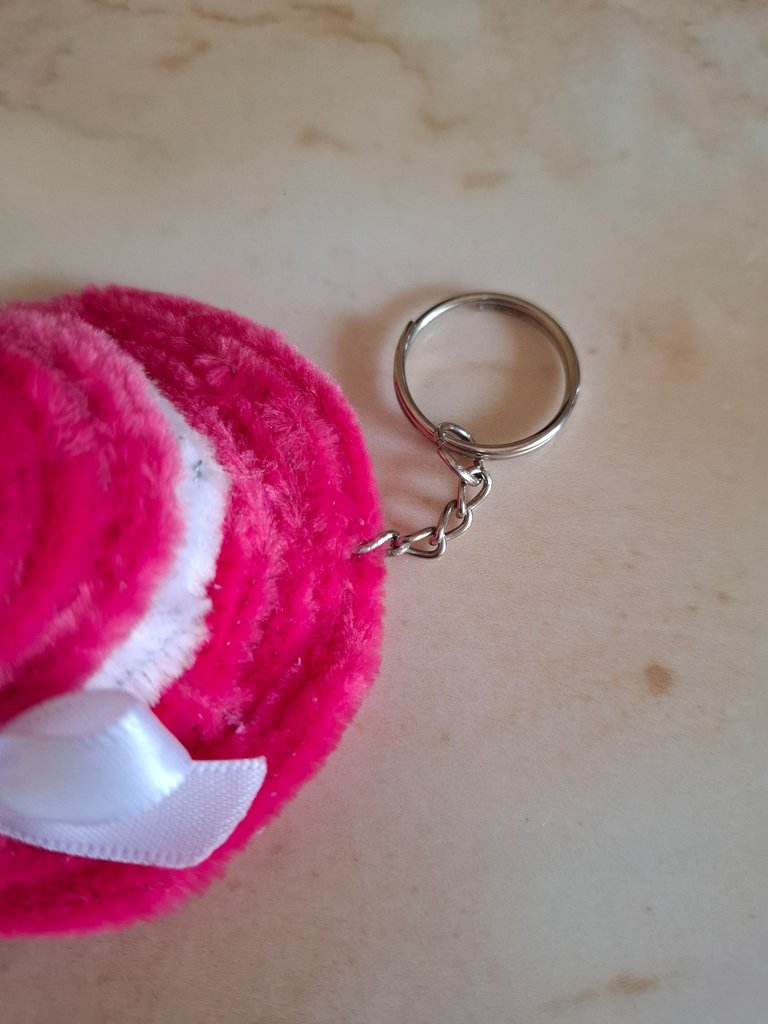
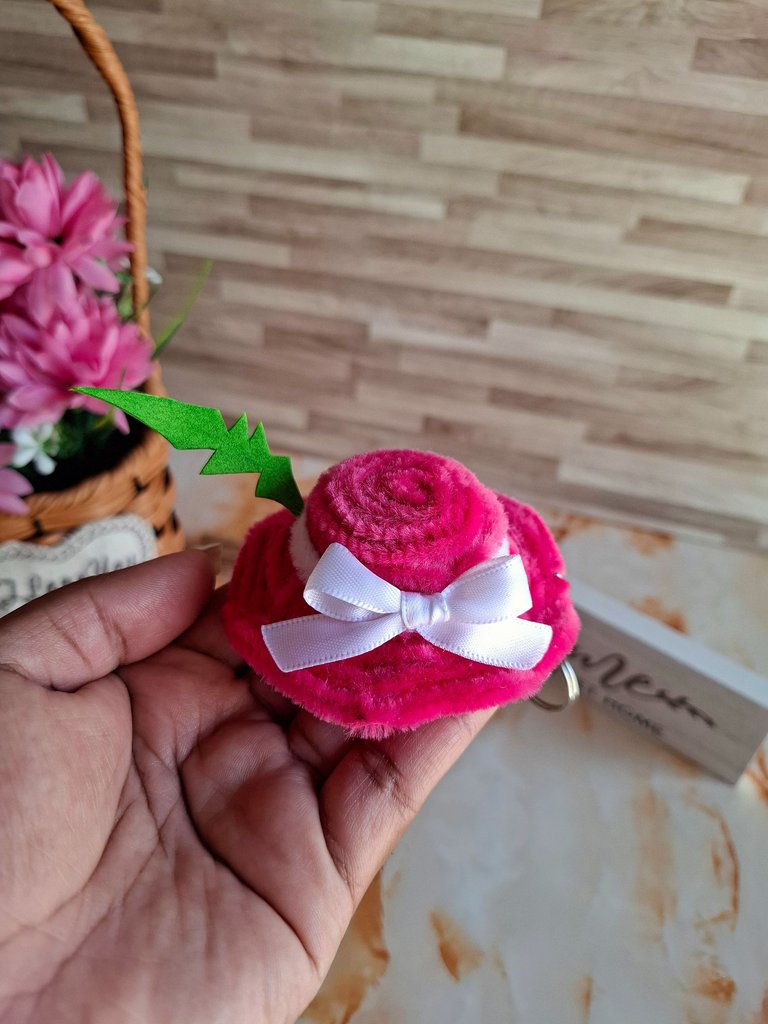
El último paso es colocar el aro para llavero, y listo, de esta forma terminé el sombrero de Silvershield Bard, lo que más me gusta es que el color es muy parecido al de la imágen original, además es súper fácil de realizar, espero les haya gustado mucho el resultado.
The last step is to attach the key ring, and that's it. This is how I finished Silvershield Bard's hat. What I like most is that the color is very similar to the original image. It's also super easy to make. I hope you like the result.
 |  |
|---|
 |  |
|---|
Estoy muy agradecida por el apoyo brindando por parte de los miembros de la comunidad DiyHub y Splinterlands, me motiva mucho a seguir inspirandome en las cartas del juego, ya que siempre hay algo que podemos convertir en arte, nos vemos en una próxima oportunidad con más ideas creativas.
I am very grateful for the support provided by the members of the DiyHub and Splinterlands community, it motivates me a lot to continue being inspired by the game's cards, since there is always something we can turn into art. See you next time with more creative ideas.

Gustas apoyar a nuestra comunidad
Puedes delegar un poco de HP a esta cuenta, cada granito cuenta para hacer brillar mas esta constelacion.
Puedes unirte al servidor de discord para compartir momentos cosmicos y participar en actividades intergalacticas.
Sumate a nuestro trail de curación, forma parte del viaje gálactico donde juntos brillamos mas.
Muchas gracias 🫂
Delegate Tokens and HP to Fallen Angels to earn weekly rewards!
Delegate | Join to the guild
Has hecho un hermoso trabajo amiga
Gracias por el apoyo ✨
It is beautiful, colorful, and lovely. It looks awesome. Good to see how you made this. Well done. Keep it up!
selected by @rezoanulvibes
Thank you very much for the support, Blessings
this is really cool, the details are really good
Awesome! I admire and applaud the effort you've put into this. Everything looks beautiful and it's a high-quality project. Thanks for bringing it to the DIYHub Community...
I really appreciate your comment, thank you for supporting me, greetings 🫂
que lindo, me encantan los colores, muy creativo
how cute, I love the colors, very creative
Pero que resultado más hermoso y tan bien elaborado, definitivamente con el limpiapipas es otra textura y estética, muy bien acertado el material, lo amé. 😍
But what a beautiful and well-crafted result! The pipe cleaner definitely gives it a different texture and aesthetic. The material was very well chosen. I loved it. 😍
Muchísimas gracias 🫂
Making a wonderful head cap is really fun. These caps are usually loved by children and they run away after seeing them. Thank you very much for presenting such a wonderful skill in a smooth manner and presenting each step to us.
Thanks for sharing! - @cieliss
