Never put Taunt Monsters in the Middle of the Pack


Introduction
I like playing in Frontier Mode because it's simpler and there's less cards available. Sometimes, the less options, the better as it allows you to be creative. However, there are times, just like in this game, that you and your opponent will have the same units and archon on the board and the sole difference between you winning and them losing is a difference in position of a single card.


For 8 mana, New Beluroc Aegis has low 1 melee damage and 2 speed, making him slow and not threatening in terms of damage. However, his usefulness lies more in defense, with 3 armor and 5 health giving him good stats to act as a tank. His stats show he is designed to absorb damage rather than deal it making him a sturdy and strong protector if you need one on the battlefield.
New Beluroc Aegis only have one ability, Taunt. It's a simple ability but very powerful if you know how to use it. Taunt negates a lot of abilities like Opportunity or Snipe. With Taunt, you can redirect the attacks to where you want them to in order to limit the damage to your team.
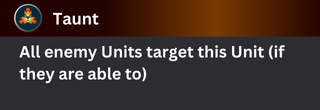
Taunt: [Defense] [Target Modifier] Opponent's monster will be forced to attack this card, if possible.

Pros
- Can strengthen your defense. Taunt can redirect a lot of attacks. You can use this to plan around. Since this battle has Explosive Weaponry Ruleset, you can control whoever takes the blast damage so it won't strike the most of your team.
- Has Good Stats. New Beluroc Aegis has decent health and good armor. This gives you more options for defense such as Tank Heal and Repair. Due to armor, New Beluroc Aegis is very useful when dealing with melee and range units.
- Better stats on higher levels. Since New Beluroc Aegis does not gain abilities on level up, he gains stats instead. The stat gain is also focused on defense, namely health and armor. You don't need New Beluroc Aegis for damage so the increase in health and armor is much better since you want him to absorb more damage instead of do more damage.
Cons
- Taunt can backfire if not supported properly.Since enemies will focus more on attacking New Beluroc Aegis because of Taunt, expect him to die more often. This can be bad if New Beluroc Aegis is the only tank you have that keeps the opponents from reaching your back line.
- High Mana Cost.All Foundation cards have increased mana cost. This means that if you're using them, it would give you less leeway for other monsters. You will not be able to employ better monsters due to the lack of mana in the battle so make sure you have what you need before employing New Beluroc Aegis.
- Foundation cards have significantly lower stats than other sets.When being compared to other sets like Rebellion or Conclave Arcana, even at lower levels, New Beluroc Aegis is very lackluster than other Taunt monsters. It has higher mana for less stats and you may be better off with other monsters such as Bellowmancer.

 |
 Up Close & Personal |
During this battle, only monsters with melee damage type are allowed: New Beluroc Aegis has good armor which is effective with melee units. With the Taunt ability as well, New Beluroc Aegis keeps your team safe against melee units with Sneak and Opportunity or Range units with Snipe. |
 |
 Born Again |
All monsters on the board gains the Rebirth ability that revives them when they die once: When a monster is revived, it only gets 1 health but full armor. New Beluroc Aegis's high armor is beneficial in this ruleset to let him survive more after using Rebirth ability from Born Again ruleset. |
 |
 Heavy Metal |
You can only summon armored units.: This ruleset requires monsters to have armor before you can use them. New Beluroc Aegis already have armor which makes him a good monster when this ruleset limits your options. |

|
 Ferocity |
All monsters do double damage to opponent's monster that has Taunt ability: Never use monsters with Taunt in this ruleset. This gives every monster Fury to deal twice the damage to any monsters with Taunt. |
|
 Aimless |
All monsters on the board gains the Scattershot ability that changes the targetting mechanics of monsters with Range and Magic damage to "Random opponent.": While Taunt works against Sneak, Snipe, Opportunity and other attacks, Taunt does not work with Scattershot. Since the attack of range and monsters with magic damage is random, you cannot redirect it with Taunt. |
|
 Healed Out |
All healing effects and abilities are disabled during this battle.: New Beluroc Aegis has good armor which is effective with melee units. With the Taunt ability as well, New Beluroc Aegis keeps your team safe against melee units with Sneak and Opportunity or Range units with Snipe. |

|
 Little Sister |
Monsters with Life Leech gets stronger over time. This means you need to buy time for them until they get strong. Monsters with Taunt abilities are perfect for this. While New Beluroc Aegis takes the brunt of the damage, Little Sister's Life Leech gives her higher health for the late game. |
|
 Conclave Tracker |
Conclave Tracker is a cheap monster you can rent if you play Modern Ranked Format. Since New Beluroc Aegis has armor, Conclave Tracker's Repair is very useful in keeping New Beluroc Aegis alive. |
|
 Arachne Weaver |
While you can use Tank Heal abilities to keep New Beluroc Aegis, Corrupted Healing does more restoration making Arachne Weaver a better healer than others. |

For this battle, I have New Beluroc Aegis at the very front to control where the Blast damage from Explosive Weaponry will go. Nim Guard Captain on the 2nd position because I know New Beluroc Aegis will fall at some point. The other two monsters I have are my damage dealers, Little Sister and Sorrow Harvester. While they do not do high damage, this is a Frontier Mode so 2 magic damage is actually good enough to land my regular lineup.
Lineup

Thalgrimore
The -1 max health is good as a general ability and the Death monsters are good and complements each other. If I am not playing Marlai Singariel, Thalgrimore serves as my other main archon to play.

New Beluroc Aegis
Put in the frontmost position so the blast from Explosive Weaponry Ruleset would only affect Nim Guard Captain. This difference in positioning between me and my opponent proved game-breaking and you will see that in the replay in this article.

Nim Guard Captain
Has Void ability which is good because it directly counters Marlai Singariel if the opponent ever tried to choose them and her team. Nim Guard Captain's stats are also good and doesn't die quickly due to the mix of health and armor.
Little Sister
A good unit that can become a third tank depending on how long the battle goes. OF course, since Little Sister only have 1 damage, if her attacks get blocked by Void, she would not gain health like what happened in this battle.

Sorrow Harvester
Sorrow Harvester has good 2 magic damage. The Weaken ability also complements Thalgrimore's -1 max health reducing the opponent's health by 2 even at the start of the fight.

This battle could've been a draw but it wasn't because there's a difference in positioning that make or break the result of the battle. One of the rulesets for this battle is Explosive Weaponry giving Blast ability to all monsters on the board. My positioning controls where the blast damage will go only affecting Nim Guard Captain while theirs get his back line affected as well. This shows how important the proper positioning is on battles and how it can allow you to either win or lose.

Positioning is one of the most overlooked aspects of Splinterlands, yet it often decides the outcome of battles. In this match, the difference between victory and defeat was not the strength of the cards but the placement of each unit. Small adjustments can completely change who will be the winner and loser of that battle.
New Beluroc Aegis proved how crucial a strong frontline with Taunt can be under the Explosive Weaponry Ruleset. By directing the focus of the enemy’s attacks, he ensured the rest of the team survived long enough to secure the win. His role highlights how a single card, when used wisely, can carry the entire formation.
Ultimately, this battle is a reminder that strategy is about more than just card selection. The right card in the wrong position can cost you the match, while the right placement can turn the tide even with similar chosen monsters. Mastering positioning of your monsters is also a key to thriving in Splinterlands.

- This post is an entry for Splinterlands Social Media Contest.
- Animated Banners and Dividers are edited in Canva Pro.
- Other sources that I do not own are cited under their respective photos.
- Some of the fonts used are from instafonts.io
If you're interested in playing the game, support me by registering using my referral link here

View or trade
LOHtokens.@konaqua122, You have received 1.0000 LOH for posting to Ladies of Hive.
We believe that you should be rewarded for the time and effort spent in creating articles. The goal is to encourage token holders to accumulate and hodl LOH tokens over a long period of time.
https://bsky.app/profile/did:plc:fhsritgaf5jeg75ojwtvhnff/post/3lzbtudvngc26
https://bsky.app/profile/did:plc:fhsritgaf5jeg75ojwtvhnff/post/3lzbtudvngc26
The rewards earned on this comment will go to the author of the blog post.
Congratulations @konaqua122! You have completed the following achievement on the Hive blockchain And have been rewarded with New badge(s)
Your next target is to reach 50 replies.
Your next payout target is 50 HP.
The unit is Hive Power equivalent because post and comment rewards can be split into HP and HBD
You can view your badges on your board and compare yourself to others in the Ranking
If you no longer want to receive notifications, reply to this comment with the word
STOPThanks for sharing! - @clove71

View or trade
LOHtokens.@ladiesofhive, you successfully shared 0.1000 LOH with @konaqua122 and you earned 0.1000 LOH as tips. (5/50 calls)
Use !LADY command to share LOH! More details available in this post.
!LADY
View or trade
LOHtokens.@hive-124452, you successfully shared 0.1000 LOH with @konaqua122 and you earned 0.1000 LOH as tips. (23/50 calls)
Use !LADY command to share LOH! More details available in this post.