Strategy for Winning Gods Unchained Matches when Going Second! (+Full Gameplay Example)

Ever felt flustered by the way your opponent somehow manages to always stay ahead when they get to go first and you're stuck putting creatures in play that keep getting struck down before you can even attack? Or wondering how to better use your 3 Small Bag of Tricks in gameplay so that you can turn the tide of the onslaught of creatures being launched first by your opponent? Well, then I've got exactly what you need! This is my breakdown of a full game I just played with my exact strategy for what to do to get the win when going second in a Gods Unchained match.
But before I show any part of the game, I want to mention that choosing cards with low mana for your opening hand are crucial for you to effectively use your Small Bag of Tricks from the start to turn the tide in your favor. I don't mean that all creatures should be 1 mana, but low in general. I personally prefer having two 1 mana creatures, one 2 mana creature, and one 3 mana creature to start (after your turn's first draw for the fourth card). This allows you to mirror the unlocking of gems in the mana wheel, and to thus use an extra mana gem where needed with the creatures already in your hand.
And finally, the biggest point of all with going second is this: as soon as you can in the match, try to become the player that is deploying creatures first. What I mean by that is that you need to try to get the board completely clear of all creatures except your own ASAP. This will be the "turning of the tide" that I keep mentioning, because if you deploy your creatures first, that means that by the next turn, you will be the one attacking first, which is usually the crucial advantage of the player that gets to go first in the game. And the way to get to that point is to put as many creatures/spells in play from the start so that you can wipe out the opponent's initial creatures. This is why I stress making immediate use of Small Bag of Tricks extra mana gems from the start, because I truly believe that is where the game is either won or lost when you have been assigned the second turn in the game. And I'll show you exactly what I'm talking about here in this gameplay example.
OK, so let's dive right in! Here is the first screenshot of what my opponent played and what I countered with.
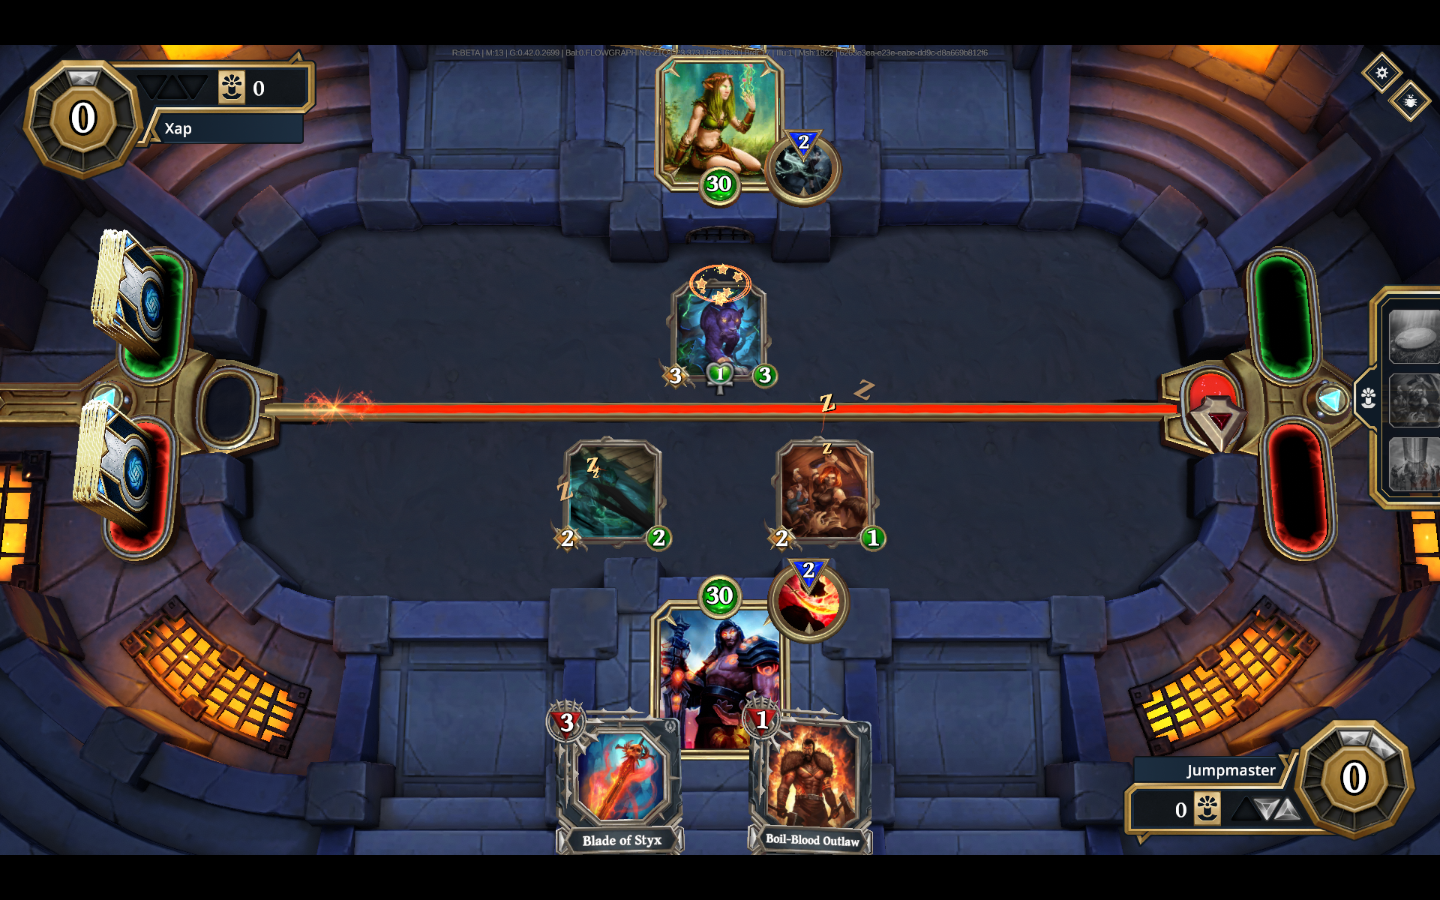
My opponent kicked things off with a very tough opening play, a 2 mana Black Jaguar. But, this also meant that they had already used their one and only Small Bag of Tricks extra mana gem. Still, this posed me some problems because I knew that all of my 1 mana creatures in my hand only had 2 attack points and 2 or less defense points. This meant that the Black Jaguar could attack them on the next turn, destroy them and then regen 1 health and still have 3/2 for it's stats. Thus essentially wiping out my creature with minimal damage. So I needed to make sure that I could wipe out the Black Jaguar by my second turn, while trying to maintain a card on the board if possible. Thus, knowing that in my second turn (with the use of a Small Bag of Tricks) I could deploy my Blade of Styx and wipe out their Black Jaguar, I decided to launch two 1 mana creatures on my first turn to turn up the volume of what I had available to attack with for my next turn. I started with my Dockside Prowler, which with it's one turn of hidden, would likely be available and ready to attack for my next turn. And then to invest in the future and give a big +2 attack point boost to the Boil Blood Outlaw in my hand, I decided to launch the Tartessian Improviser as well. My only qualm with this play was that if my opponent used their god power (Selena's Mark, dealing one damage to a random enemy creature and healing their god for one point) in the next turn and I got unlucky, then my Tartessian Improviser could be wiped out, since it only has one health point. However, if my opponent did use their God Power on the next turn, it would take use all their mana gems and thus not allow them to put any other creatures in play. So that would be a risky move for them. Thus, I decided it was worth the risk/reward to have two creatures on the board, and a stronger third waiting in the wings, so I went for it! And at the end of the day, that's the entire strategy with going second, make strong deployments of your creatures and then planning for the next move with one greater mana gem than your opponent thanks to your extra Small Bags of Tricks.
I know that's a lot of strategy talk, but it's crucial when planning out your moves! So let's see how they played out. On to turn 2!
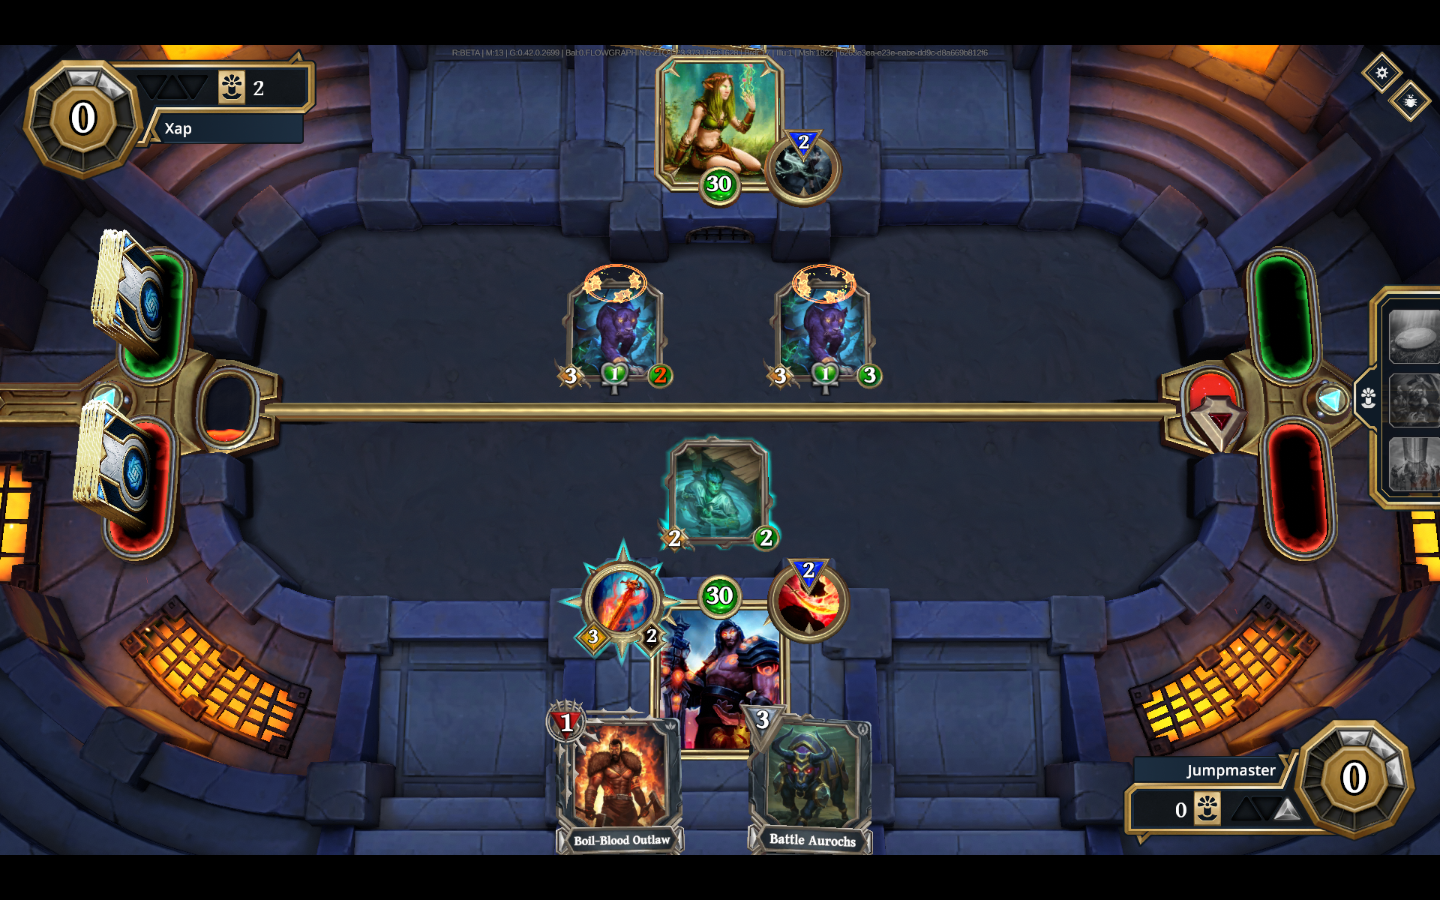
Alright, so as you can see, my opponent launched a second Black Jaguar, and used their first to wipe out my Tartessian Improviser. This played absolutely perfectly into my hand because as planned, I was able to use my second Small Bag of Tricks to launch my 3 mana Blade of Styx. And this gave me an opportunity to wipe the board clean (a key move that I mentioned in the third paragraph) for the first time, while maintaining an active advantage (I would still have one more attack left with my Blade of Styx). So I set it in motion.
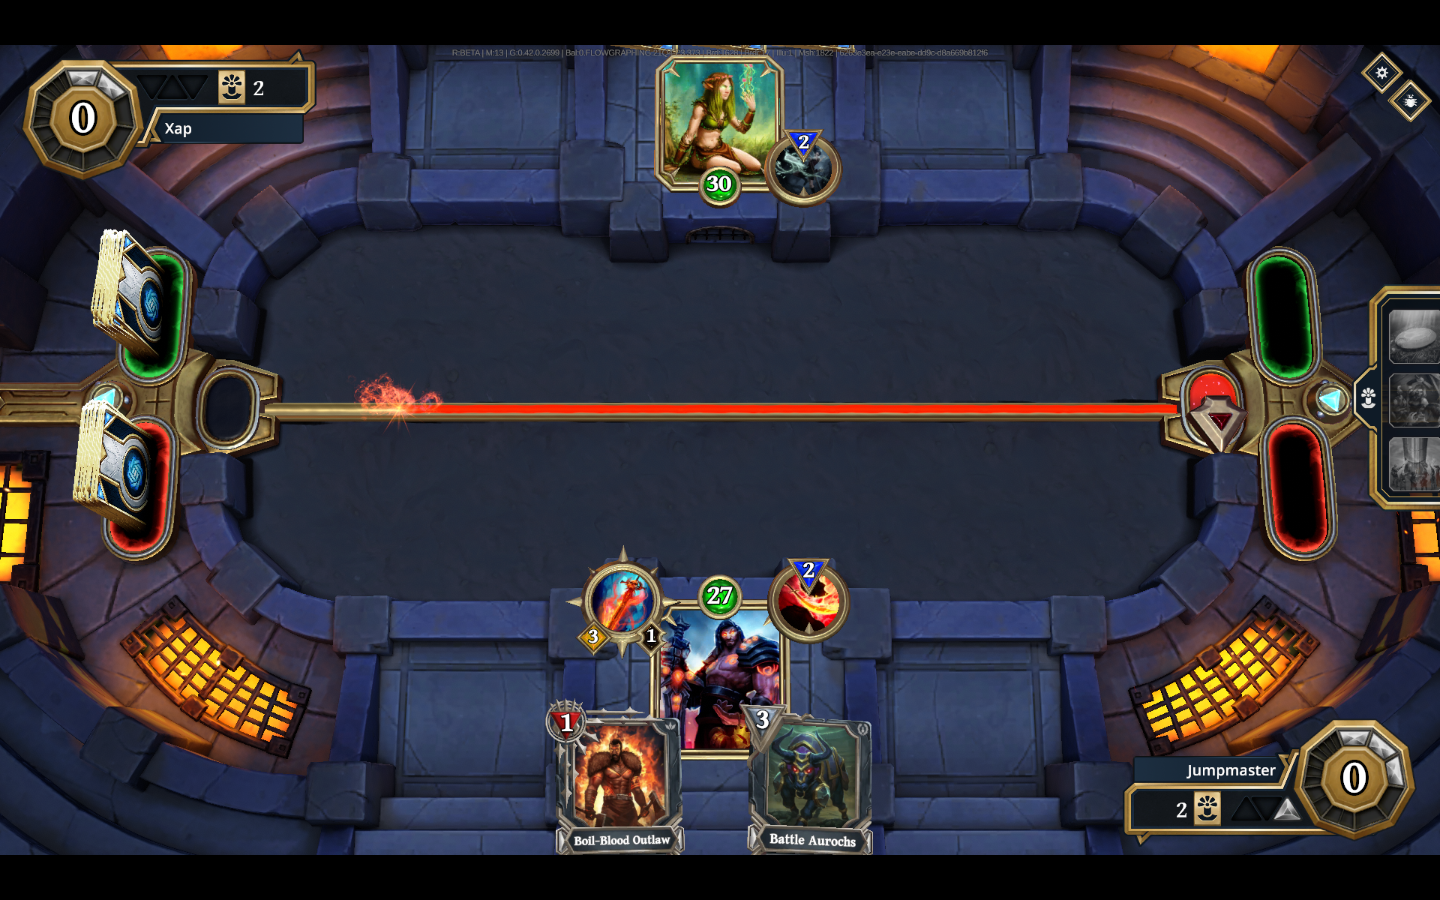
I attacked the Black Jaguar with 2 health left with my Dockside Prowler and wiped it out. And then I attacked the second Black Jaguar with my Blade of Styx and wiped it out as well. This left me with just my Blade of Styx, with one durability left, and left my opponent with nothing left in play, as seen above.
Next, there is a screenshot missing, but my opponent deployed ANOTHER Black Jaguar and I used my final Small Bag of Tricks in get up to 4 unlocked mana gems and respond with both my Battle Aurochs and my 4/2 (Tartessian Improviser elevated) Boil Blood Outlaw. Thus, in the first three turns, I had already used all of my Small Bag of Tricks extra mana gems, but it was so worth it. And that's what I want to emphasize...those Small Bag of Tricks are there to be used ASAP. Save them at your own peril because you may fall too far behind to ever even get to use them at all. The only one time I try to save any is if I have a 6 mana card that I really want to use ASAP (like the Giant Pangolin with blitz for nature decks), so that I can unlock it on my second 5 mana gem turn. But even then, you only one have to save 1 Small Bag of Tricks and can use the other two ASAP.
Now, let's see what happened next:
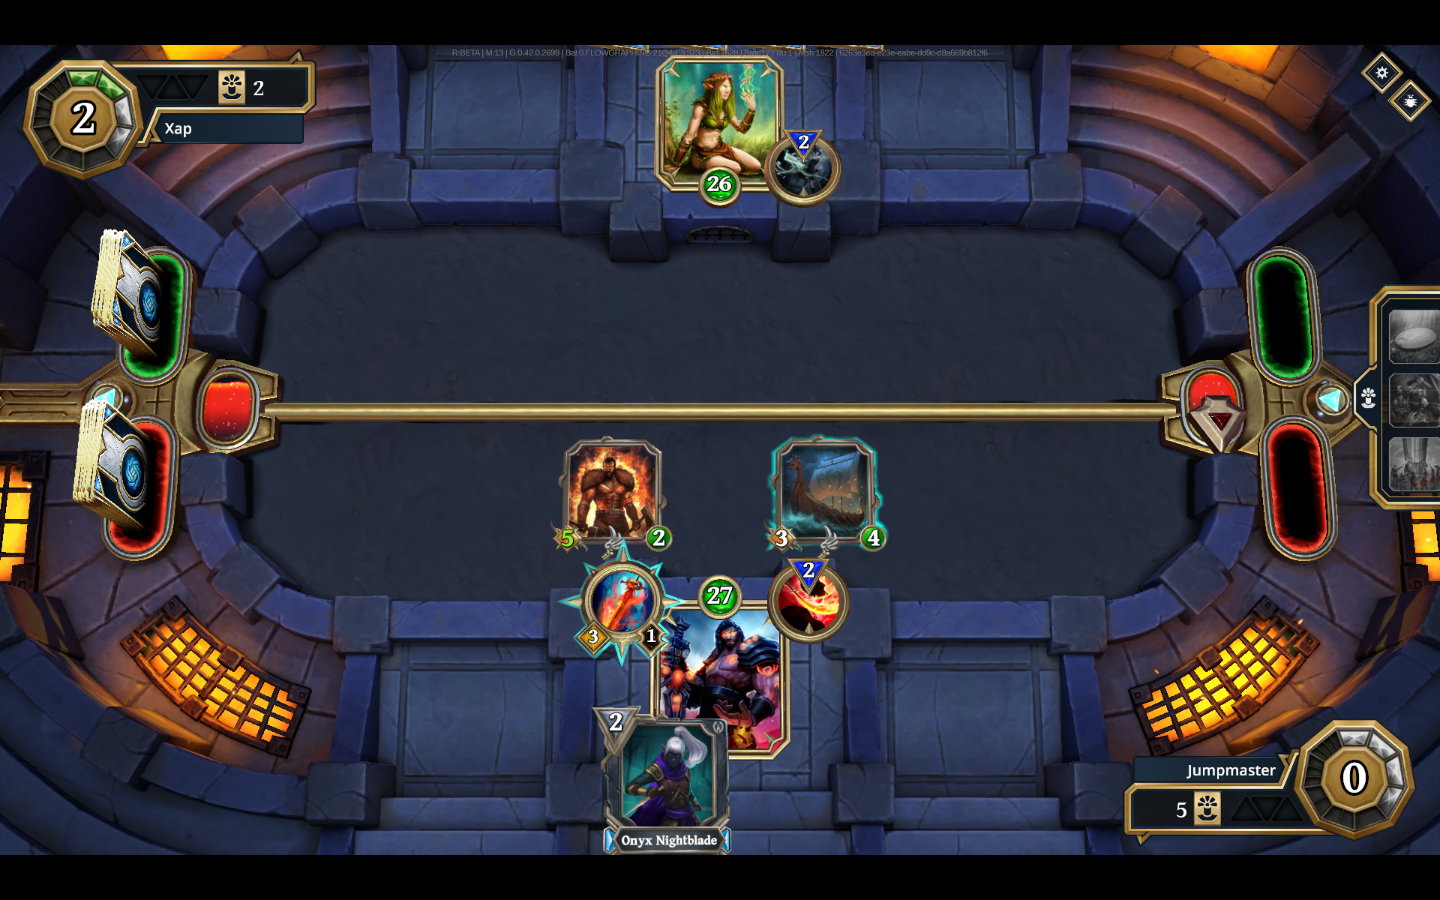
My opponent countered by using their God Power and then attacking my Battle Aurochs with their Black Jaguar, thus destroying both creatures. I guess their hands were tied and they didn't have any other creatures left that cost less than 4 mana, so they were forced to throw away the turn in regards to playing a new card. And that is exactly what I needed in order to become the player who was attacking and deploying cards first (my target goal the whole time in this second turn strategy)
It was time to finally take control, and that's exactly what I did. I deployed my 4 mana Viking Longship, and attacked my opponent's God with my Boil Blood Outlaw, dealing 4 damage, and boosting his attack to 5 for the next attack! Also, I saved my Blade of Styx, so now I had two creatures available to attack and a relic. Felt really good at this point that I'd taken over the attacking position in the game, which was our mission.
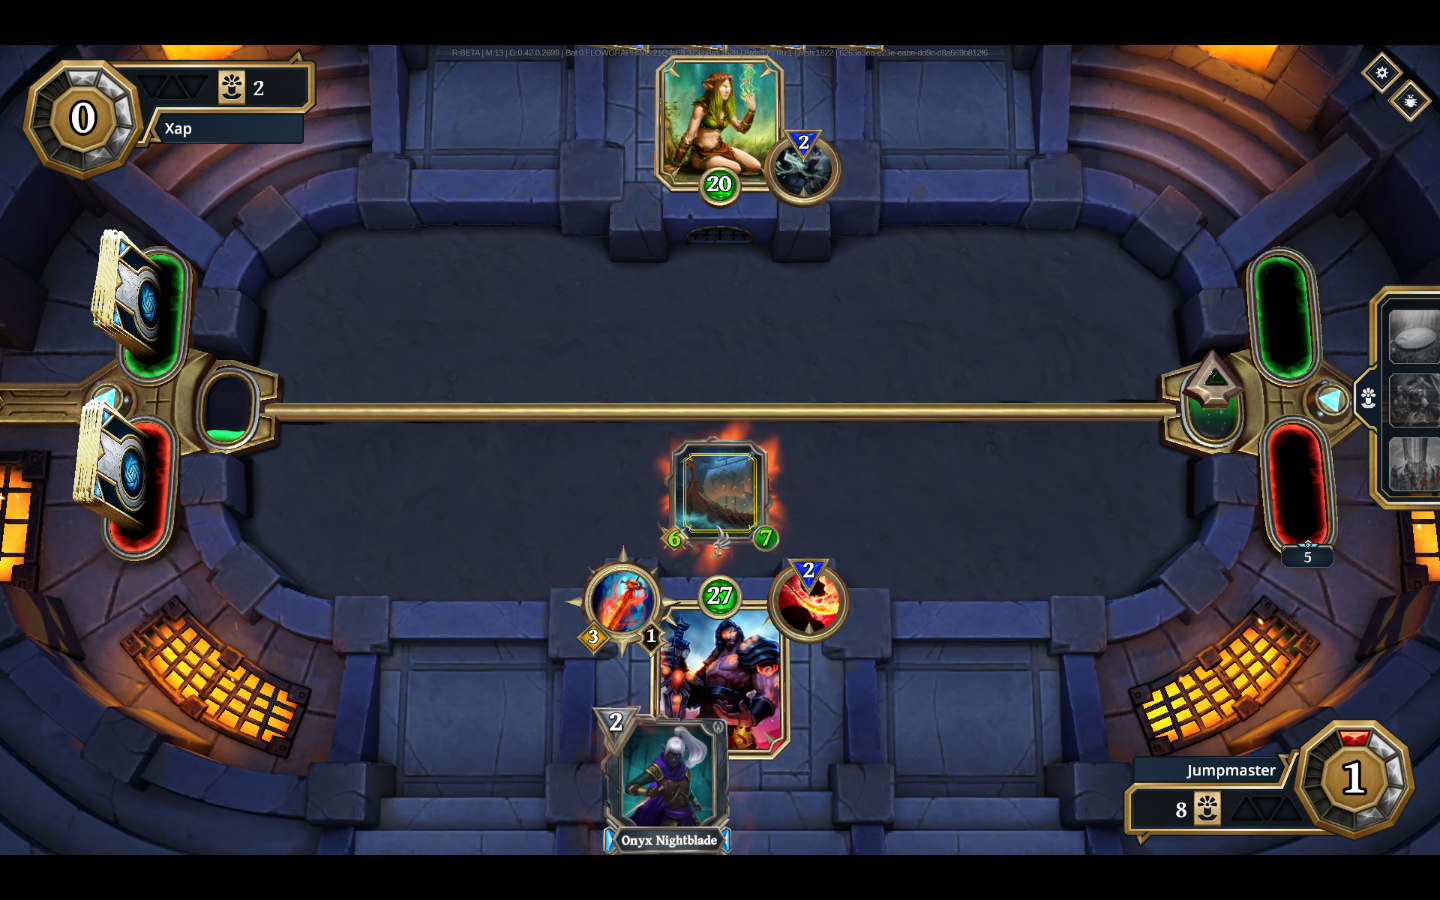
My opponent made a strong move on the next turn and played an Escaped Silverback, because as I had guessed, they likely only had high mana creatures available in their hand. This card also dealt one damage to my Boil Blood Outlaw with its roar. However, my opponent had to end their turn at that point, since they didn't have any more mana gems to spend. And that's what gave me a massively positive trade-off opportunity. My 5 attack point Boil Blood Outlaw was down to only 1 health point, but the Escaped Silverback had only 4 health points, so I attacked with my Boil Blood Outlaw and destroyed both creatures. This essentially allowed me to trade a 1 mana creature for a 5 mana creature from my opponent, which was a massive boost. And this also opened the gate for my next move, as I used the Another Round card to give +3/+3 to my Viking Longship, which I then attacked my opponent's God with, to deal a massive 6 point blow. And as an added bonus, by making my God frenzied, I was able to give my Onyx Nightblade +1/+1 at the end of my turn (a frenzied bonus feature of Another Round)!
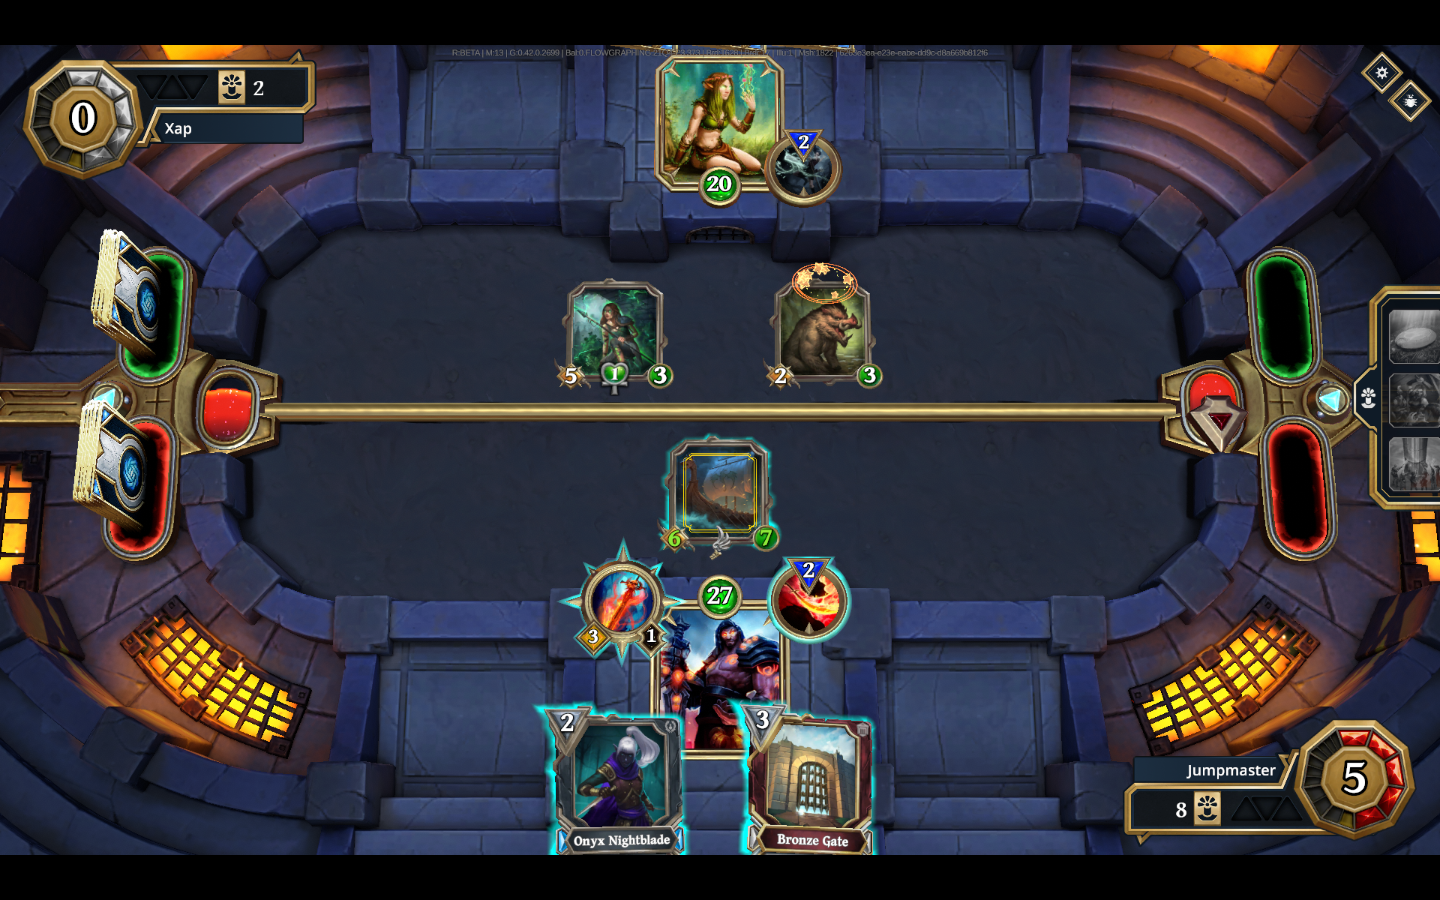
My opponent followed by putting two creatures in play, including the dangerous 5/3 Underbridge Assailant. I knew that was the biggest threat at the moment to my Viking Longship, which I wanted to keep in play as long as possible with its 6 attack points and flank feature. So I decided it was time to finally use the second attack for the Blade of Styx that I'd been saving. I knew that I would take 5 damage directly to my God in doing so, but it would be worth it, as it would wipe out the biggest threat to my strategy to stay ahead of my opponent with stronger and a higher number creatures on the board at all times. So I pulled the trigger and wiped out the Underbridge Assailant with my Blade of Styx. I then attacked my opponent's God with my Viking Longship, used my Slayer God power to deal two more damage to their God, and then deployed my Bronze Gate to provide frontline protection to my Viking Longship.

Thus, by the end of this turn, I was able to maintain my strongest creature, add a frontline force to protect, and also reduce my opponent's health to 12.
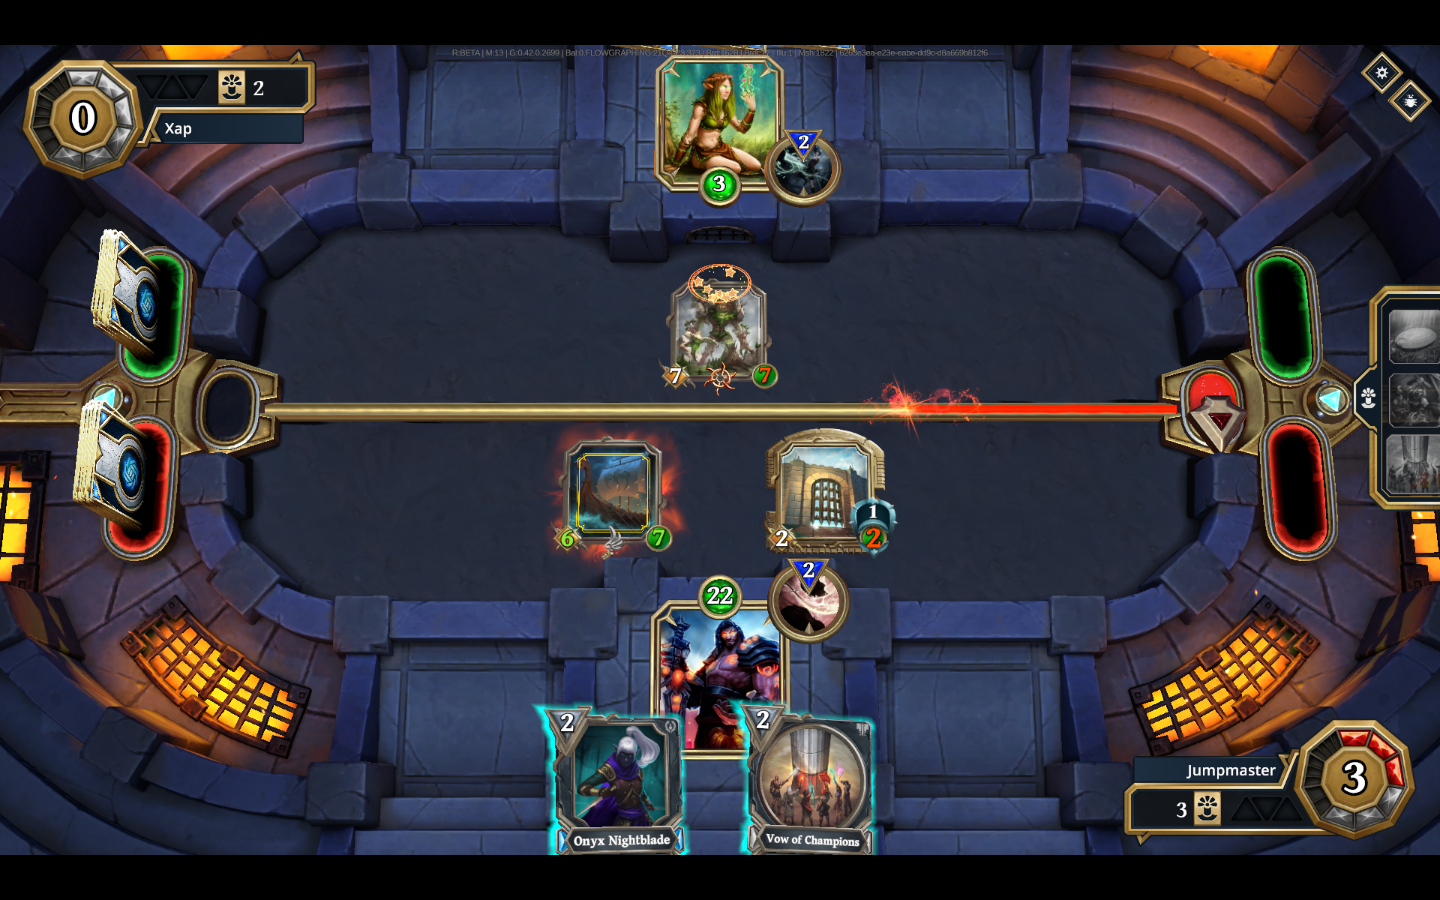
A lot happened in the next turn, and it allowed me to mitigate the danger of the Green Giant that my opponent played. Also, in addition to launching the Green Giant, my opponent also attacked my Bronze Gate with their Wild Hog, bringing the hog's health down to 1 point. Now, knowing that when my opponent attacked with the Green Giant the next turn, they'd be able to distribute the damage dealt (via overkill) to destroy my Bronze Gate and also damage my Viking Longship, I had to take action to deal as much damage to their God as possible in this turn to ensure my victory. It was now or never. So I attacked with my Viking Longship, used my Slayer God Power to deal two damage, and then used Bar Fight to deal one damage to each enemy creature and my opponent's God. Bar Fight thus also wiped out the Wild Hog my opponent had with only 1 health point remaining. This also left my opponent with 3 health points, and I had 3 unspent mana gems, so I decided to go to the Sanctum and purchase the Vow of Champions.
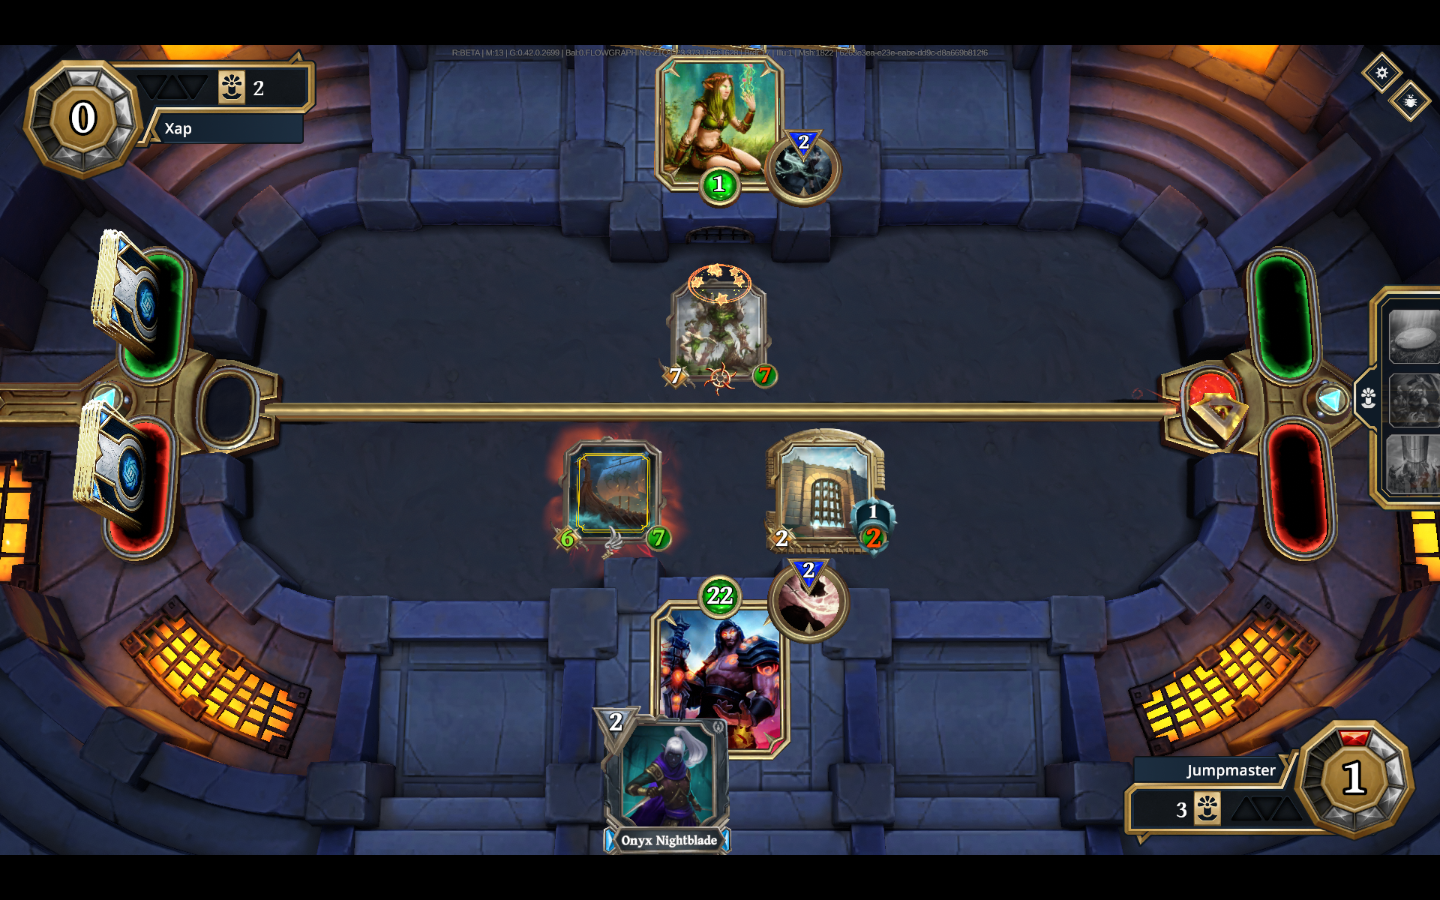
Then, as shown above, I decided to immediately utilize that Vow of Champions to deal 2 more damage to my opponent's God. This brought my opponent's God down to 1 health point, which ensured that no matter what frontline creature that was put up, I would still be able to win with one use of my Slayer God Power, unless if my opponent was somehow able to heal their God (most likely using Revivification) in this next turn.
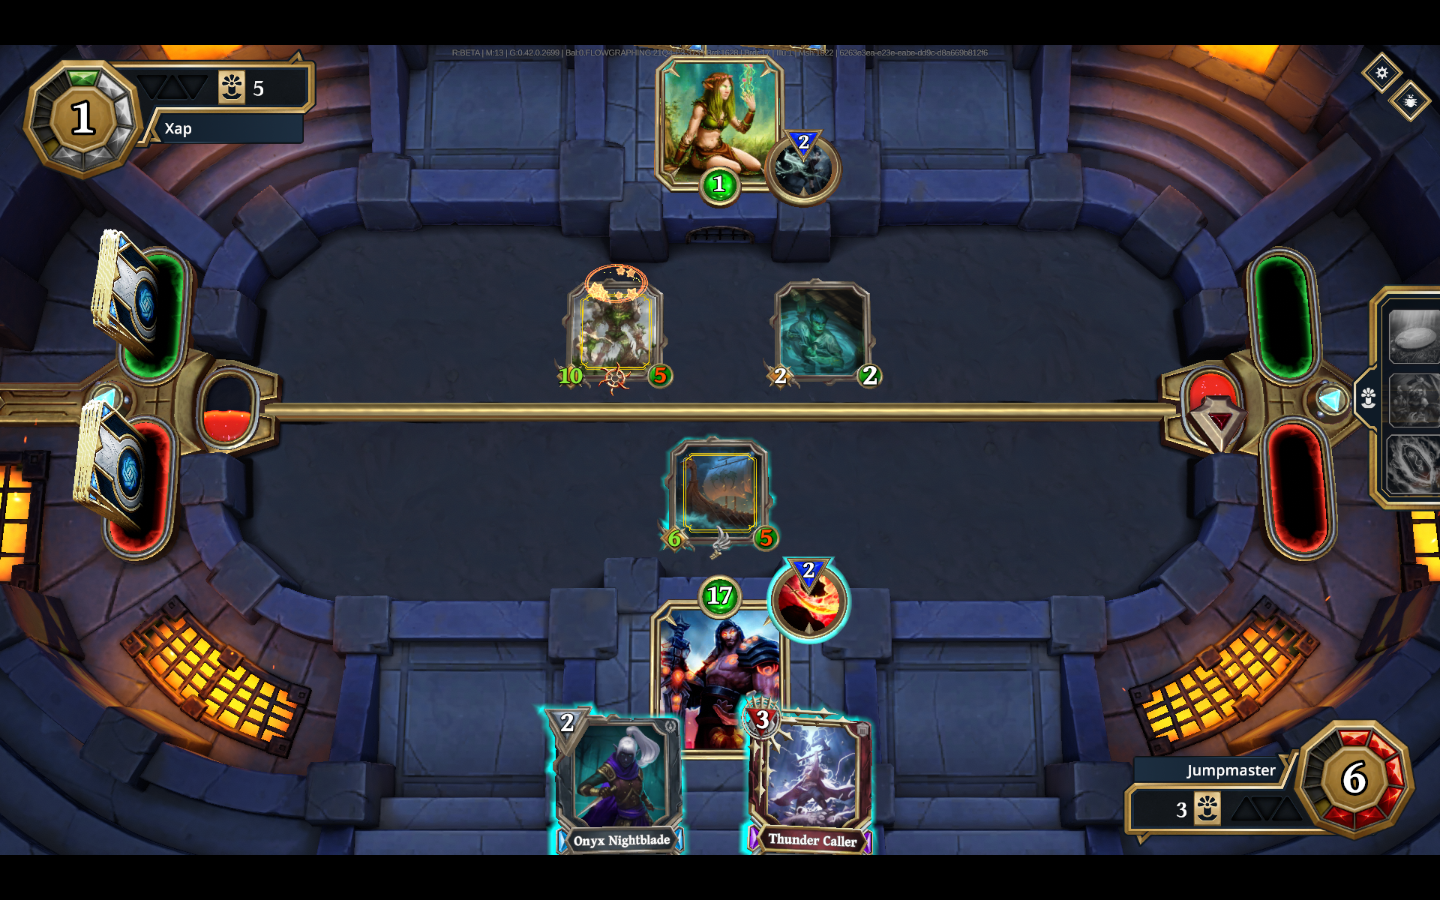
However, my opponent did not have a play to heal their God. They deployed a Dockside Prowler and then used Jump On to add 3 extra damage points to their Green Giant, and then attacked my Bronze Gate, destroying it outright and dealing damage to my God and my Viking Longship. However, it wasn't enough, and with no frontline character blocking me, I was able to attack their God to take their final health point and end the match!

And that's a wrap folks! This was a perfect example of the strategy that I described for success when going second. Remember, it's all about these three points:
- Deploying a high volume of creatures as soon as possible
- Being aggressive early with using your extra Small Bags of Tricks
- Trying to wipe the board clean ASAP to turn the tide and allow you to deploy attacking creatures first, instead of your opponent, who has that advantage at the beginning of the match.
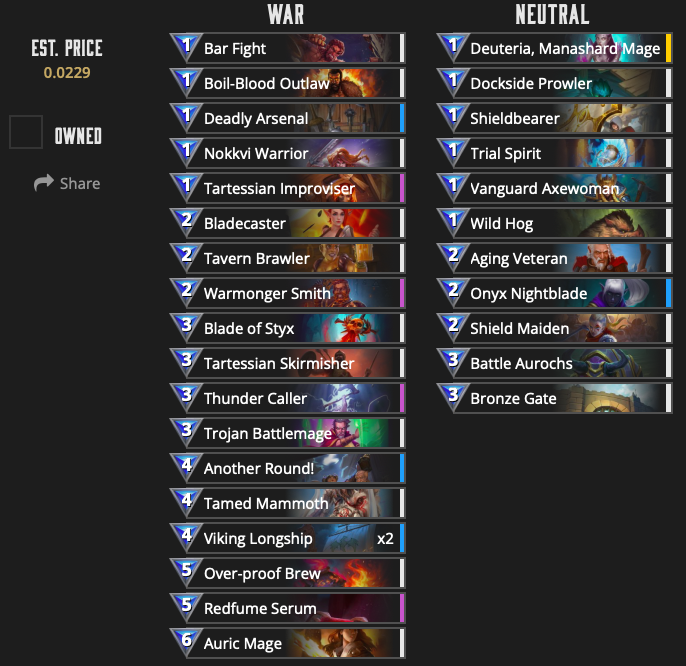
Hope this strategy and the gameplay example shown have been helpful! Also, if you'd like to try out the strategy with this specific deck as well, here's the deck code: GU_1_6_IAYHAbCChCBbHADIAVCBuCCXCBaHAFHAECDlCDmCCJCDuCDqCBBCCtCAZICNCDPIAcCCkIAZCCxCCjCCjHAiCCLCBz
And here's a screenshot of the deck list:
Now go forth and conquer in your matches this week!
-Jumpmaster
Solid post. You have broken down what you are doing. So by providing this commentary you are shedding light on a useful topic. Some decks tend to have a real tough time if they are going second. So a strategy for going second is certainly a topic that has needed so attention brought to it. If I may add one suggestion, If you really wanted to add the cherry on top of the Sunday so to speak. Perhaps the deck list you were running being added with a screenshot or deck link would have been good. It would have pushed this post even farther ahead.
Hey @squirrelacus, thanks for the feedback! Love that recommendation, about to go back and edit the post to add a screenshot of my deck list so that anyone reading this can use this deck as well. Appreciate you!
Dear @jumpmaster,
The current HiveBuzz proposal will expire in a few days.
Do you mind supporting our proposal for 2022 so our team can continue its work next year?
You can do it on Peakd, ecency, Hive.blog or using HiveSigner.
https://peakd.com/me/proposals/199
Thank you. We wish you a Happy New Year!