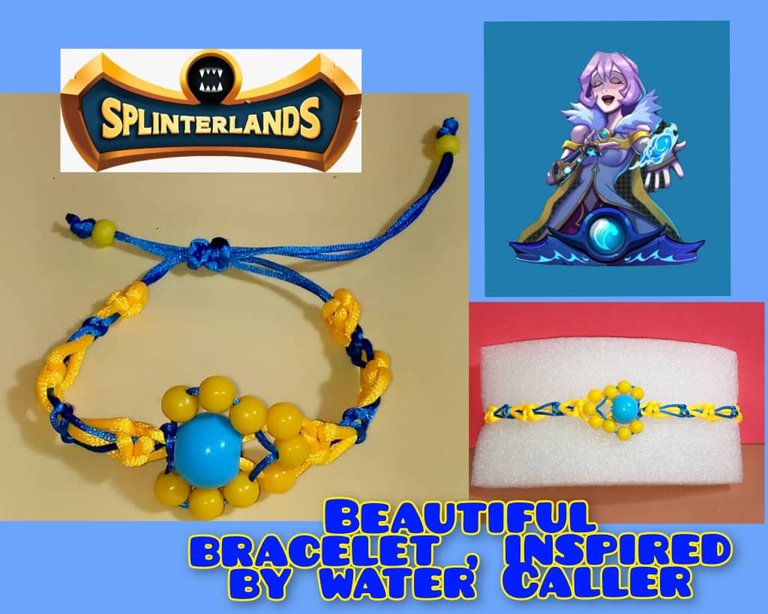
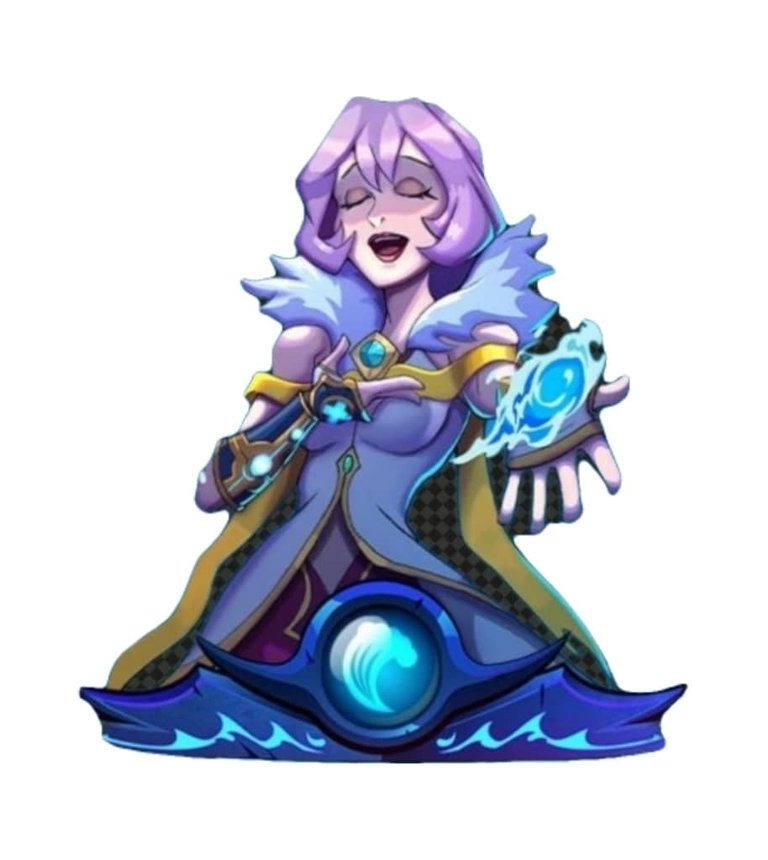
(Esp/Eng) Hermosa pulsera , inspirada en Water Caller , semana 295 del concurso de arte de Splinterlands /Beautiful bracelet, inspired by Water Caller, week 295 of the Splinterlands art contest.
¡Bienvenidos a mi blog!
Welcome to my blog!
Buenas noches a todos los que forman parte de esta comunidad de #Diyhub ,feliz lunes por la noche, espero que se encuentren bien, ya descansando del exitoso día que hayan tenido. Dios les bendiga a todos.
Hoy quiero mostrar como hacer una linda pulsera hecha con hilo chino y mostacillas de colores, inspirada en Waller Caller , nació en el reino acuático pasó años formándose en el agua, posee mucha habilidades. Utiliza sus poderes para ayudar a otros.
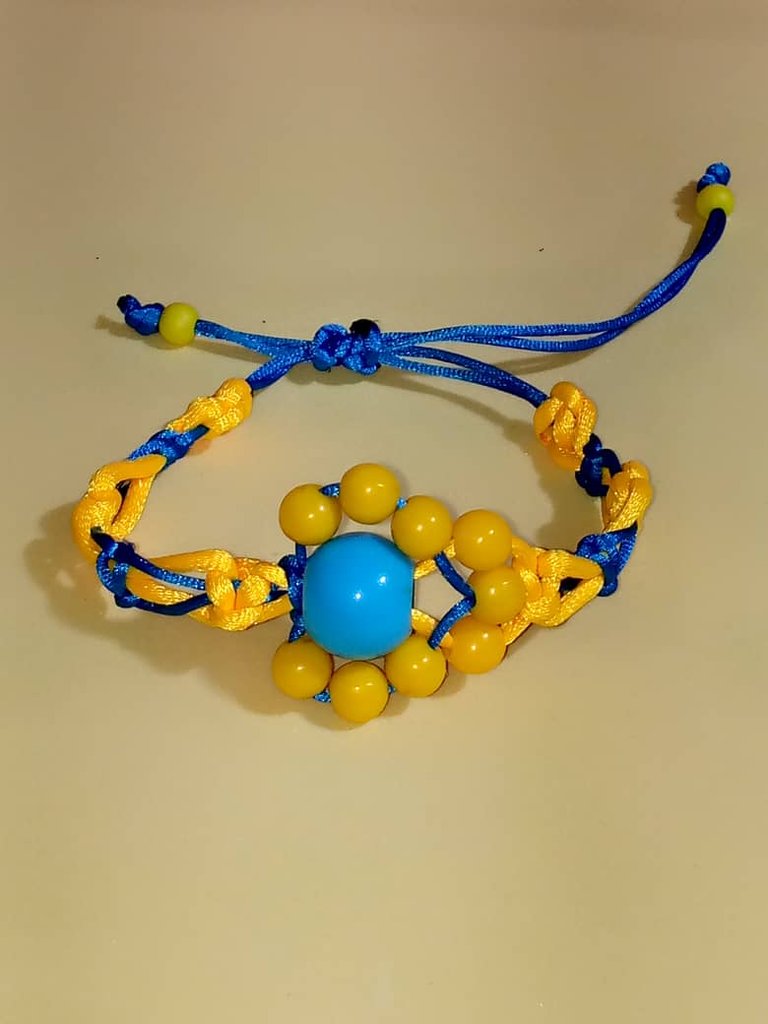
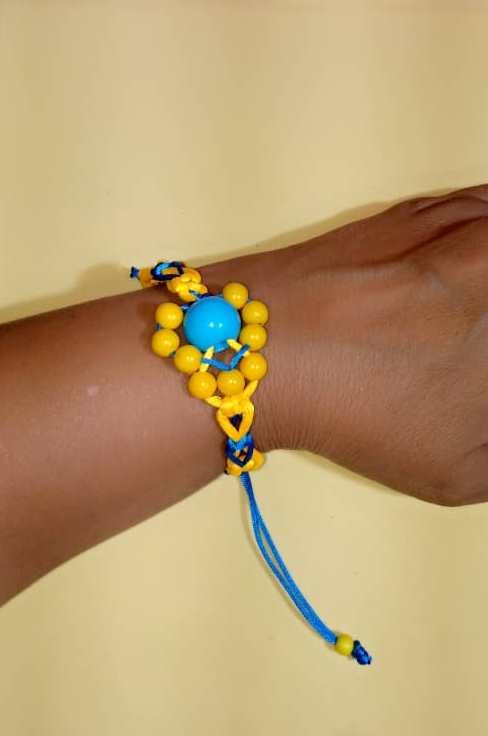
Esta pulsera es especial para regalar a un ser muy querido.
Primera vez que participo en el concurso de arte semanal para fanart de @splinterlands,número 295, espero que sea de su agrado.
Good evening to all who are part of this #Diyhub community ,happy Monday night, I hope you are well, already resting from the successful day you have had. God bless you all.
Today I want to show how to make a cute bracelet made with Chinese thread and colored beads, inspired by Waller Caller , born in the aquatic realm spent years training in the water, has many skills. She uses her powers to help others.
This bracelet is a special gift for a loved one.
First time I participate in @splinterlands weekly fanart contest,number 295, hope you like it..
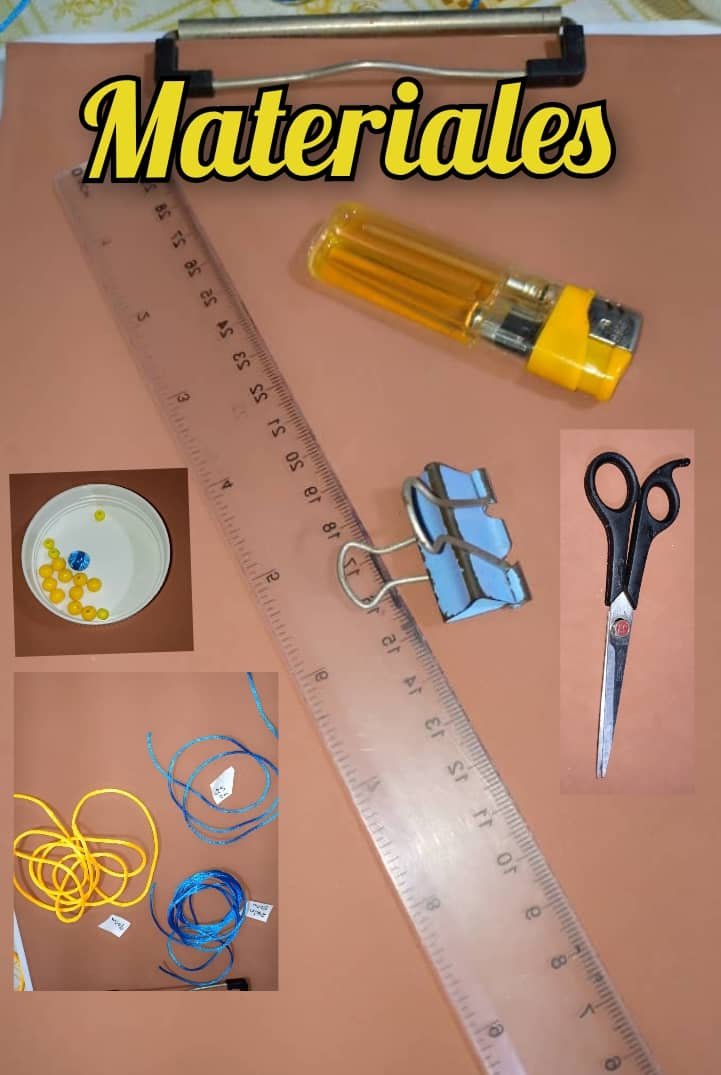
Los materiales que se utilizan para la realización de la pulsera:
- Hilo chino color azul de 0,5 cm y amarillo de 1 cm.
- Tijera,
- Regla.
- Gancho.Carpeta con gancho.
- Yesquero.
- Mostacillas amarillas y azul.
The materials used for the realization of the bracelet:
- Chinese thread blue color of 0.5 cm and yellow of 1 cm.
- Scissors,
- Ruler.
- Hook. folder with hook.
- Tinder.
- Yellow and blue beads.
Pasos para la realización:
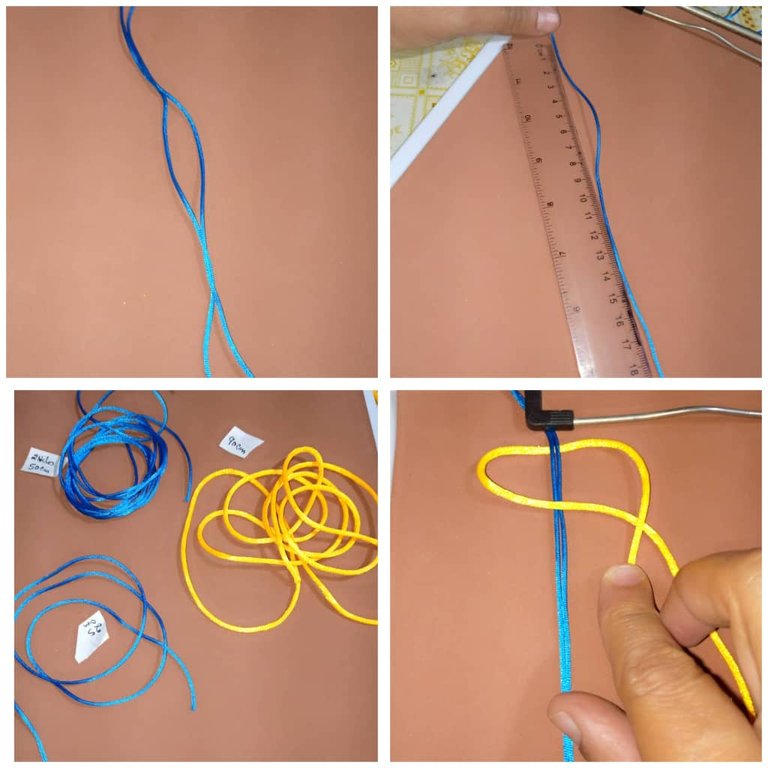
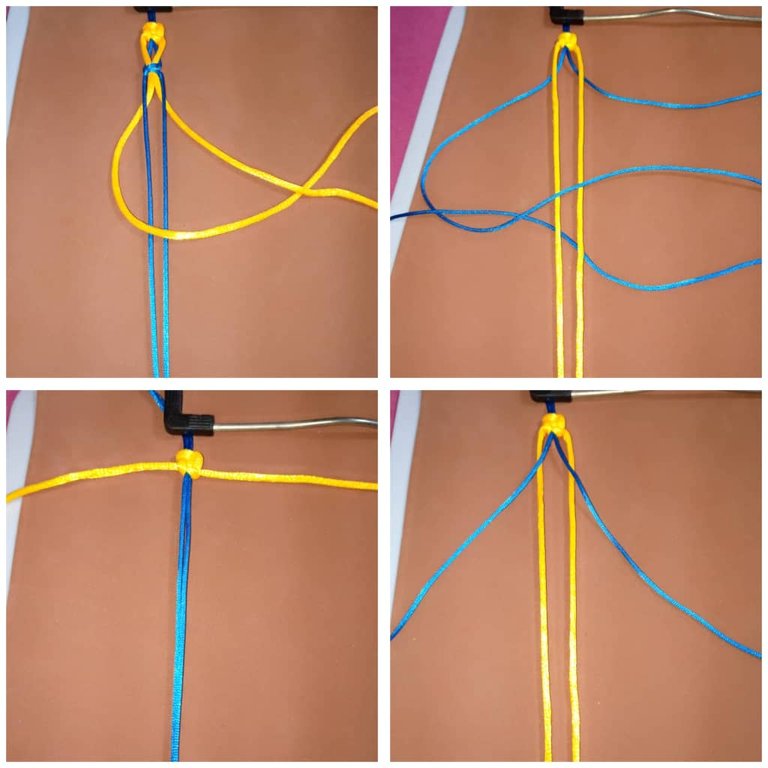
- Lo primero que haremos es tomar el hilo azul , con la regla medir 5o centímetros y luego picar dos pedazos de 50 cm, ahora medir el hilo amarillo de 90 cm y picar con la tijera.
- Otro pedazo de color azul de 25 cm.
- Ahora con los pedazos de hilo azul de 50 cm , medir 15 cm y colocar desde allí en la carpeta con gancho, para comenzar a realizar la pulsera.
- En esta oportunidad vamos a realizar esta pulsera con nudos: planos y mariposa.
- Después de acomodar los hilos azules en la carpeta con gancho, lo estiramos bien, en la parte de abajo colocamos el otro gancho para poder trabajar mejor.
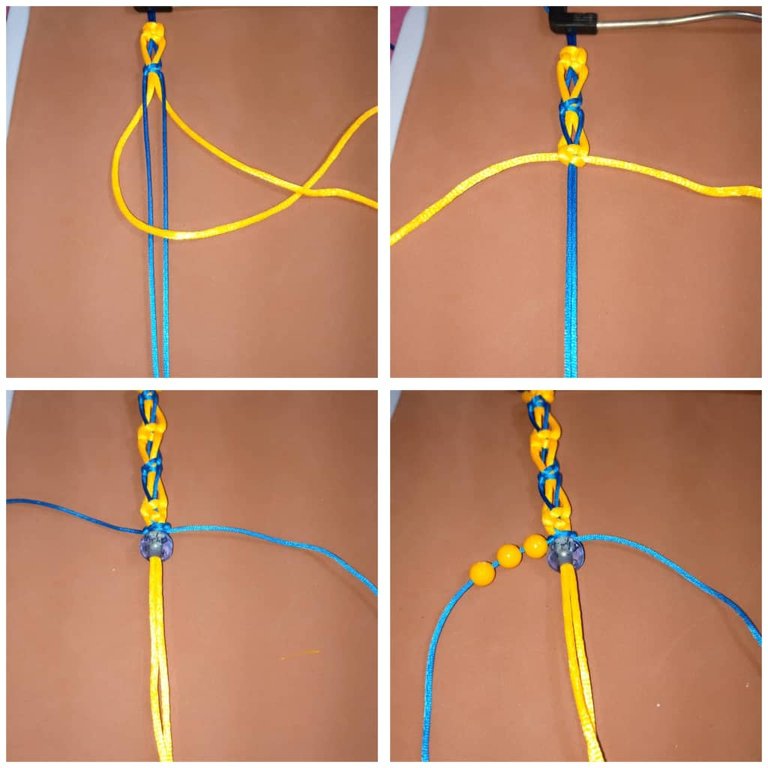
- Luego tomamos el hilo amarillo de 90 cm y colocamos por la mitad , vamos a realizar nuestro primer nudo plano, comenzamos por la derecha , pasamos el hilo de la izquierda para la derecha y por arriba el hilo de la derecha , hacemos como forma de P, dentro de la barriga de la P,metemos la punta del hilo y la sacamos por arriba. Ahora hacemos lo mismo pero comenzando con el hilo de la izquierda.Ya tenemos el nudo plano .
- Continuamos con el nudo mariposa, los dos hilos que eran los centrales lo soltamos y ahora pasamos el amarillo por arriba y con los hilos azules estarán hacia los lados para realizar el nudo plano, pero para realizar el nudo mariposa debemos dejar como 1,5 cm de espacio para que se forme el nudo.Luego continuamos con los nudos planos.
- Así haremos toda la pulsera.
Steps to realization:
- The first thing we will do is to take the blue thread, with the ruler measure 5o centimeters and then chop two pieces of 50 cm, now measure the yellow thread of 90 cm and chop with the scissors.
- Another piece of blue thread of 25 cm.
- Now with the pieces of blue thread of 50 cm, measure 15 cm and place from there in the folder with hook, to begin to make the bracelet.
- In this opportunity we are going to make this bracelet with knots: flat and butterfly.
- After arranging the blue threads in the folder with hook, we stretch it well, at the bottom we place the other hook to be able to work better.
- Then we take the yellow thread of 90 cm and we place it in the middle, we are going to make our first flat knot, we start on the right side, we pass the thread from the left to the right and from the top the thread from the right, we make a P shape, inside the belly of the P, we put the tip of the thread and we take it out from the top. Now we do the same but starting with the thread on the left, we have the flat knot.
- We continue with the butterfly knot, the two threads that were the central ones we let go and now we pass the yellow one over the top and with the blue threads they will be towards the sides to make the flat knot, but to make the butterfly knot we must leave about 1.5 cm of space for the knot to form, then we continue with the flat knots.
- This is how we will make the whole bracelet.
Para colocar las piedras a la pulsera:
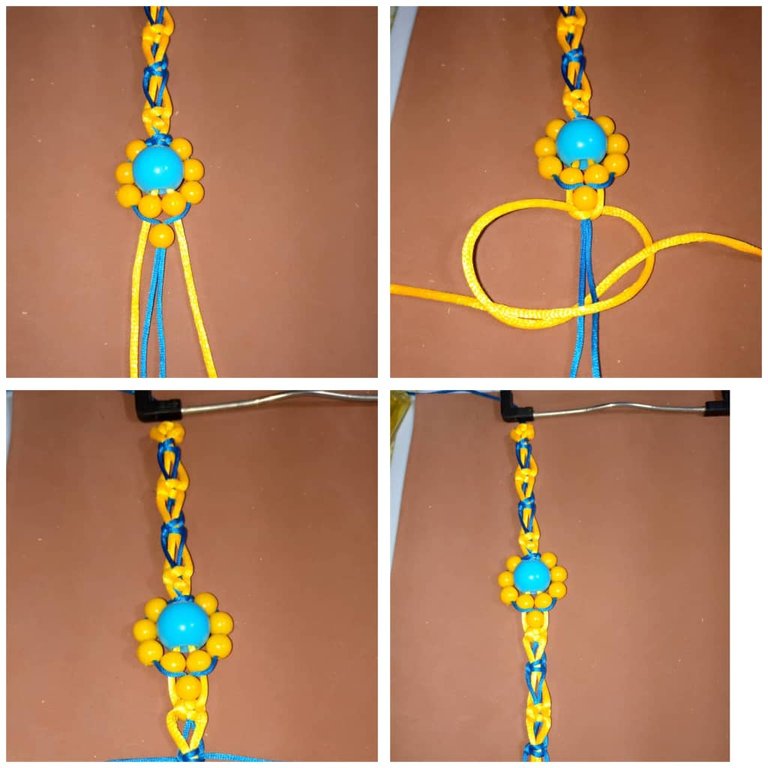
- Introducimos la mostacilla grande azul , en los hilos amarillos y las amarillas en los hilos azul,introducimos tres de un lado y tres del otro lado , luego dos amarillas en el hilo amarillo y una amarilla en el hilo azul.
- luego seguimos con los nudos planos y mariposa.
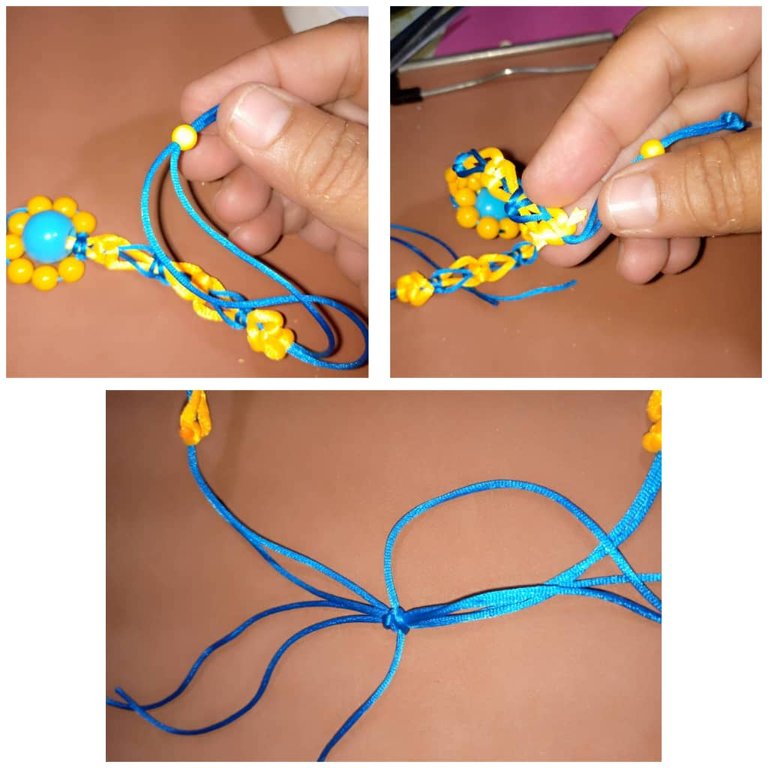
- Recortamos el excedente con la tijera y quemamos las puntas con el yesquero.
- En la parte de atrás hacemos la tranca con nudos planos , como se explicó al principio. y se le colocan dos mostacilla amarillas al final de cada punta.
To place the stones on the bracelet:
- We introduce the big blue beads in the yellow threads and the yellow ones in the blue threads, we introduce three on one side and three on the other side, then two yellow ones in the yellow thread and one yellow one in the blue thread.
- Then we continue with the flat and butterfly knots.
- We cut the excess with the scissors and burn the ends with the tinder.
- On the back, we make the lock with flat knots, as explained at the beginning, and we place two yellow flappers at the end of each end.
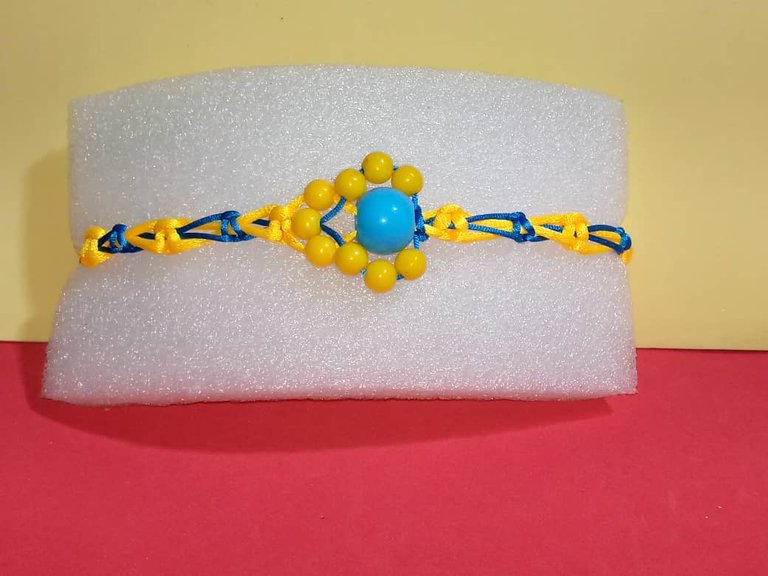
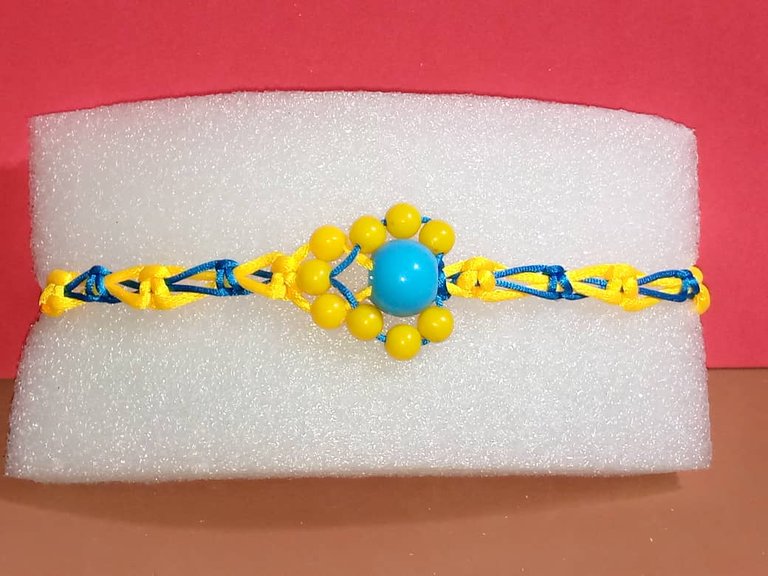
Aquí el resultado final de la hermosa pulsera , inspirada en Waller Caller
Here is the final result of the beautiful bracelet, inspired by Waller Caller.
Gracias por leer y comentar mi post, muchas bendiciones, hasta la próxima.
Las fotos son mías , tomadas con teléfono Infinix, editadas con incollage y traducidas con DEEPL.
Thank you for reading and commenting on my post, many blessings, see you next time.
The photos are mine, taken with Infinix phone, edited with incollage and translated with DEEPL.
Gracias por el apoyo @splinterboost . Bendiciones.
Beautiful bracelet. It looks like a super power bracelet. Nicely done
Me alegra que le guste @diyhub , gracias por el apoyo. Bendiciones.
Crafted a bracelet with an extraordinary feel. Art is always the emergence of great art is always the emergence of human life. May God always bless you with all abilities. Thank you so much for presenting every step smoothly with great feeling.
Amén, gracias por esas lindas palabras. Bendiciones
This is beautiful bracelet made with Chinese thread and colored beads.
Si, muy hermosa @tahastories1 , bendiciones.