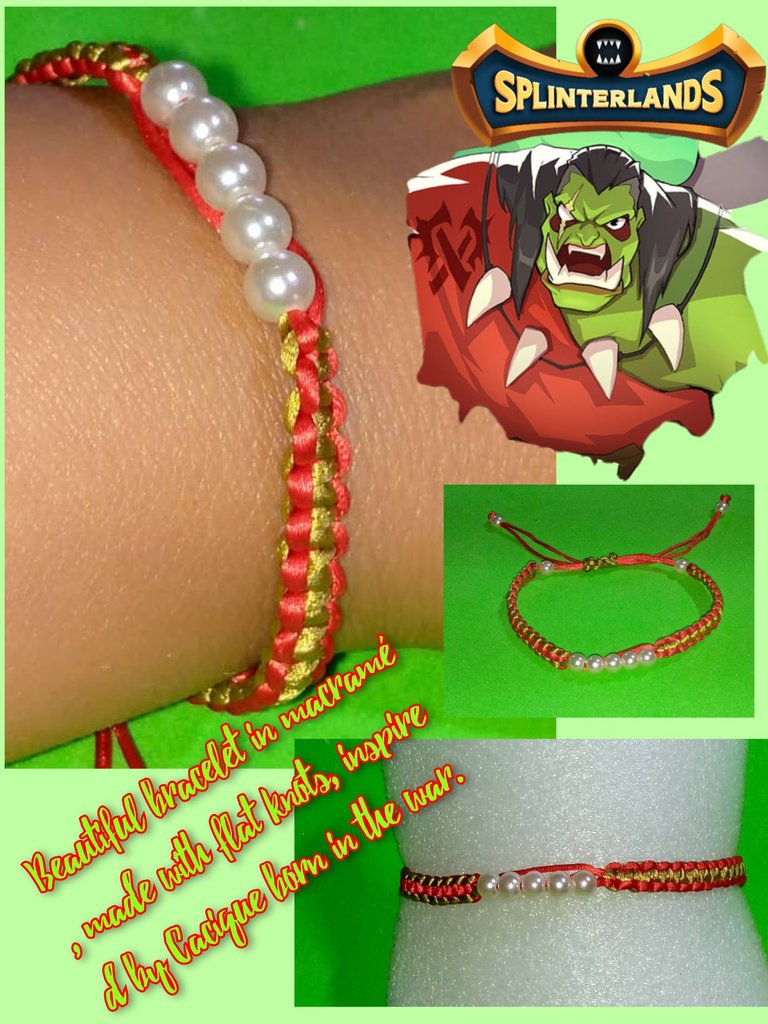
(Esp/En) Pulsera en macramé ,hecha con nudos planos, inspirada en cacique nacido en la guerra/Macramé bracelet, made with flat knots, inspired by a war-born cacique.
¡Bienvenidos a mi blog!
Buenas noches, feliz Martes a todos los miembros de esta comunidad de #diyhub , muchas bendiciones.
Después de tanto tiempo sin practicar el macramé , me activé nuevamente.
Este proyecto de hoy ,trata sobre una linda pulsera en macramé ,hecha con nudos planos, inspirada en los colores del personaje Cacique nacidos en la guerra del concurso de arte 355 en @splinterlands.
Está pulsera es muy atractiva, debido a los colores: verde y rojo que la conforman. Aunque puedes hacerla del color de sumo referencia. Espero que te guste.
Welcome to my blog!
Good evening, happy Tuesday to all members of this #diyhub community , many blessings.
After such a long time without practicing macramé , I got active again.
This today's project is about a nice macramé bracelet, made with flat knots, inspired by the colors of the character Cacique born in war of the 355 art contest in @splinterlands.
This bracelet is very attractive, because of the colors: green and red that make it. Although you can make it in the color of sumo reference. I hope you like it.
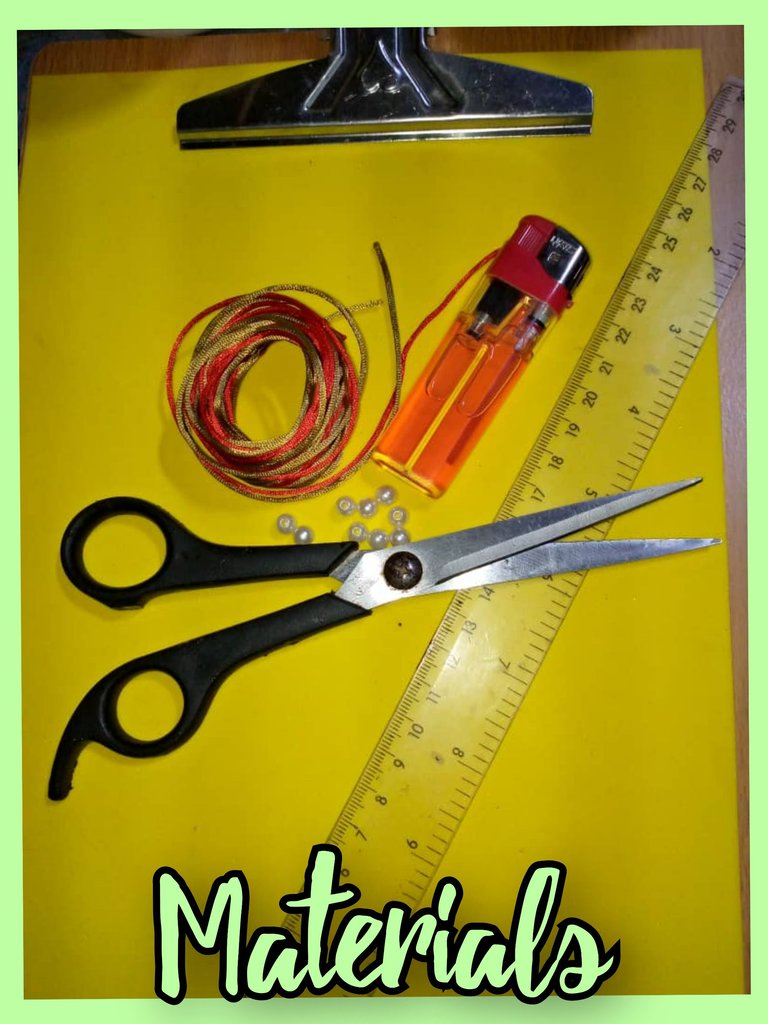
Materiales para su realización de la linea pulsera en macramé :
- 2 metros de Hilo ,cola de ratón , colores : verde y rojo.
- Tijeras.
- Yesquero.
- Carpeta con ganchos.
- Perlas blancas medianas.
- Regla para medir.
Materials for the realization of the macramé bracelet line:
- 2 meters of thread, mouse tail, colors: green and red.
- Scissors.
- Tinder.
- Folder with hooks.
- Medium white beads.
- Measuring ruler.
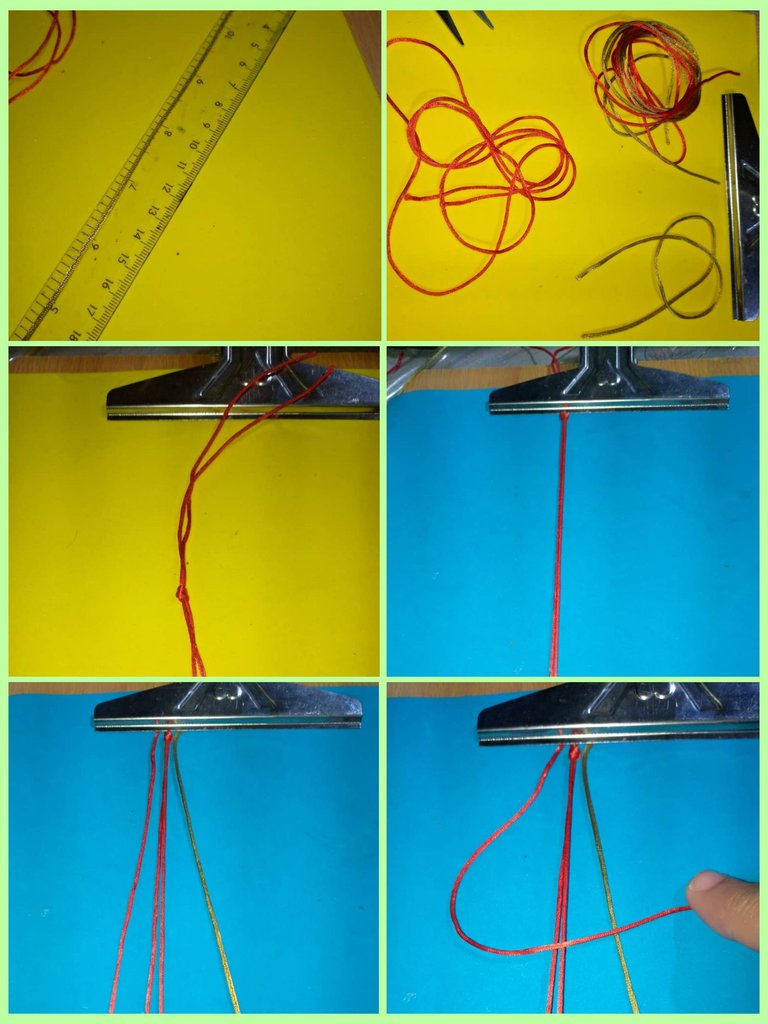
Paso a paso para la realización de la hermosa pulsera:
- Recortar con las tijeras ,el hilo verde, 30 centímetros.
- Luego recortar el hilo cola de ratón : rojo y verde 120 cm cada uno y dos hilos verdes de 45 centímetros.
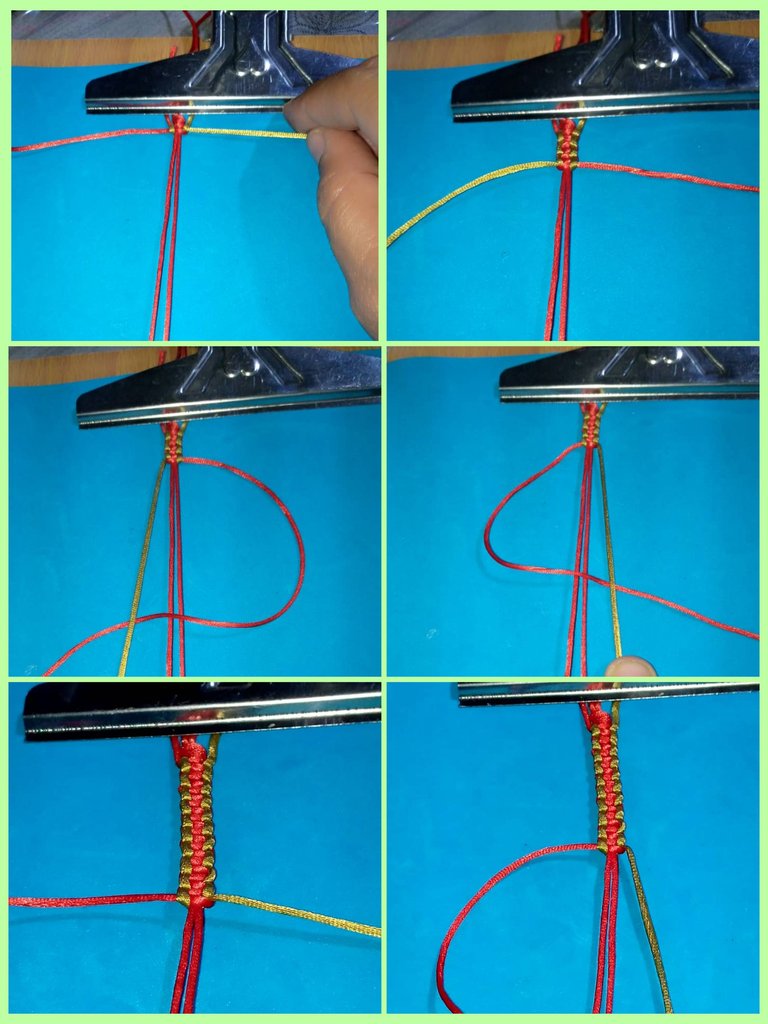
- Ya tenemos los hilos ,ahora procedemos a colocarlo en la carpeta.
- Los dos hilos de 45 centímetros van a hacer los hilos base. Dejamos 12 centímetros para comenzar , estoy seria para colocar la tranca de la pulsera más adelante.
- Luego colocamos los hilos de 120 cm sobre los hilos base.
- Comenzaremos a realizar el nudo plano, haciendo un número 4 con el hilo rojo de la izquierda y pasando por arriba el hilo verde, introduciendo la punta del verde dentro del cuatro. Jalamos el hilo. - Tenemos el primer nudo.
Step by step for the realization of the beautiful bracelet:
- Cut with scissors, the green thread, 30 centimeters.
- Then cut the mouse tail thread: red and green 120 cm each and two green threads of 45 centimeters.
- We already have the threads, now we proceed to place them in the folder.
- The two threads of 45 centimeters are going to make the base threads. We leave 12 centimeters to begin with, this would be to place the bracelet strap later.
- Then we place the 120 cm threads over the base threads.
- We will begin to make the flat knot, making a number 4 with the red thread on the left and passing over the green thread, introducing the tip of the green thread inside the four. We pull the thread. We have the first knot.
- Ahora tomamos el hilo verde del lado derecho, hacemos una letra "P", y el hilo rojo lo pasamos por encima e introducimos dentro del hueco de la letra. Ya tenemos completo el nudo plano. Así vamos a realizar todos los nudos planos hasta que tengamos la mitad de la pulsera, ahora quemamos las puntas con el yesquero para poder meter las perlas blancas.
- Continuamos con los nudos planos de la misma manera, uno en forma de "4" y otro nudo en forma de "P"
- Now we take the green thread from the right side, we make a letter "P", and the red thread we pass over it and introduce it inside the hole of the letter. The flat knot is now complete. We are going to make all the flat knots until we have half of the bracelet, now we burn the ends with the tinder to put the white pearls.
- Continue with the flat knots in the same way, one in the shape of "4" and another knot in the shape of "P"
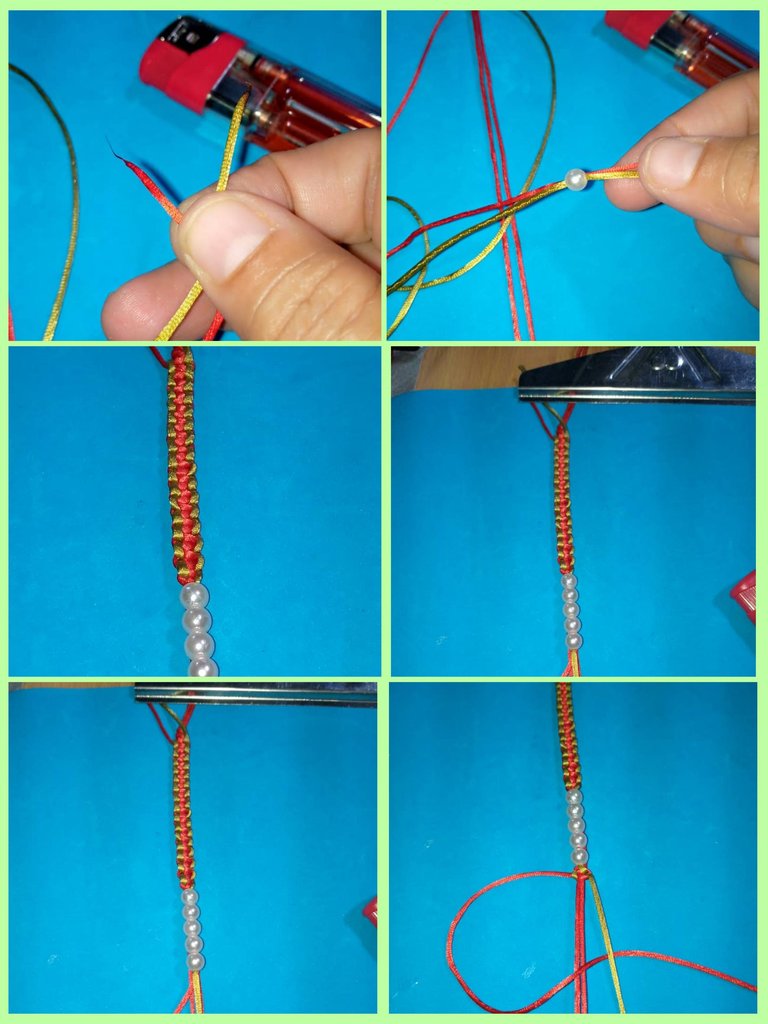
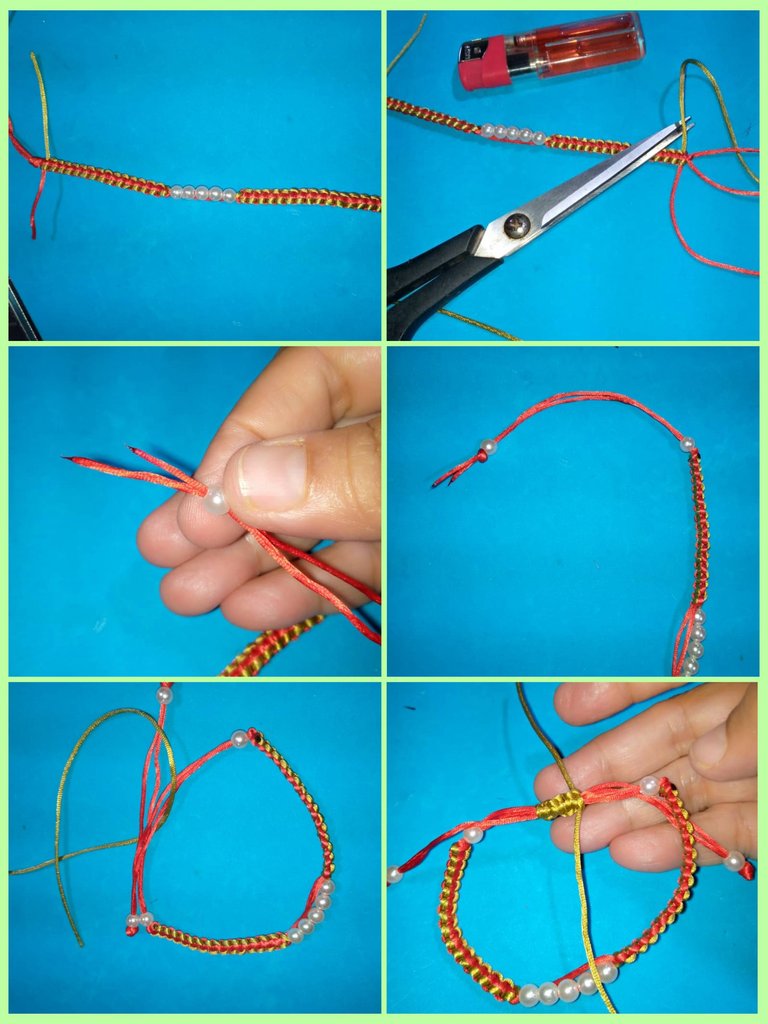
- Cuando tengamos el largo deseado de la pulsera ,recortamos el excedente con las tijeras y quemamos o sellamos las puntas. Colocamos las otras perlas , hacemos un nido, sellamos las puntas.
- Con el hilo verde hacemos la tranca de la pulsera, también con nudos planos. De esta manera se hace la linda pulsera.
- When we have the desired length of the bracelet, we cut the excess with scissors and burn or seal the ends. Place the other beads, make a nest and seal the ends.
- With the green thread we make the strand of the bracelet, also with flat knots. This is how the beautiful bracelet is made.
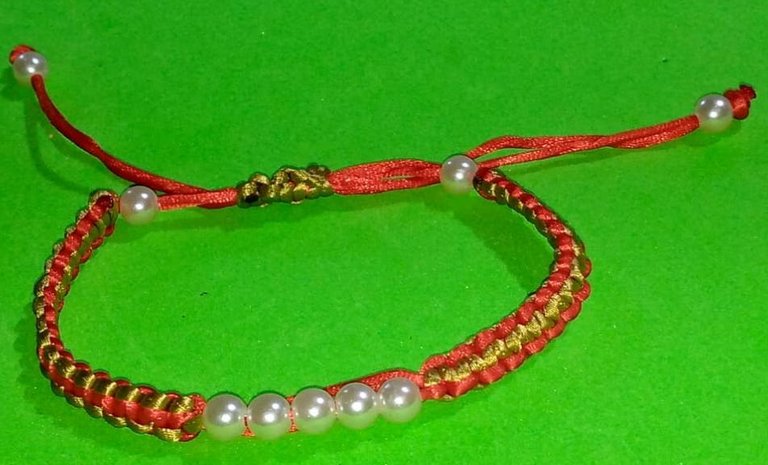
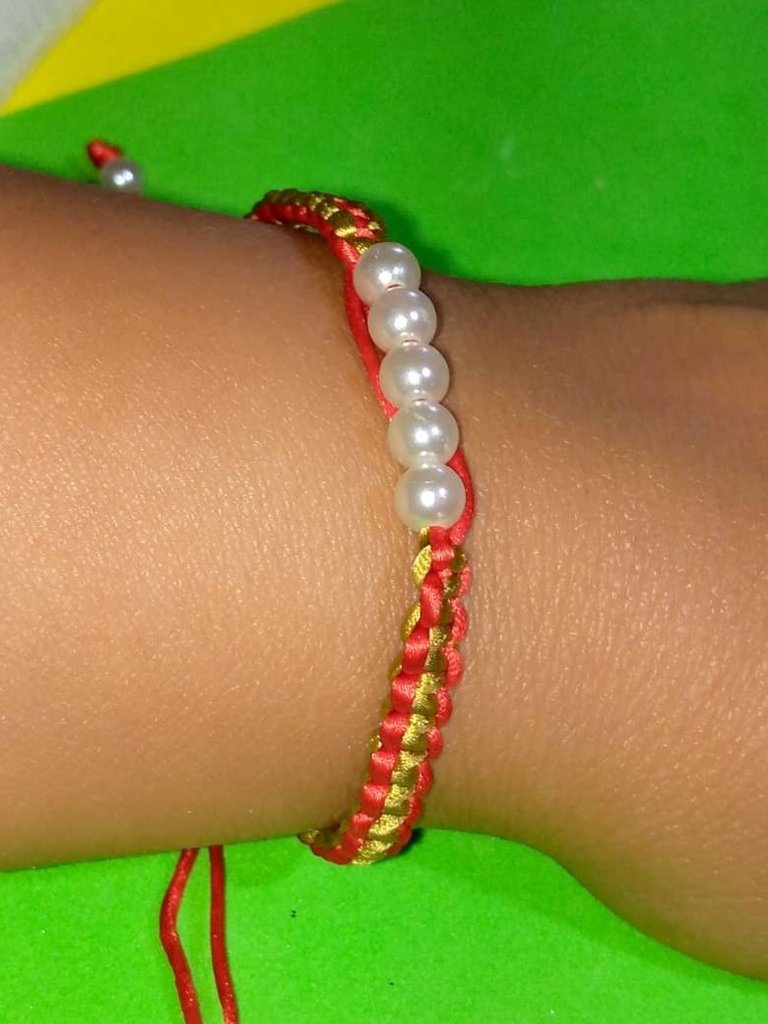
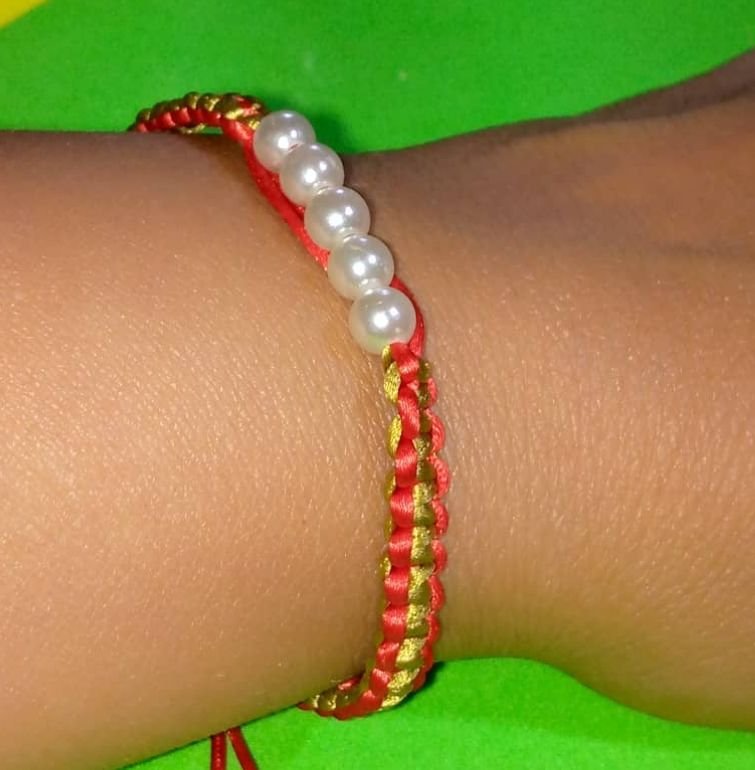
Aquí el resultado final de la linda pulsera en macramé
Here the final result of the beautiful macramé bracelet

Gracias por leer mi post, las fotos son mías , tomadas con teléfono infinix, editadas con incollage y traducidas con Deepl.
Thanks for reading my post, the photos are mine , taken with infinix phone, edited with incollage and translated with Deepl.
Gracias @splinterboost por el voto positivo. Bendiciones.
Always beautiful and original, thanks for highlighting your Splinterlands inspiration on the DIYHub Community.
selected by @jesuslnrs
Gracias @diyhub , me alegra mucho que le haya gustado. Saludos.
I've been following your Splinterlands-inspired work for a while, and you know I love seeing you choose colors and details that truly highlight the characters' key characteristics. I admire you so much and I'm glad you always have something new to share with us on the DIYHub Community, with all your characteristic brilliance. Thank you for that dear Eunice!...
I have picked this post on behalf of the @OurPick project! Check out our Reading Suggestions posts!
Please consider voting for our Liotes HIVE Witness. Thank you!
Me emociona mucho esas lindas palabras @jesuslnrs , gracias . Bendiciones.
que genial, la combinación de colores y el diseño, excelente!
How great, the combination of colors and design, excellent!
Si @yasmarit , los colores de la pulsera y las perlas la hacen ver muy linda. Saludos.
Congratulations @josdelmi! You have completed the following achievement on the Hive blockchain And have been rewarded with New badge(s)
Your next target is to reach 4000 comments.
You can view your badges on your board and compare yourself to others in the Ranking
If you no longer want to receive notifications, reply to this comment with the word
STOP