[SPA - ENG] DIY Dalia de cinta raso para vestido de maternidad 🙋🌸✨


✨Hello community! | ¡Hola comunidad!✨
¡Bienvenidos a este tutorial! Esta vez les enseñaré a realizar esta hermosa y delicada Dalia rosada como accesorio para el vestido de una amiga que está embarazada y el cual utilizó para su sesión de embarazada. Los materiales a utilizar son los siguientes:
Welcome to this tutorial! This time I will show you how to make this beautiful and delicate pink Dahlia as an accessory for the dress of a friend who is pregnant and which she used for her pregnancy session. The materials to be used are as follows:
`✨Materials to be used✨`
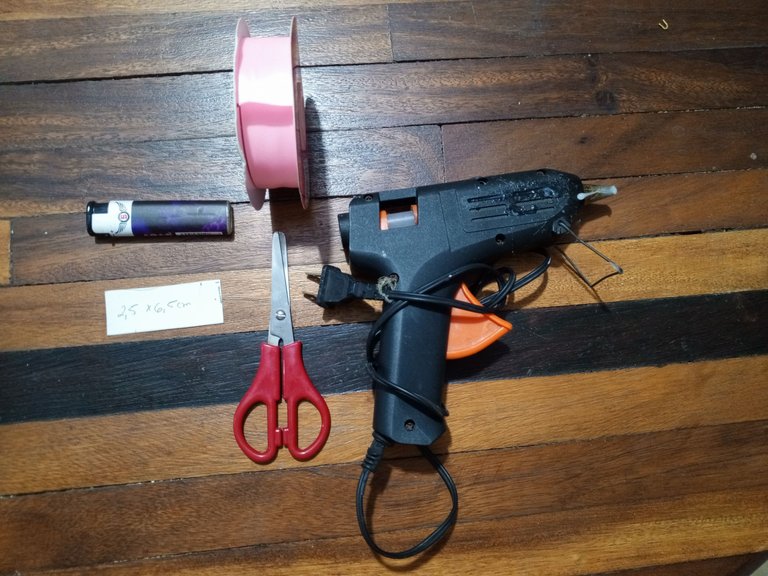
| -💮Pink satin ribbon (2 m is enough) this is 2.5 cm wide satin ribbon | - 💮Cinta raso rosada (con 2 m es suficiente) esta es cinta raso de 2.5 cm de ancho | |
|---|---|---|
| - 💮Hot or cold silicon | - 💮Silicón frio o caliente | |
| - 💮Scissors | - Tijeras | |
| - 💮Lighter | - 💮Encendedor | |
| - 💮A 2.5×6.5 rectangular mold | - 💮Un molde rectangular de 2.5×6.5 |
•STEP BY STEP•
•STEP BY STEP• Vamos a tomar el molde rectangular y lo vamos a colocar encima de la cinta raso y vamos a llevarlo hacia adelante cosa de envolverlo y dar unas 20 vueltas encima del molde. Ya dadas las 20 vueltas lo vamos a recortar quedando unos 28 pedazos recortados para armar la flor. Luego de esto, vamos a quemar los lados recortados para que los mismos no se deshagan.
Cabe de resaltar que si tienen un buen encendedor lo pueden hacer más rápido, sin embargo, mi encendido a mitad de tutorial se dañó por lo cual como plan B o segunda opción esta quemarlos con el fuego de una vela. Pero, tienen que tener cuidado de que estos no se manchen.
We are going to take the rectangular mold and we are going to place it on top of the satin ribbon and we are going to take it forward to wrap it and make about 20 turns on top of the mold. Once the 20 turns have been made, we are going to cut it out, leaving about 28 pieces cut out to make the flower. After this, we are going to burn the cut sides so that they do not fall apart.
It should be noted that if you have a good lighter you can do it faster, however, my lighter halfway through the tutorial was damaged so as a plan B or second option is to burn them with the fire of a candle. But, you have to be careful that they do not stain.

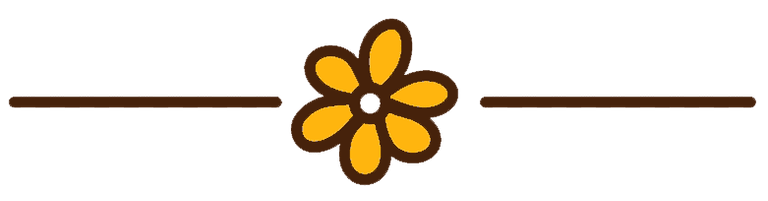
Habiendo las cintas cortadas ya listas, vamos a doblarlas para armar los pétalos. Lo que haremos es lo siguiente, lo doblaremos a la mitad, cosa de que se haga un triángulo, tomamos la parte izquierda doblándola hacia dentro. Quemamos por los laterales y la parte de abajo para que no se nos deshaga el pétalo. Si no me explico bien, aquí tengo un gif con la demostración:
Y así armamos todos los 28 pétalos para comenzar a realizar la Dalia.
Having the cut ribbons ready, we are going to fold them to make the petals. What we will do is as follows, we will fold it in half, so that it becomes a triangle, we take the left side folding it inward. We burn the sides and the bottom so that the petal does not fall apart. If I do not explain well, here I have a gif with the demonstration:
And so we assemble all 28 petals to start making the Dahlia.


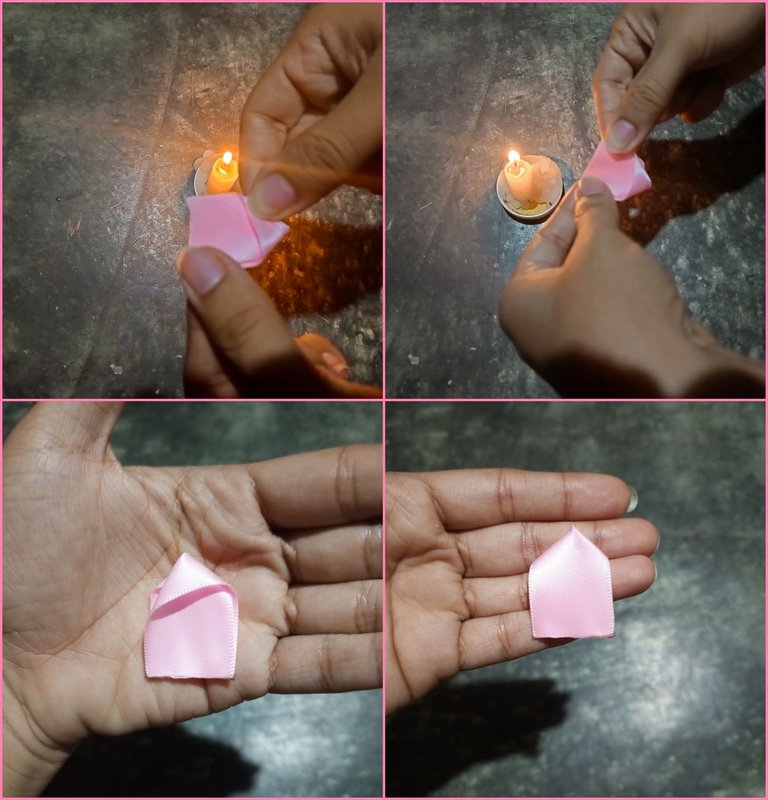
Ahora bien, pasamos a pegarlas con silicón para realizar la flor. Para la base vamos solamente a tomar un pétalo y lo vamos a enrollar hacia dentro formando como un capullo largo y delgado.
A continuación, tomaremos dos pétalos y pegaremos solamente la esquina de uno con la esquina de otro y repetimos lo mismo de las otras dos esquinas, realizando el efecto de como si se estuviese envolviendo.
Repetimos el mismo paso con 3, con 4, 5, 7 y 8.
En la siguiente imagen se observa mejor como quedaría el acabado:
Now, we are going to glue them with silicone to make the flower. For the base we will only take one petal and we will roll it inwards forming a long and thin bud.
Next, we will take two petals and glue only the corner of one with the corner of the other and repeat the same for the other two corners, making the effect as if it were wrapping.
Repeat the same step with 3, 4, 5, 7 and 8.
In the following image you can see better how the finish would look like:

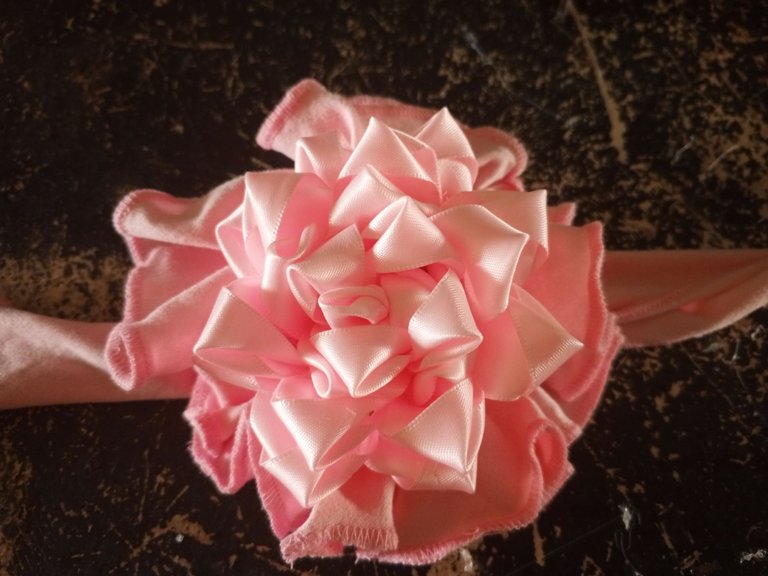
Realizadas las bases de la Dalia, ahora si vamos a armarla. Pegando primero el capullito con los dos pétalos (estos se pegan únicamente en el final y no arriba para que se vean más sueltos los pétalos). Luego se pega la base de dos con la de tres pétalos y así sucesivamente hasta finalizar la Dalia. En mi caso, la pegué a una cinta de tela micro durazno rosada de un vestido que tenía mi amiga para una sesión de fotos de maternidad. Fue como un regalo. La cual quedo realmente bonita y un accesorio hermoso para esta ocasión.
Once the bases of the Dahlia are done, now we are going to assemble it. First glue the bud with the two petals (these are glued only at the end and not at the top so that the petals look looser). Then glue the two-petal base with the three-petal base and so on until the Dahlia is finished. In my case, I glued it to a pink micro peach fabric ribbon from a dress my friend had for a maternity photo shoot. It was like a gift. Which was really pretty and a beautiful accessory for this occasion.

•RESULT•
•RESULT•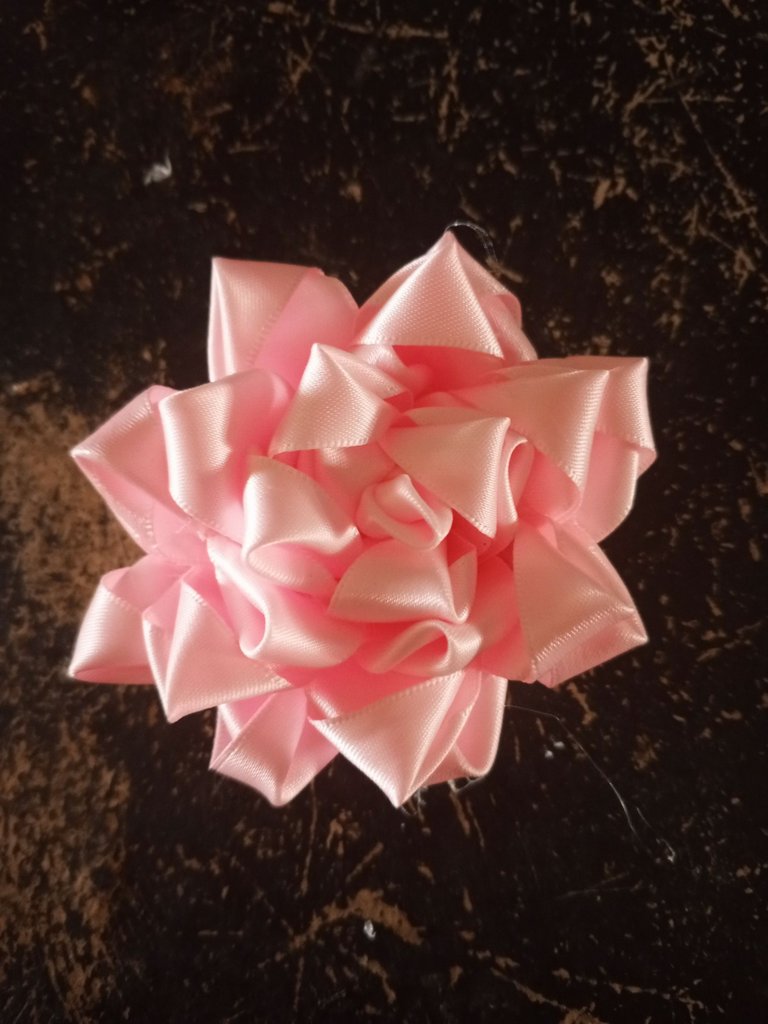
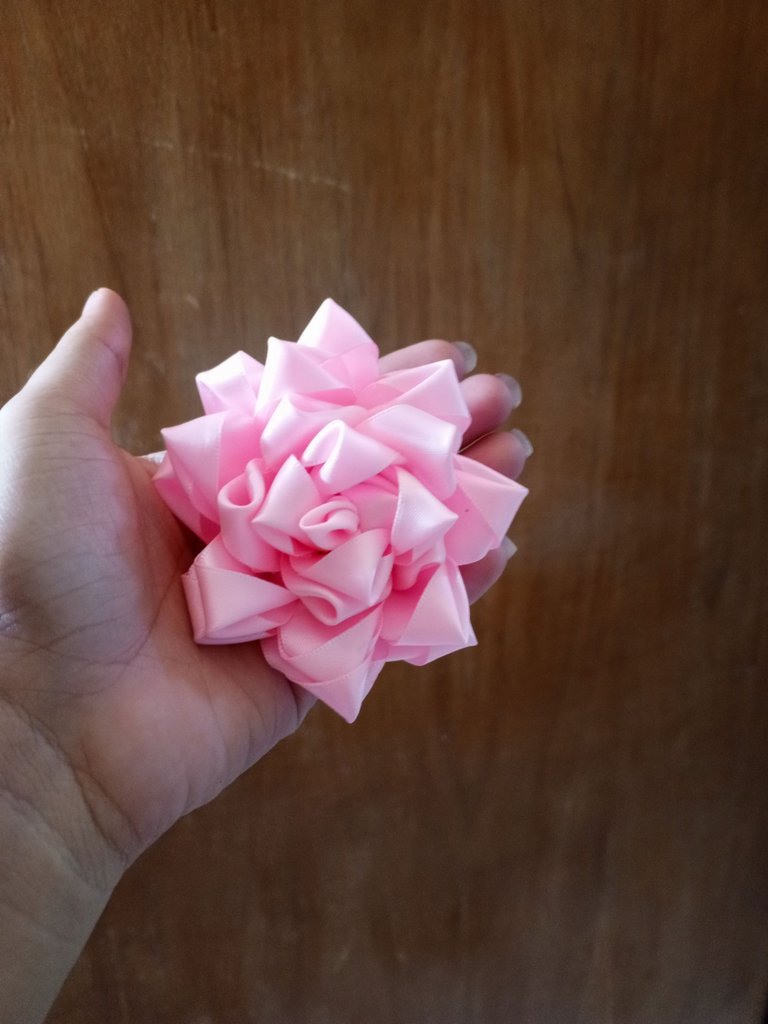


💖Y este es el resultado💖
Esta Dalia es una manualidad algo trabajosa también, pero, que te maravillara con el resultado🫶💘. Me gustó bastante como le quedó. Así que espero que la realices y que me haya explicado bien, si no, puedes ver en las imágenes como la realicé.
This Dahlia is also a somewhat laborious craft, but you will be amazed with the result🫶💘. I really liked the way it turned out. So I hope you make it and that I have explained it well, if not, you can see in the images how I made it.
💞Thank you so much for making it this far! I hope you liked my post, I'll see you next time!💞
💞¡Muchas gracias por llegar hasta aquí! Espero que te haya gustado mi post. ¡Nos vemos en una próxima oportunidad!💞

📲 Todas las fotografías fueron tomadas con un teléfono Tecno Spark 10 pro
📷 TODAS LAS FOTOS SON DE MI PROPIEDAD


Thank youuu @splinterboost 🤗
the flowers are so beautiful, each petal seems to hold a million stories. the details are also very neat.
Thank you my friend 🫶🏻❤️
Yes you're welcome dear♥️
Admiro a las personas con habilidades con las manos. Te quedo muy bien el resultado.
Saludos.
Muchas gracias, me alegro que te haya gustado ❤️
Este post ha sido votado y curado por el equipo Hive Argentina | Participa en nuestro Trail de curación.
Únete a nuestro Trail Aquí.
Puedes hacerlo también en nuestros enlaces preconfigurados de Hivesigner:
| 10 HP | 25 HP | 50 HP | 100 HP | 250 HP | 500 HP | 1000 HP | 1500 HP | 2000 HP |
Muchas gracias @hiveargentina 🫶🏻
¡Felicidades! Esta publicación obtuvo upvote y fue compartido por @la-colmena, un proyecto de Curación Manual para la comunidad hispana de Hive que cuenta con el respaldo de @curie.
Si te gusta el trabajo que hacemos, te invitamos a darle tu voto a este comentario y a votar como testigo por La Colmena.
Si quieres saber más sobre nuestro proyecto, te invitamos a acompañarnos en nuestro servidor de Discord.
Muchas gracias @la-colmena ❤️🫶🏻
Muy lindo estilo para este vestido materno.
Es un lindo accesorio, gracias por el tutorial 🤗
gracias a ti por leer mi publicación 🤗