Splinterlands - A Battle with a new Strategy with only Rebellion Cards [ENG/DE]

Soon the time will come: With the release of the new expansion Conclave Arcana (Introduction), Chaos Legion will be rotated out of Modern and will no longer be playable in this mode. Besides Conclave Arcana, only cards from Rebellion will be playable in Modern. I will miss Chaos Legion a lot, as it is the expansion I own the most cards from and I started playing Splinterlands with the release of Chaos Legion.
So it's time to get used to the fact that you can no longer fall back on Chaos Legion cards in the Modern format. New strategies have to be developed. Currently, this is only possible by familiarizing yourself with the Rebellion cards, as virtually nothing is yet known about the cards from Conclave Arcana. This is very well possible in tournaments where only Rebellion cards can be played. I really enjoy playing these tournaments and would like to show you one of my battles from these tournaments today, where I came across a completely new strategy.
Have fun reading!

Matchup & Rulesets
 | All Splinter are available. |
 | A maximum of 29 mana can be used. |
 | Lost Legendaries - You cannot summon legendary units. |
 | Maneuvers - All units have Reach (can use melee attacks from the second position). |
 | Silenced Summoners - Summoners give no stat buffs or debuffs and neither grant nor use abilities. |
My Lineup & Strategy
| Position | Card | Explanation |
|---|---|---|
| Summoner |  | As a summoner, I chose Akane because I wanted to play a Dragon card. The abillities were irrelevant anyway because of the Silenced Summoners ruleset. Then I decided on the Life Splinter. |
| #1 | 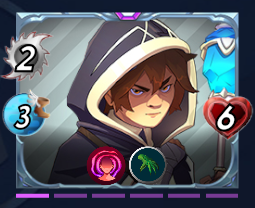 | With Halfling Refugee I chose a very cheap tank for the first position. With a bit of luck with the Weary ability, he can even deal some damage. |
| #2 | 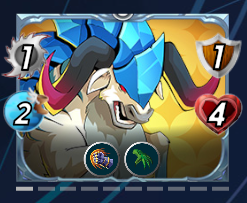 | Due to the ruleset Maneuvers, I positioned Skyspire Yak in the second position, as he can attack with his armor in addition to his melee attack thanks to the Armored Strike ability. |
| #3 | 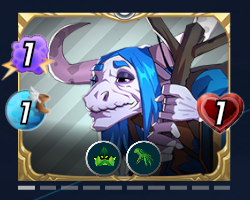 | Ujurak Elder has no specific role in this matchup. I only chose the card because I had mana and a position left in my lineup. |
| #4 | 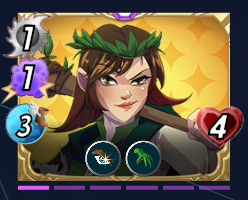 | I have placed Olivia of the Brook in the fourth position. Her job is to use the ability Opportunity to quickly eliminate the opponent's weaker monsters. |
| #5 | 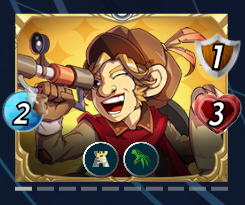 | Nimbledook Explorer takes on the supporter role in my lineup. With the ability Protect, he not only supports the defense of my monsters, but also strengthens the armor attack of Skyspire Yak. |
| #6 | 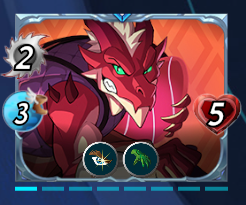 | At the very back I placed Dragon Egg Forager, who, analogous to Olivia of the Brook, is supposed to quickly eliminate the opponent's weaker monsters. |
You may have already been able to make out my strategy with this lineup. It can be divided into two parts. On the one hand, my goal with Olivia of the Brook and Dragon Egg Forager was to take out opposing weak monsters and potential glass cannons that deal a lot of damage but can't take it. Both cards also have very good stats and are very strong in many situations. On the other hand, with the combination of Rulest Maneuvers, Skyspire Yak in the second position and Nimbledook Explorer I tried to create a strong attacker in the second position. I think I succeeded, because Skyspire Yak had three armor attacks and one melee attack.
The Battle
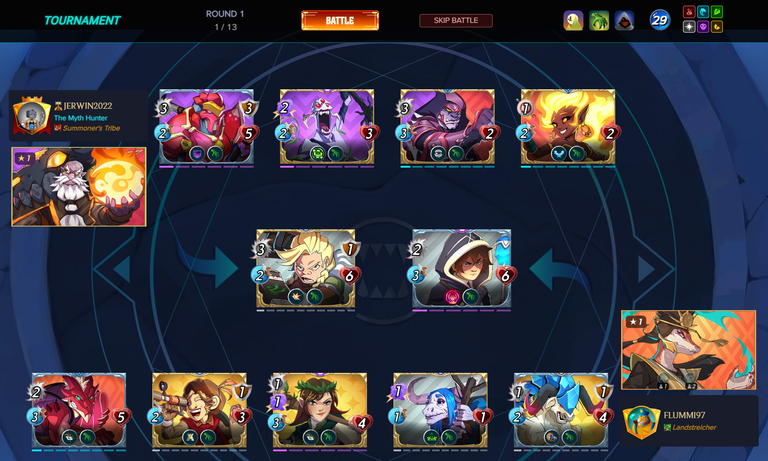
My opponent @jerwin2022 chose a completely different strategy. He opted for the summoner Dolfar Darflak to be able to play cards from the Fire and Death Splinter. A smart choice in combination with the ruleset Silenced Summoners, as you can save mana costs. Several cards from his lineup could become a problem for me. It will be difficult to get past Grimbardun Fighter in the first position due to the ability Shield. Executioner Kraan will deal a lot of damage from the second position with three melee attack and if his Night Stalker is not eliminated early by me, he will quickly decimate my lineup from behind.
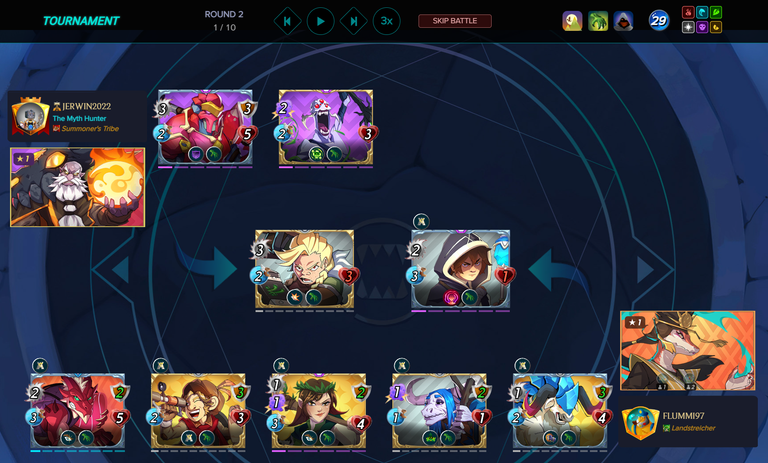
After the first round, my two Opportunity attackers were already able to eliminate an enemy threat with Night Stalker. They also fell victim to another monster, Flame Mephit. So this part of eliminating weak enemy monsters has already worked. My monsters are still holding up well, even though Halfling Refugee is standing there with only one life point.
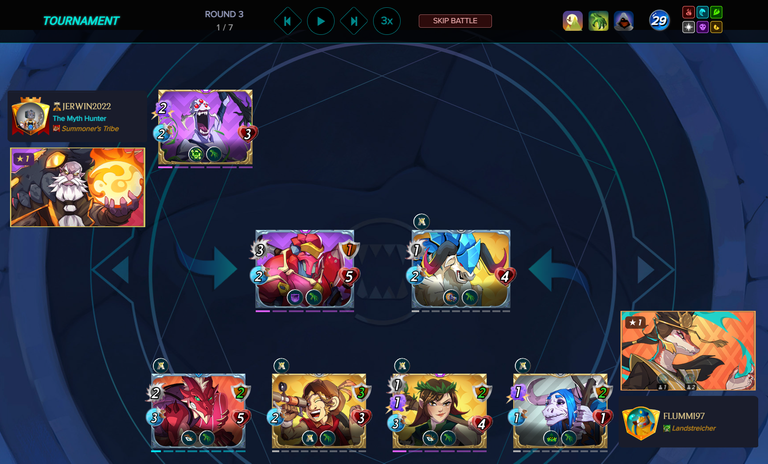
After the second round, Halfling Refugee finally fell and Skyspire Yak's armor was also destroyed, leaving him without an extra attack. But the opposing tank in the first position, Grimbardun Fighter, was also defeated.

In the third round, Arachne Weaver was also defeated, so my opponent only had one monster left with Executioner Kraan, which was already injured. I, on the other hand, had five monsters left and there was almost no way I could lose the battle.

So it happened as it had to, and I took the win without any further losses. GG to my opponent @jerwin2022!
Last Words
All in all, I think this strategy, which I used, is really useful. Sure, playing multiple monsters with the ability Opportunity is nothing new, but it's pretty successful. The other side of my strategy, playing Skyspire Yak with the ability Armored Strike in the second position and attacking from there, is. Of course, this was only possible thanks to the ruleset Maneuvers, but this strategy can also be adapted somewhat by playing Janni Rebel in the first position, for example. This not only has the Flank ability, so that melee attackers can attack from the second position, but also the Inspire ability to buff your own melee attackers. As you can see, a lot is possible and the cards from Rebellion open up some new strategies, especially when the cards are leveled.
But now I've written enough, it's your turn. What do you think of my strategy and the battle? Have you perhaps already developed new strategies with the Rebellion cards? Feel free to let me know in the comments, I would be very happy to hear from you. Thanks for reading this far and have a great time!

Bald ist es soweit: Mit der Veröffentlichung der neuen Erweiterung Conclave Arcana (Ankündigung) wird Chaos Legion aus Modern rausrotieren und in diesem Modus nicht mehr spielbar sein. Neben Conclave Arcana können dann nur noch Karten aus Rebellion im Modern Format gespielt werden. Ich werde Chaos Legion sehr vermissen, da es die Erweiterung ist von der ich die meisten Karten besitze und ich damals mit dem Release von Chaos Legion begonnen habe Splinterlands zu spielen.
Deswegen ist es langsam an der Zeit sich daran zu gewöhnen, dass man im Modern Format nicht mehr auf Chaos Legion Karten zurückgreifen kann. Neue Strategien müssen also entwickelt werden. Aktuell ist das nur möglich, indem man sich mit den Rebellion Karten vertraut macht, da zu den Karten aus Conclave Arcana quasi noch nichts bekannt ist. Das ist sehr gut in Turnieren möglich, bei denen ausschließlich Rebellion Karten gespielt werden können. Ich spiele diese Turniere sehr gerne und möchte euch heute eines meiner Battles aus diesen Turnieren zeigen, wo ich auf eine ganz neue Strategie gestoßen bin.
Viel Spaß beim Lesen!
Matchup & Rulesets
| Alle Splinter sind verfügbar. |
| Maximal 29 Mana kann verwendet werden. |
| Lost Legendaries - Du kannst keine legendären Einheiten beschwören. |
| Maneuvers - Alle Einheiten haben Reach (können Nahkampfangriffe von der zweiten Position aus durchführen). |
| Silenced Summoners - Summoners verleihen keine Buffs oder Debuffs und gewähren oder benutzen keine Abilities. |
Meine Aufstellung & Strategie
| Position | Karte | Erklärung |
|---|---|---|
| Summoner | | Als Summoner habe ich mich für Akane entschieden, da ich eine Dragon Karte spielen wollte. Die Abillities waren wegen des Rulesets Silenced Summoners sowieso irrelevant. Anschließend habe ich mich für das Life Splinter entschieden. |
| #1 | | Mit Halfling Refugee habe ich einen sehr billigen Tank für die erste Position gewählt. Mit etwas Glück bei der Ability Weary kann er sogar noch den ein oder anderen Schaden austeilen. |
| #2 | | Aufgrund des Rulesets Maneuvers habe ich an der zweiten Position Skyspire Yak positioniert, da er dank der Ability Armored Strike, zusätzlich zu seinem Melee Attack auch noch mit seiner Armor angreifen kann. |
| #3 | | Ujurak Elder hat keine spezielle Aufgabe in diesem Matchup. Ich habe die Karte nur gewählt, weil ich noch Mana und eine Position in meiner Aufstellung übrig hatte. |
| #4 | | Auf der vierten Position habe ich Olivia of the Brook platziert. Ihre Aufgabe ist es mit der Ability Opportunity die gegnerischen schwächeren Monster schnell auszuschalten. |
| #5 | | Nimbledook Explorer nimmt in meiner Aufstellung die Supporter Rolle ein. Durch die Ability Protect unterstützt er nicht nur die Defensive meiner Monster, sondern verstärkt auch den Armor Attack von Skyspire Yak. |
| #6 | | Ganz hinten habe ich Dragon Egg Forager platziert, der, analog zu Olivia of the Brook, die gegnerischen schwächeren Monster schnell ausschalten soll. |
Meine Strategie mit dieser Aufstellung habt ihr vielleicht schon etwas herauslesen können. Diese lässt sich in zwei Teile aufteilen. Zum einen war es mein Ziel mit Olivia of the Brook und Dragon Egg Forager gegnerische schwache Monster und potentielle Glaskanonen, die viel Schaden austeilen aber nicht einstecken können, auszuschalten. Beide Karten haben außerdem sehr gute Stats und sind in vielen Situationen sehr stark. Zum anderen habe ich mit der Kombination aus dem Rulest Maneuvers, Skyspire Yak in der zweiten Postion und Nimbledook Explorer versucht einen starken Angreifer in der zweiten Postion zu erschaffen. Das ist mir denke ich auch gelungen, da Skyspire Yak dadurch drei Armor Attack und einen Melee Attack hatte.
Das Battle
Mein Gegner @jerwin2022 wählte eine ganz andere Strategie. Und zwar entschied er sich für den Summoner Dolfar Darflak, um Karten aus dem Fire und Death Splinter spielen zu können. Eine kluge Wahl in Kombination mit dem Ruleset Silenced Summoners, da man so Manakosten sparen kann. Zum Problem für mich könnten mehrere Karten aus seiner Aufstellung werden. An Grimbardun Fighter in der ersten Position wird es aufgrund der Ability Shield schwierig sein vorbei zu kommen. Executioner Kraan wird von der zweiten Postion aus mit drei Melee Attack viel Schaden austeilen und falls sein Night Stalker nicht früh von mir eliminiert wird, wird er schnell meine Aufstellung von hinten dezimieren.
Nach der ersten Runde konnte meine beiden Opportunity Angreifer mit Night Stalker bereits eine gegnerische Gefahr ausschalten. Außerdem fiel den beiden mit Flame Mephit ein weiteres Monster zu Opfer. Somit ging dieser Teil, schwache gegnerische Monster zu eliminieren, schon mal auf. Meine Monster halten sich noch gut, auch wenn Halfling Refugee mit nur noch einem Lifepoint da steht.
Nach der zweiten Runde fiel letztendlich Halfling Refugee und auch die Armor von Skyspire Yak wurde zerstört, sodass er keinen extra Angriff mehr zur Verfügung hatte. Aber auch der gegnerische Tank in der ersten Position, Grimbardun Fighter, konnte bezwungen werden.
In der dritten Runde konnte dann auch noch Arachne Weaver bezwungen werden, sodass mein Gegner mit Executioner Kraan nur noch ein Monster übrig hatte, welches bereits verletzt wurde. Ich hatte hingegen noch fünf Monster übrig und ich konnte das Battle fast gar nicht mehr verlieren.
So kam es, wie es komme musste, und ich holte mir ohne weitere Verluste den Sieg. GG an meinen Gegner @jerwin2022!
Letzte Worte
Alles in allem finde ich diese Strategie, die von mir angewendet wurde, wirklich brauchbar. Klar, das Spielen von mehreren Monstern mit der Ability Opportunity ist nichts neues, aber dafür ziemlich erfolgreich. Die andere Seite meiner Strategie hingegen, also Skyspire Yak mit der Ability Armored Strike in der zweiten Position zu spielen und von dort anzugreifen, hingegen schon. Natürlich war das nur dank dem Ruleset Maneuvers möglich, jedoch kann diese Strategie auch etwas angepasst werden, indem zum Beispiel in der ersten Position Janni Rebel gespielt wird. Diese besitzt nämlich nicht nur die Ability Flank, sodass Melee Attacker von der zweiten Position aus angreifen können, sondern auch die Ability Inspire, um die eigenen Melee Attacker zu buffen. Ihr seht also, es ist vieles möglich und die Karten aus Rebellion eröffnen einige neue Strategie, vor allem wenn die Karten gelevelt werden.
Ich habe nun aber genug geschrieben, ihr seid an der Reihe. Was haltet ihr von meiner Strategie und dem Battle? Habt ihr vielleicht auch schon neue Strategien mit den Rebellion Karten entwickelt? Schreibt es mir gerne in die Kommentare, über einen Austausch würde ich mich sehr freuen. Vielen Dank fürs Lesen bis hierhin und ich wünsche euch eine gute Zeit!

Why I'm blogging about Splinterlands?
I want to increase the growth of my Hive and Splinterlands account with the rewards of blogging about my experiences, tactics and much more on Splinterlands.
Not playing Splinterlands yet?
You can use my link to sign in. Write me a message or a comment under this post and I will help you to start!
https://www.reddit.com/r/Splinterlands/comments/1jw7mzg/splinterlands_a_battle_with_a_new_strategy_with/
The rewards earned on this comment will go directly to the people( @flummi97 ) sharing the post on Reddit as long as they are registered with @poshtoken. Sign up at https://hiveposh.com. Otherwise, rewards go to the author of the blog post.
Thanks for sharing! - @mango-juice

@flummi97, I'm refunding 0.517 HIVE and 0.116 HBD, because there are no comments to reward.