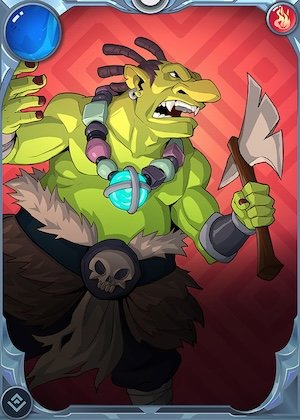
Splinterlands Art Contest 374 - Wooden Carved Hobgoblin Drybone Axe Keychain [ENG-ESP]


Hello dear friends of Jewelry, and greetings to my fellow artists at Splinterlands! I'm grateful and pleased to be back sharing something new, and I want to express my gratitude for all the support I've received. My entry for last week's contest was chosen among the top three, an achievement I owe to everyone's support. That's why I'm back for this week's contest with a keychain, this time of Drybone Hobgoblin's weapon: a powerful attack axe. I carved the keychain from pine wood and added chains. Here's a step-by-step guide on how I created this design. I hope you like it!
Hola queridos amigos de Jewelry y también mis saludos para los amigos artistas de Splinterlands, estoy agradecido y complacido de poder regresar a compartir algo nuevo, no sin antes agradecer el apoyo recibido, pues mi publicación para el concurso de la semana pasada fue escogido en los 3 primeros lugares, un logro que se lo debo a todo el apoyo brindado. Es por eso que para el concurso de esta semana he regresado para participar con un llavero, esta vez del arma de Drybone Hobgoblin quien tiene una poderosa hacha de ataque. El llavero lo he hecho tallado en madera, utilizando madera de pino, y cadenas, aquí les muestro como hice este diseño paso a paso, espero que les guste.

 |  | |
|---|---|---|
 |  |
I used a piece of wood that I had long ago turned into a measuring ruler, but my daughter had taken it as a toy and painted over the numbers with markers. So, to give it a second life, I took a smaller piece to use as material for creating the axe. Sometimes you shouldn't waste things, even if their original purpose is no longer relevant. What I did was clean the entire surface to prepare the wood properly.
Utilicé un trozo de madera que hace mucho tiempo había convertido en una regla para medir, pero mi hija la tomó como juguete y la pintó con marcadores y borrón los números que tenia. Así que para darle una segunda oportunidad tomé un trozo más pequeño para utilizarlo como material para crear el hacha, a veces no hay que desperdiciar las cosas aunque su sentido original ya no esté activo. Lo que hice fue limpiar toda la superficie para preparar bien la madera.
 |  | |
|---|---|---|
 |  |
Once I had prepared the wood, I began sketching the axe. I changed the handle slightly, making it wavy, like an ancient Viking warrior's axe. I thought it was great to add that detail. The goal is to cut along all the edges of the drawing until the shape is complete.
Una vez que ya había preparado la madera comencé a hacer el boceto del hacha, la cual le cambié un poco el mango, ya que lo hice ondulado, así como un hacha antigua del algún guerrero vikingo, se me hizo genial agregarle un detalles. El objetivo es cortar todos los bordes del dibujo hasta completar la figura.
 |  | |
|---|---|---|
 |  |
I started by shaping one end of the handle. I discovered that this wood, although pine, is very hard. I don't know why, but I had to use a utility knife, whereas in previous cases I would have used smaller blades, and at least for this initial step, I couldn't. However, with the utility knife blade, I was able to solve this problem and shape it following the lines of the drawing.
Comencé dándole forma a uno de los extremos de la empuñadura, algo que descubrí es que esta madera aunque es de pino es muy dura, no sé por qué, pero tuve que utilizar el cúter, cuando en casos anteriores hubiera utilizado las cuchillas pequeñas, y al menos para este paso inicial no pude. Sin embargo, con la hojilla del cúter pude solucionar este problema y pude darle forma siguiendo el trazo del dibujo.
 |  | |
|---|---|---|
 |  |
Then I began carving the wood on the top. This part of the wood was even harder than the previous part. My theory is that this piece of wood was right at the knot, since these areas are always the hardest, almost like concrete. But with great concentration, I was able to gradually give it the shape I had drawn.
Luego comencé a tallar la madera de la parte superior, esta partde la madera estaba aún mas dura que la parte anterior, mi teória es que este trozo de madera estaba justo en el nudo, ya que estas zonas siempre suelen ser las mas duras, como si fuera concreto. Pero con mucha concentración pude coco a poco darle la forma que había dibujado.
 |  | |
|---|---|---|
 |  |
Next, I began shaping the axe blade from the front. However, there was a lot of wood to carve on the underside of the handle, and it was so hard it would have taken hours. So, I drew a small square, which I then cut out with a saw. This saved a lot of time, so I finished shaping the axe handle.
Seguidamente comence a darle forma a la hoja del hacha por el lado frontal, sin embargo, en la parte inferior del mango había mucha madera que tallar, y con lo dura que estaba iba a tardar horas, así que lo que hice fue dibujar un pequeño cuadro, que luego corte con una sierra. Hacer esto ahorró mucho tiempo, así que lo que hice fue terminar de darle forma al mano del hacha.
 |  |  |
|---|---|---|
 |  |  |
Then I shaped the blade and the handle at the top, making small cuts to give the appearance that the blade is inserted into the handle. Next, I shaped the neck with a circular blade to remove the wood. I also made small cuts on the weaker side of the blade to give it that shape.
Luego le di forma a la hoja y al mismo mango en la parte superior, hice unos pequeños cortes para dar la aparicienca de que la hoja va metida en el mango. Luego le di forma en el cuello con una cuchilla circular para poder extraer la madera. También hice unos pequeños cortes en el lado más débil de la hoja, para darle esa forma.
 |  |  |
|---|---|---|
 |  |  |
I added more details to the blade because I felt it deserved more attention, so I also made small cuts along the front edge to create the blade's edge. Then I sanded the entire piece until it was very smooth. Once I finished sanding, I applied a coat of glossy varnish to protect the wood. Another detail I thought was great was adding a string around the base of the axe; it gives it a slightly more tribal look. Finally, I added the chain, and that's how the keychain was finished.
Agrego más detalles en la hoja, porque creo que merecía más atención, asi que en el borde frontal también hice pequeños cortes para hacer el filo de la hoja. Luego pasé a lijar toda la pieza hasta pulirla muy bien, una vez terminado de lijar la pieza le puse barniz brillante para proteger la madera. Un detalle que también se me hizo genial fue agregar un hilo alrededor de la base del hacha, eso la hace lucir un poco más tribal, para finalizar agregué la cadena y así quedó terminado el llavero.


This is how I managed to finish this piece. The wood gave me a lot of trouble; I even got two cuts on my fingers, but nothing serious, I'm used to it by now. But it's clear I won't be using it again. I really liked the finish, since I added some other details that make it more eye-catching and beautiful. I hope you liked it. Don't forget to comment and let me know what you think. For now, I'll say goodbye and see you next time. Blessings!
Así fue como pude terminar esta pieza, la madera me dio muchos problemas, tanto que tuve como dos cortes en los dedos, pero nada grave, ya estoy acostumbrado, pero me queda claro que no la volveré a usar. El acabado me gustó mucho, ya que agregué otros detalles que la hacen mas vistosa y hermosa. Espero que les haya gustado, ol olviden comentar que les ha parecido, por ahora me despido y será hasta una próxima oportunidad. Bendiciones!
Cómo siempre amigo un espectacular trabajo, un fanart de un elemento muy resaltante de esta carta.
Éxitos en el concurso ✨
!PIZZA
$PIZZA slices delivered:
@dayadam(2/10) tipped @fixie
Join us in Discord!