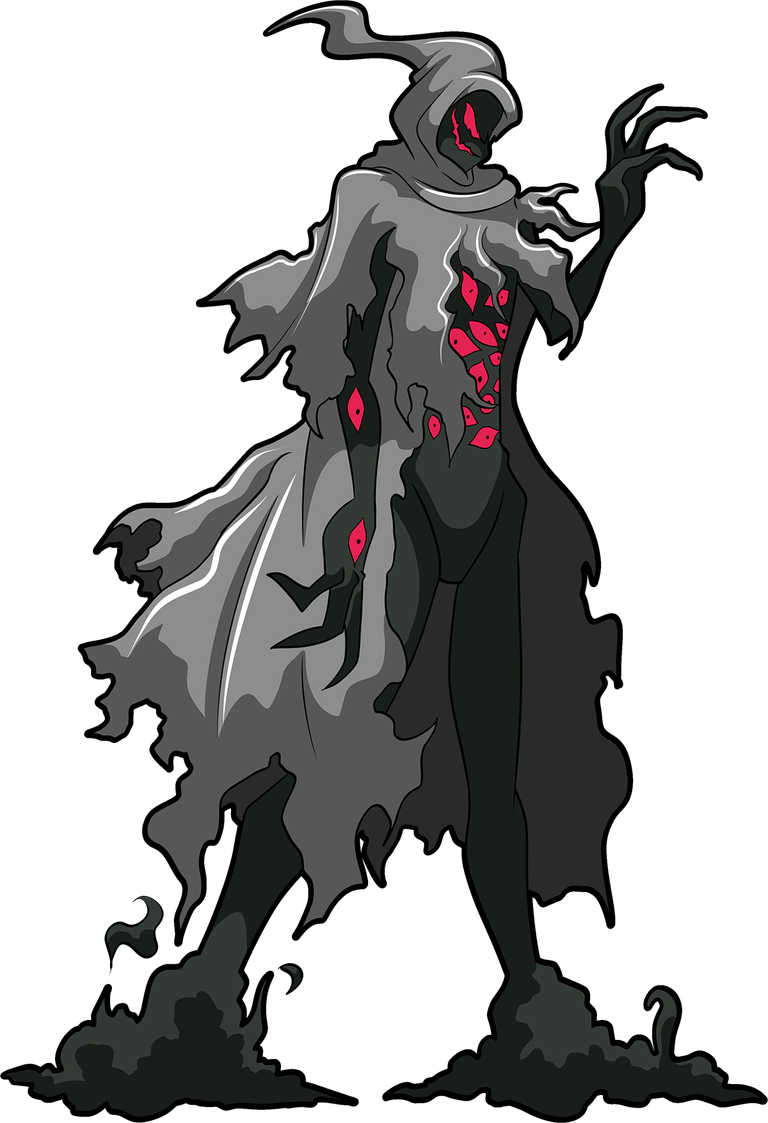
Splinterlands Art Contest 362 - Boogeyman Fan Art Drawing [ENG-ESP]


Hello dear friends, aliens, and artists! I hope you're all doing well. We're now in week 362 of the Splinterlands art contest, and I've seen some amazing, incredibly creative pieces. So, I'm joining you all this week to participate with a new fan art. This time, I've chosen the Boogeyman card, which I've always loved. As soon as I remembered it, I thought about making it in a smaller, more youthful style. With this in mind, I want to show you how I created this fan art, following a step-by-step process that I'll explain in the following lines. Join me!
Hola queridos amigos amigos, aliens y artistas, espero que se encuentren todos muy bien, ya nos encontramos en la semana 362 del concurso de arte de Splinterlands y he visto grandiosas obras, muy increíbles y creativas. De manera que yo vengo a unirme a ustedes y así participar esta semana con un nuevo fan art, en esta oportunidad he escogido la carta Boogeyman, la cual siempre me ha gustado, apenas la recordé vino a mi mente tratar de hacerla con un estilo más pequeño, que se viera algo juvenil. Con esta idea en mente quiero mostrarles como hice este fan art, siguiendo un proceso paso a paso que a continuación les voy a relatar en las siguientes líneas. Acompáñenme!

 |  | |
|---|---|---|
 |  |
I used white cardstock; I feel more comfortable with this material for cartoon-style drawings. I began by sketching a sketch that included slight changes, especially in size. For drawing, I used only a 2H drawing pencil, a pencil with a very light tip, perfect for erasing lines without leaving marks on the paper. The style I'm going for is to give our friend a chibi look, but not too cute.
Utilicé una cartulina de color blanco, para hacer dibujos estilo caricatura me siento más cómodo con este material, comencé a hacer un boceto que contiene ligeros cambios, especialmente en el tamaño. Para dibujar no utilicé más que un lápiz de dibujo 2H, un lápiz con una punta muy clara, perfecto para luego borrar las líneas sin dejar marcas en el papel. El estilo que persigo es hacer a nuestro amigo con un estilo chibi pero no tan tierno.
 |  | |
|---|---|---|
 |  |
I started painting the drawing with the face, which is my starting point. Our friend Boogeyman is an entity dressed like a ghost. The predominant colors are gray, so I start painting his face with these colors. I also put gray on the hood of his head, but in a lighter tone, and in the areas where the shadows go, I add dark gray. As you can notice, I made the eyes look like those of an alien, hehe.
Comencé a pintar el dibujo por el rostro, es mi punto de partida, nuestro amigo Boogeyman es un ente que esta vestido como un espectro, los colores predominante son los grises, así que comienzo a pintar el rostro con estos colores. La capucha de su cabeza también le pongo gris pero de un tono más claro, y en las partes donde van las sombras le agrego color gris oscuros. Como pueden notar los ojos los he hecho como si fueran los de un alien jejeje.
 |  | |
|---|---|---|
 |  |
Next, I painted the eyes, first mixing orange and then red. To give the two wax colors a more even tone, I mixed them using a yellow alcohol-based marker. This allows the two tones to blend, creating a better contrast. I then continued painting part of the hood with the aforementioned gray colors.
Luego pinte los ojos, mezclando en primer lugar color naranja y después puse color rojo. Para darle un mejor tono ambos colores de cera los mezclé utilizando un marcador amarillo a base de alcohol, esta sustancia permite que ambos tonos se mezclen generando un mejor contraste. Luego seguí pintando parte de la capucha con los colores grises mencionados anteriormente.
 |  | |
|---|---|---|
 |  |
Next, I added dark tones. For example, the shadows needed to be a darker shade. Here, I used black, but only with very light strokes, to slightly differentiate the dark gray. This is how I did the rest of the hood, which in this case covers the body, painting it a very light gray, and the body parts like the arms were done in dark gray.
Seguidamente fui agregando tonos oscuros, por ejemplo, las sombras necesitaba que fueran de un tono más oscuro, aquí utilicé el color negro, pero solo con un trazos muy suave, para solo diferenciar un poco del color gris oscuro. Así fue haciendo el resto de la capucha que en este caso cubre el cuerpo, pintándola con un color gris muy claro y las partes del cuerpo como los brazos las hice con gris oscuro.
 |  | |
|---|---|---|
 |  |
I continued painting the rest of the body. The chest is filled with red eyes. I left that space unpainted and then added the red color. I also painted the legs and the rest of the arms. I thought of creating a gloomy cemetery in the background, with dried-out trees that would look very blurred, so I used soft strokes so they could be seen in the background behind the figure.
Seguí pintando el resto del cuerpo, en la parte del pecho está lleno de ojos de color rojo, ese espació lo dejo sin pintar para luego ponerle color rojo. Pinto también las piernas y el retso de los brazos. Se me ocurrió hacer en el fondo un cementerio tenebroso, con árboles secos que se vieran bien difuminados, así que para hacerlos hice trazos suaves para que puedan notarse al fondo trs la figura.
 |  | |
|---|---|---|
 |  |
Finally, I began blending all the colors I'd used so far with a pencil. This helped give the drawing more volume and contrast. Then I began outlining all the lines in the drawing using a very fine-tipped black marker. After this, the drawing was finished.
Por último comencé a difuminar con un picen todos los colroes que había utilizado hasta ahora, esto ayuda a que el dibujo tenga un mejor volumen y contraste. Después comencé a delinear todas las líneas del dibujo utilizando un marcador de color negro de punta muy fina. Despues d eesto el dibujo quedo finalizado.


What did you think of the final result? The style is cartoonish, although the values are in grayscale, but that's the original design, and I didn't want to modify that aspect, which is part of its essence. I hope you like how it turned out. If you did, don't forget to comment what you thought. For now, I'll say goodbye until next time!
¿Qué les ha parecido el resultado final? El estilo quedó como un dibujo animado, aunque los valores estan en las escala de grises, pero así es el diseño original y no quise modificar ese aspecto que es parte de su esencia. Espero que les haya gustado como quedó, si así fue no olviden comentar cual ha sido su opinión, por ahora me despido hasta una nueva oportunidad.!
Es un buen dibujo, me parece bien hecho, le felicito.
https://x.com/AlienArtHive/status/1966286459671106042
Thanks!
Thanks for sharing! - @cieliss

Thanks for support me!