How to solve the glass that broke in my shop window, wardrobe or closed >< como Solucionar el vidrio que se me rompió del escaparate, Armario o closed
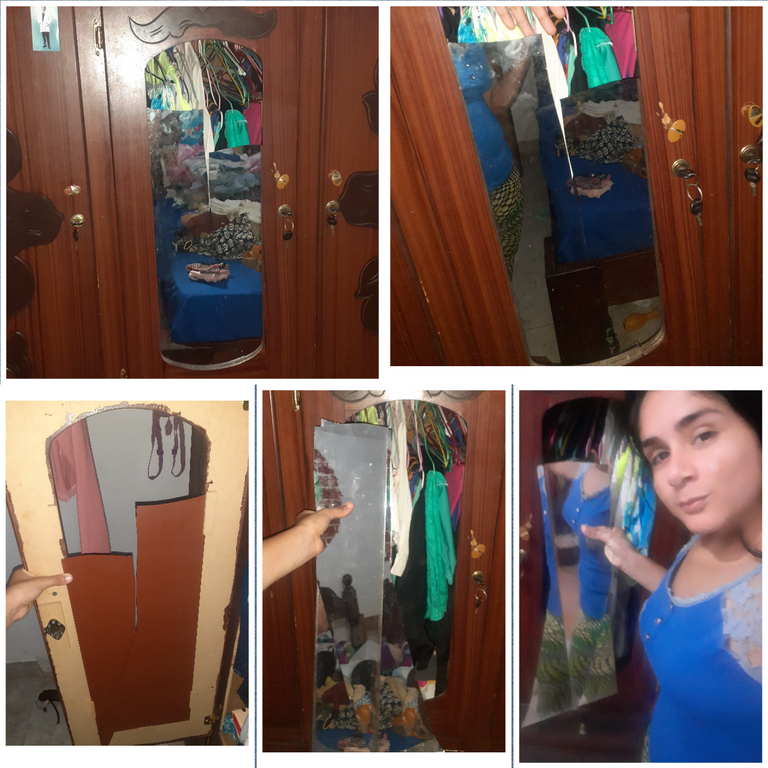
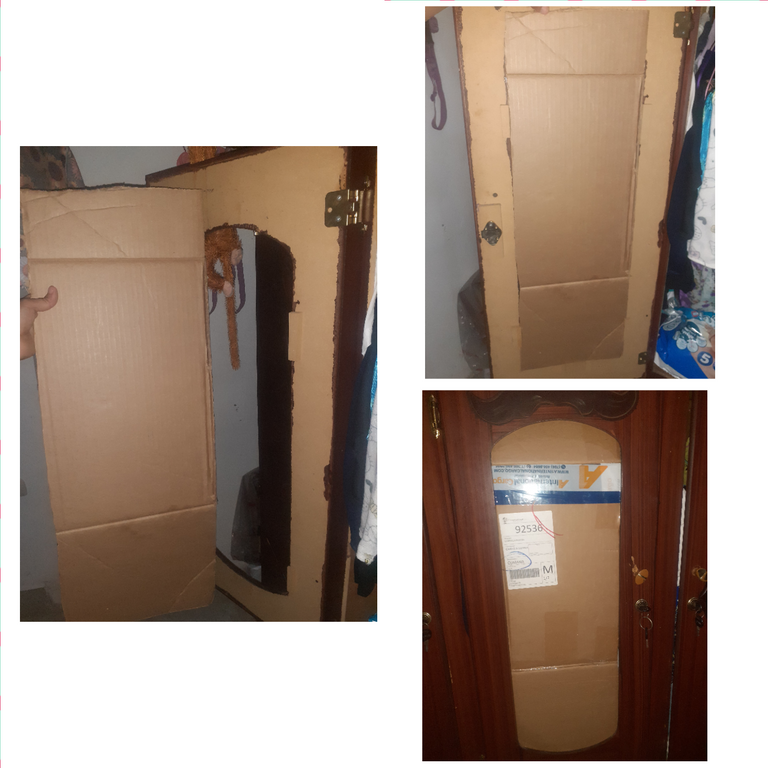
Hello my beautiful #hivediy #community, I hope you have a happy weekend, always with God's blessing 🙏, today I want to share with you what happened to me on Thursday, I got super sad because I accidentally broke my mirror that I had in the middle of my shop window, thank God nothing happened to me, I didn't cut myself or anything like that.
Hola mi hermosa #comunidad de #hivediy , espero que tengan un feliz fin de semana, siempre con la bendición de Dios 🙏, en el dia de hoy quiero compartirles lo que me paso el día jueves,me puse súper triste porque accidentalmente rompí me espejo que tenia en el medio de mi escaparate,gracias a Dios no me paso nada, no me corté ni nada de eso.

Well, I'll tell you what happened🤔, as all of us commonly place things on top of our shop window or closed, as it is; purse, dolls, and I in particular have some decoration tables for parties upstairs, I know they are heavy but my room was already extremely full.
bueno les cuento que fue lo que paso🤔 , como comúnmente todas nosotras colocamos cosas arriba de nuestro escaparate o closed, como es; cartera, muñecos, y yo en particular tengo arriba unas mesas de decoración para fiestas, se que pesan mucho pero mi habitación ya estaba sumamente full.
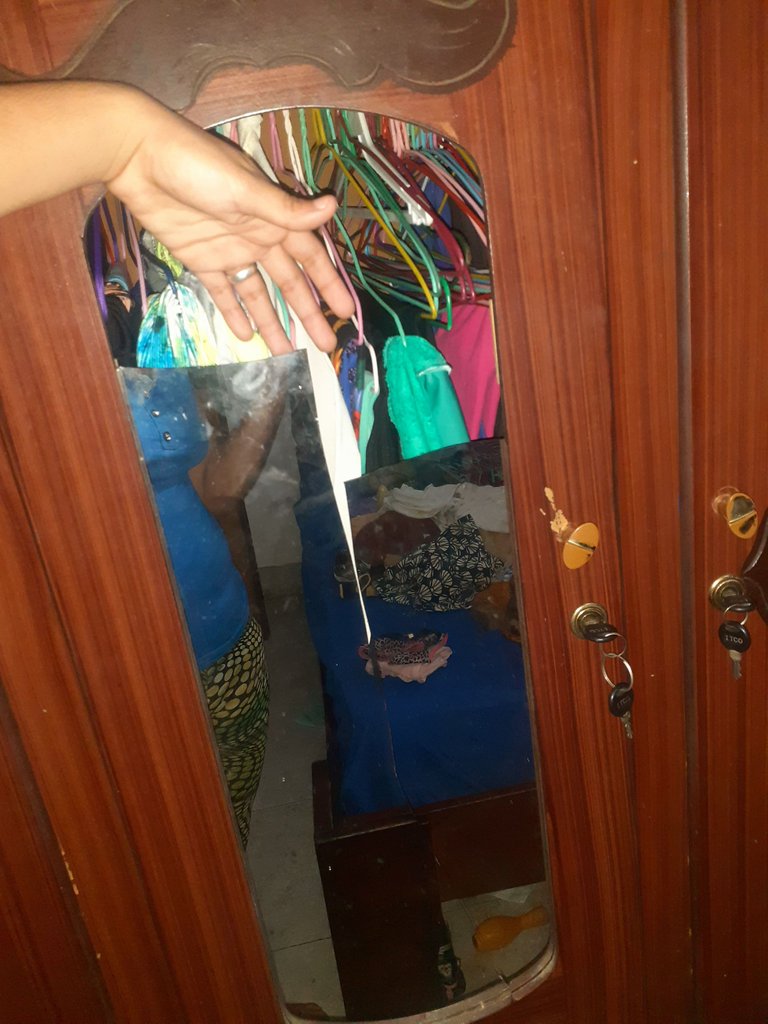
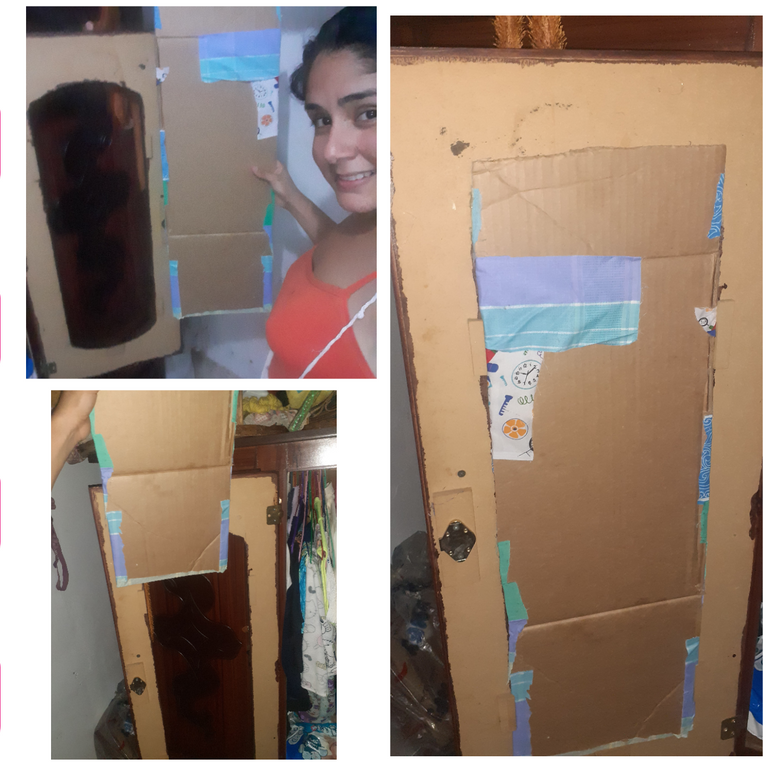
So since the bed is very close to the window, I went upstairs 🛌 to put other things up there ☝️, and what do you think? I was going to fall and my reaction was to lean to the side of the window I put my hand hard right where the mirror was 🤷 when suddenly I heard plasssss I just closed my eyes and when I opened them I saw the whole red mirror 💔 it hurt me, but well the only thing left for me was to collect and clean the glasses. And so was my showcase ☹😰.
Entonces como la cama queda muy cerca del escaparate me subí 🛌 para colocar otras cosas allá arriba ☝️, y que creen? Me iba a caer y mi reacción fue inclinarme para el lado del escaparate puse la mano fuertemente justamente donde estaba el espejo 🤷 cuando de repente escuché plasssss yo solo cerré los ojos y cuando los abrí vi todo el espejo rojo 💔 me dio un dolor, pero bueno lo único que me quedó fue recoger y limpiar los vidrios. Y así quedó mi escaparate ☹😰.
There I knew that I immediately had to find a solution, but I thought, buying a glass is too expensive, but something came to my mind, last week I had collected some fabrics that a lady was going to throw away and I casually asked her to please give them to me that I could think of something with them. And it was there that all my remodeling started and I was able to repair my closed.
Allí supe que inmediatamente tenía que buscar una solución, pero pensé, comprar un vidrio es demasiado caro, pero se me vino algo en la mente, la semana pasada había recogido unas telas que una sra la iba a botar y yo casualmente le pedí que por favor me las diera que se me podía ocurrir algo con ellas. Y fue allí donde empezó todo mi remodelacion y lograr reparar mi closed.
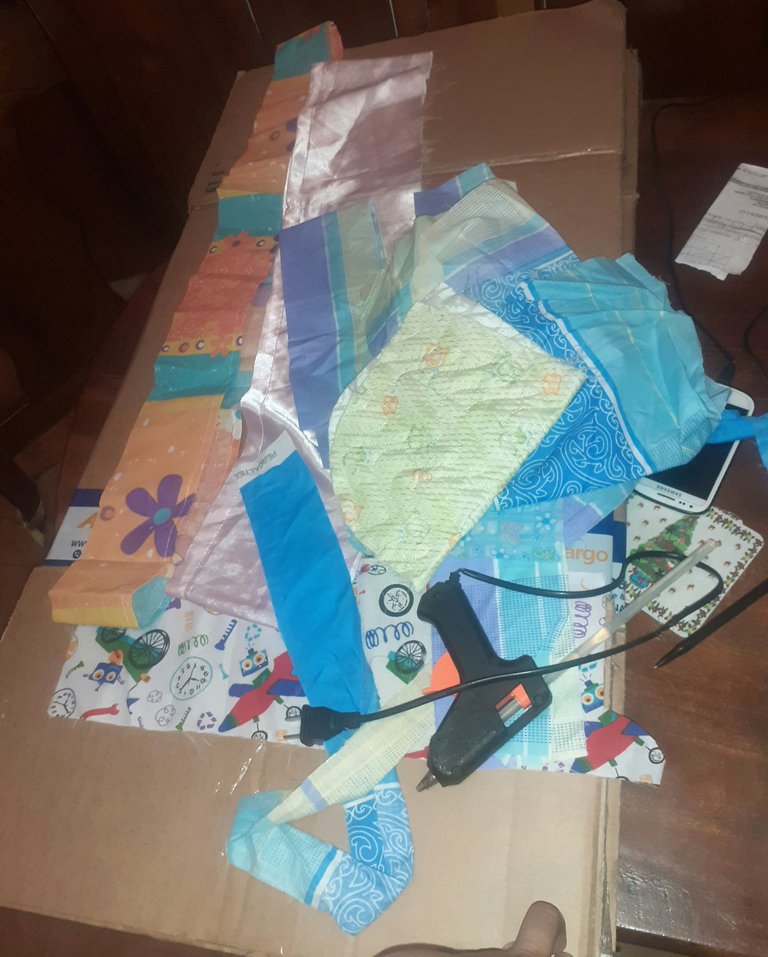
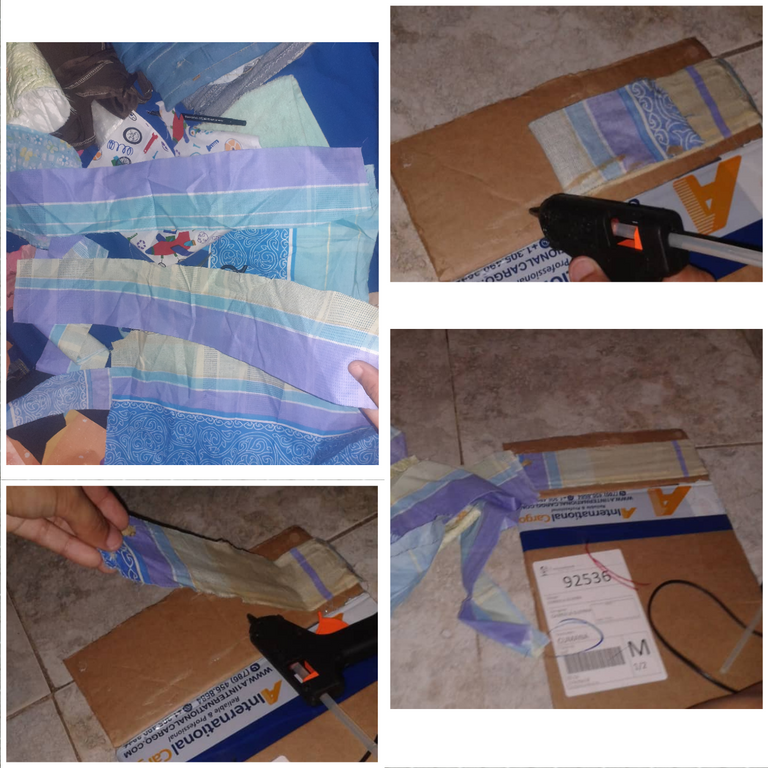
So I looked for some materials, which by the way didn't cost me anything, to solve my closed. a cardboard box that was hard and large, scissors, hot silicone, cloth and a tape measure, pencil. And let's go to work 👷🏻
entonces busque Unos materiales, que por cierto no me costo nada, para solucionar mi closed. una caja de cartón que fuese dura y grande, una tijera, silicon caliente, telas y una cinta métrica, lapiz. Y vamos mano a la obra 👷🏻♀️
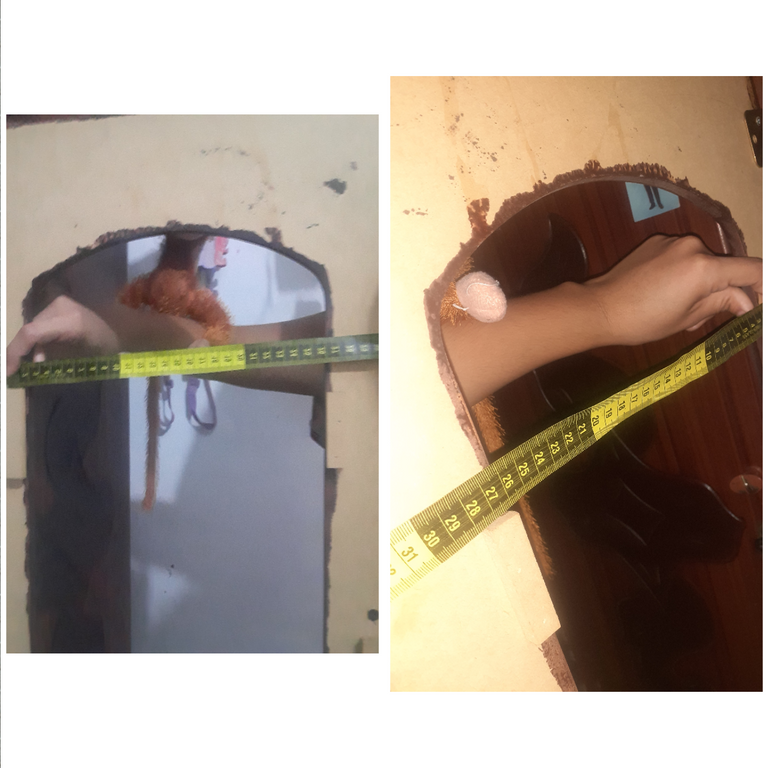
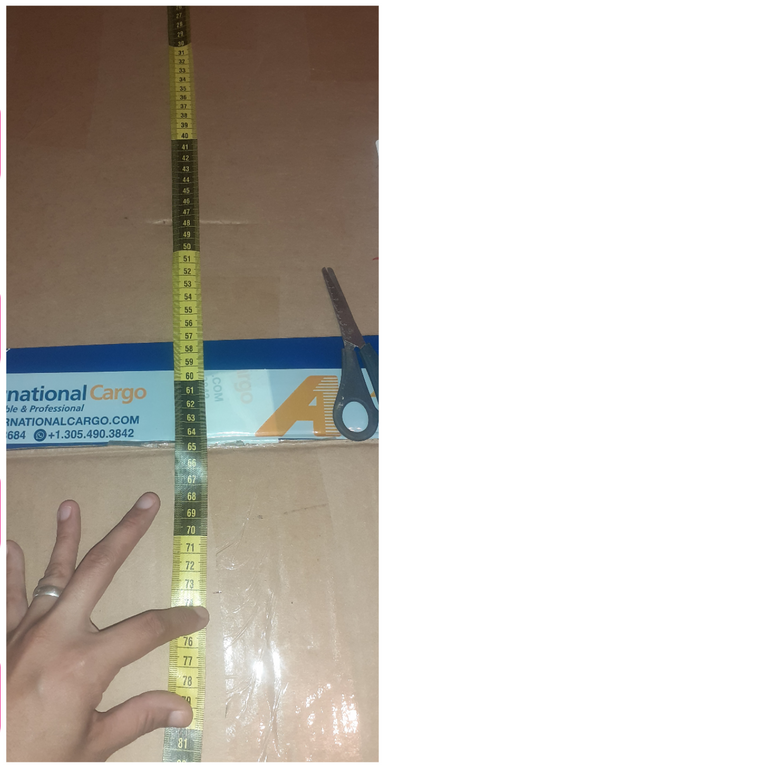
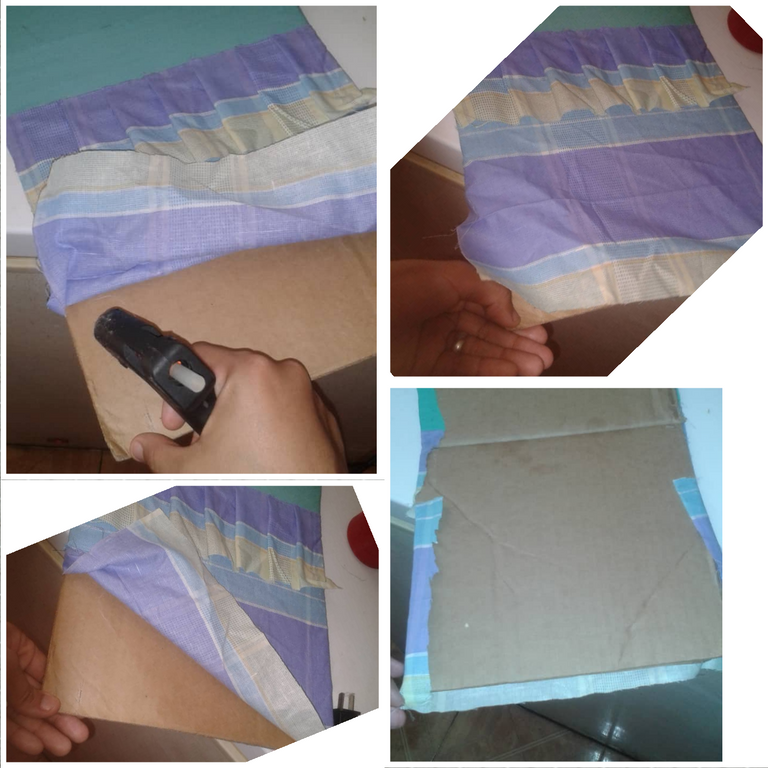
Step 1
The first thing I did was go to measure with the tape measure my shop window in the back where the mirror was. Which its measurements were 26cm wide and 36cm long.
Paso 1
Lo primero que hice fue ir a medir con la cinta métrica mi escaparate de la parte de atrás donde iba el espejo. La cual sus medidas fueron 26cm de ancho y 36cm de largo.
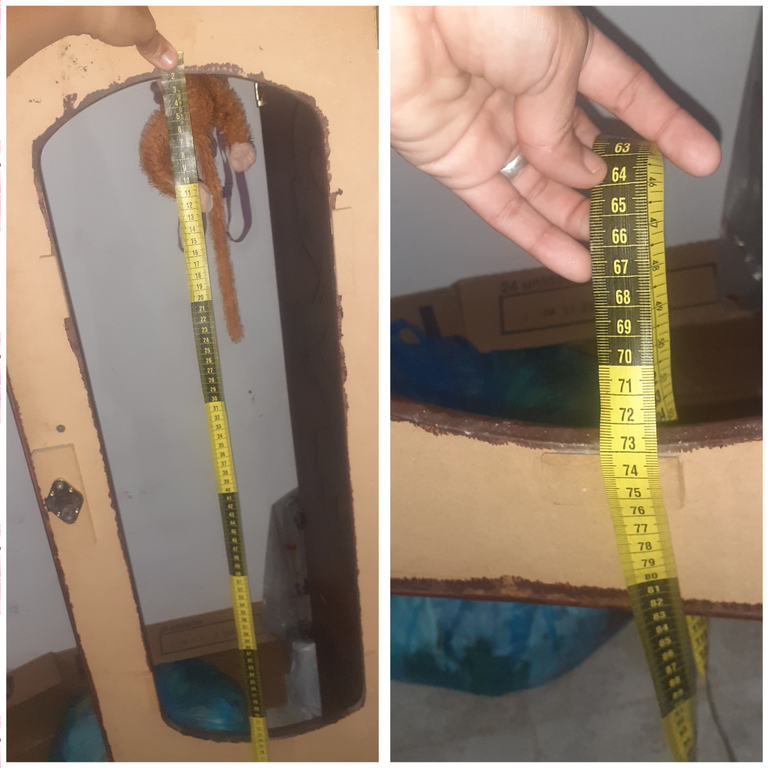
Step 2
Take the box 📦 and measure the same measurements with the measuring tape, the pica and this will be what will replace the mirror.
Paso 2
Tome la caja 📦 y medi con la cinta métrica las mismas medidas, la pica y este será lo que va a suplantar el espejo.
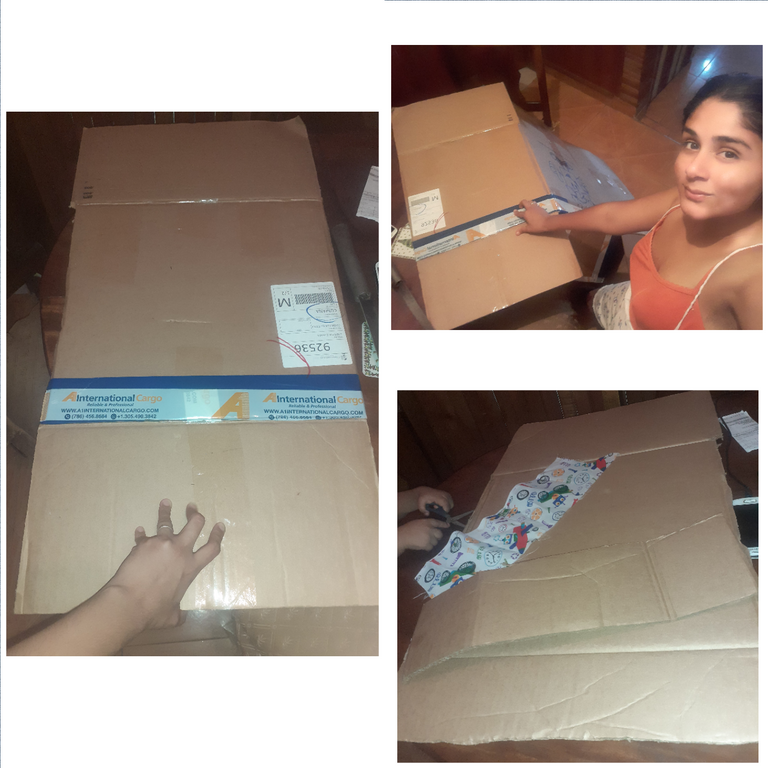
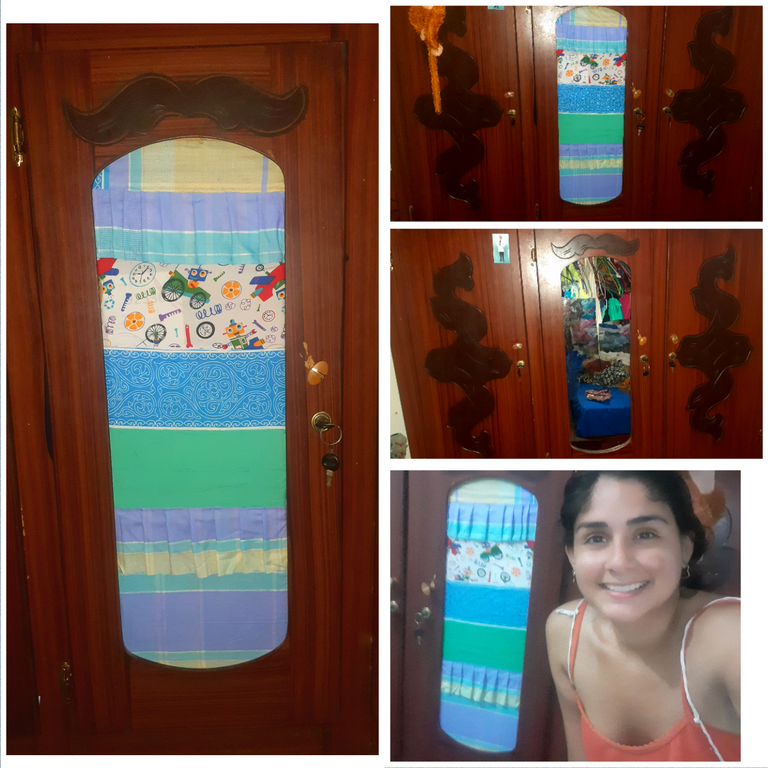
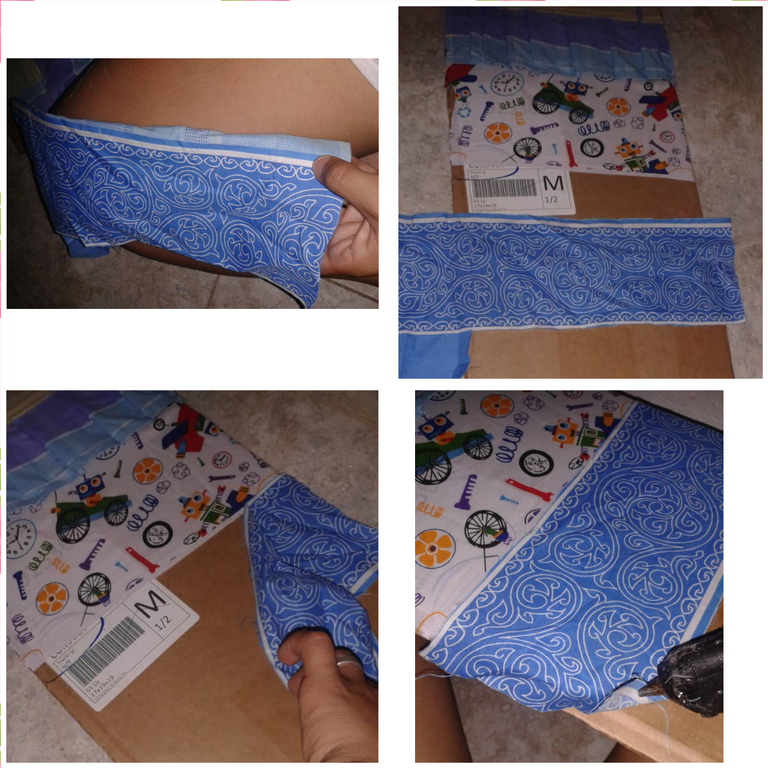
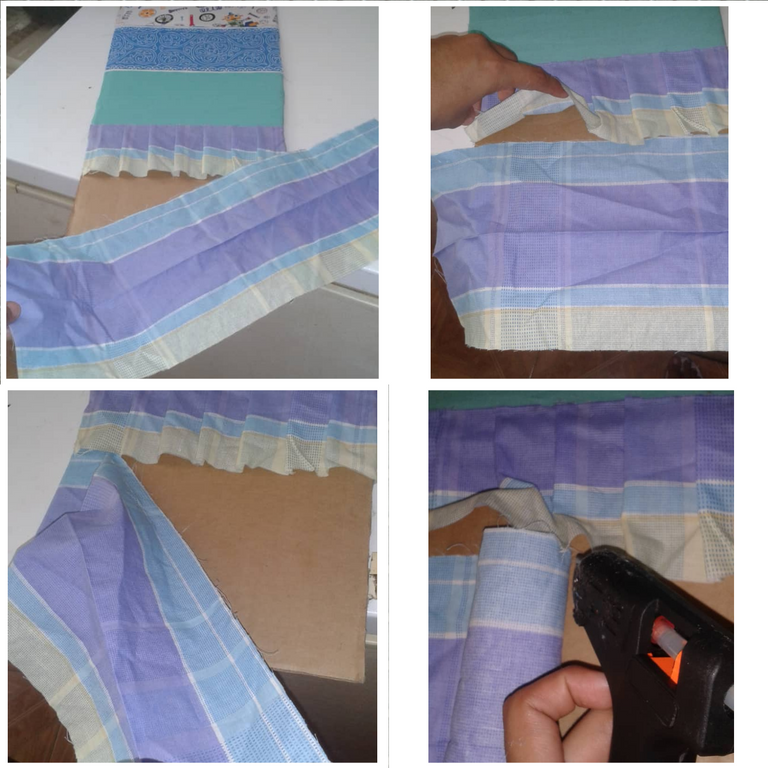
Step 3
I looked in the patchwork fabrics I had, and I found a fabric that seemed pretty to me and another fabric that was for a doll, I took them apart and went looking and thinking about what I wanted.
Paso 3
Busque en las telas de retazo que tenia, y encontré una tela que me pareció bonita y otra tela que era de muñequito,las aparte y fui viendo y pensando lo que quería.
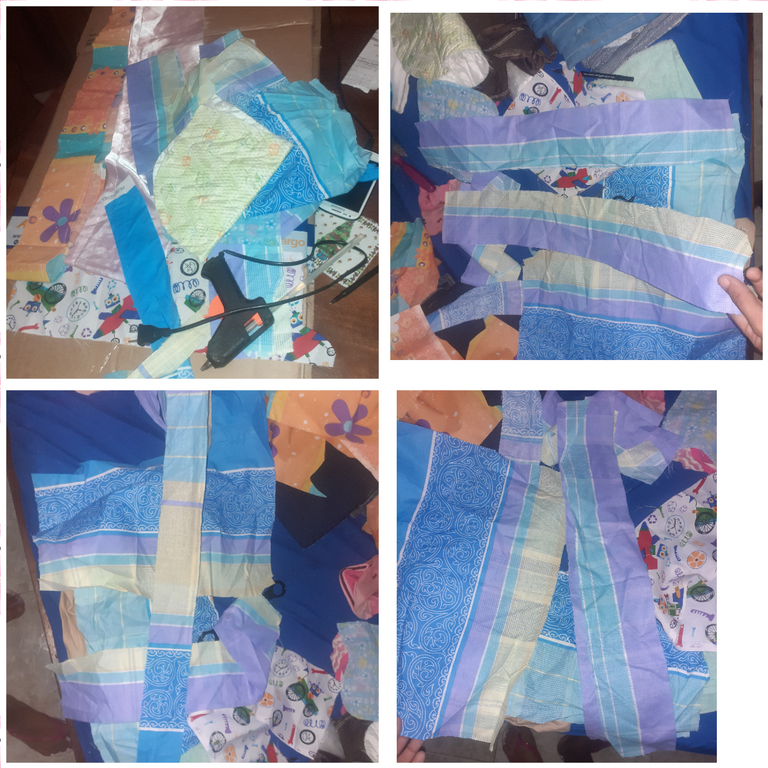
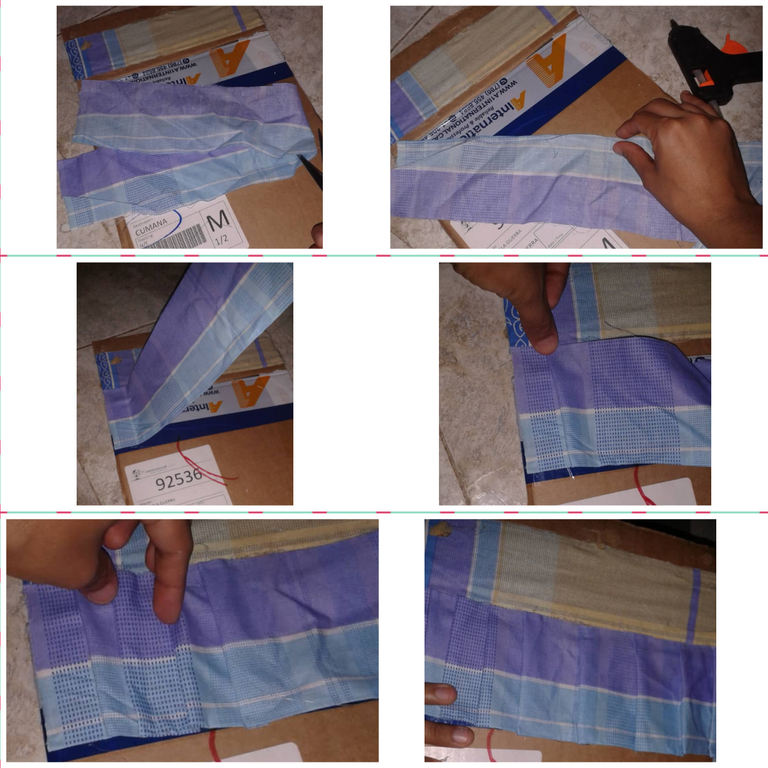
Step 4
To begin, I took a piece of fabric that was already chopped in an elongated way, then with the silicone I began to stick them. Trying to leave one more piece on the sides to glue the finish on the back of the cardboard.
Paso 4
Para comenzar, tome un pedazo de tela que ya estaban picada de forma alargadas, entonces con el silicon comencé a pegarlas. Tratando que quedé un pedazo más por los lados para pegar el terminado por la parte de atrás del cartón.
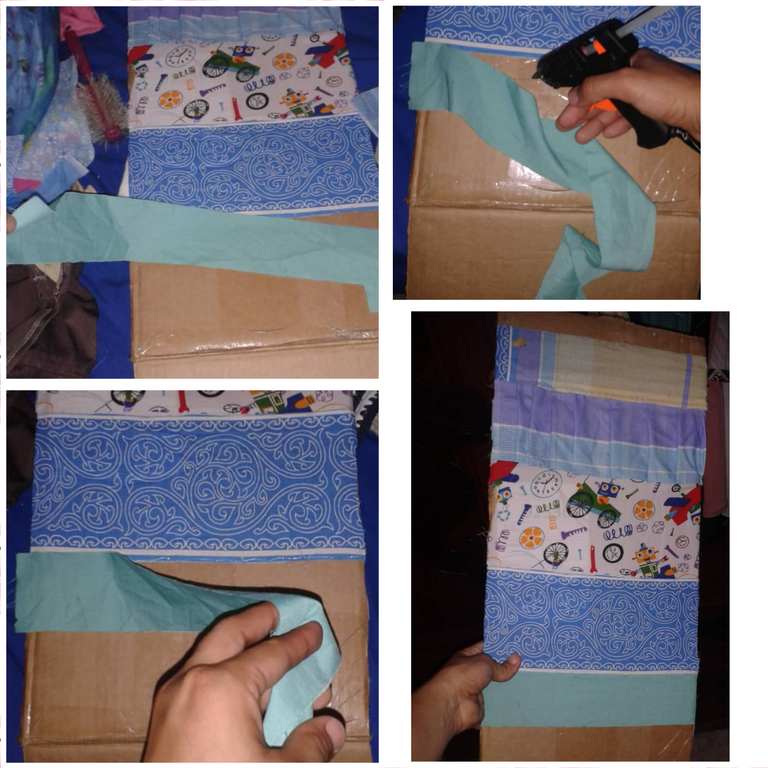
Step 5
The second layer or fabric, it was the same, it was also cut long, it was easier for me, because I didn't cut much of the fabric. But this time, I wanted it to have a scrunchy shape. I haven't glued the bottom part yet, I wait to put the fabric that is below it. It stayed this way.
Paso 5
La segunda capa o tela, era de la misma, también estaba cortadas de forma alargada, fue más fácil para mí, porque no corte mucho la tela. Pero esta vez, quise que tuviera una forma arruchadita. La parte de abajo no la pego todavía, espero para meterle la tela que sigue por debajo.nos quedo de esta manera.
Step 6
The third fabric was the one for a doll, I loved this fabric 💕, it was the only piece I found, I'm going to stick it under the previous fabric.
Paso 6
La tercera tela, fue la de muñequito, esta tela me encantó 💕, era el único pedacito que encontré,la voy a pegar por debajo de la tela anterior.
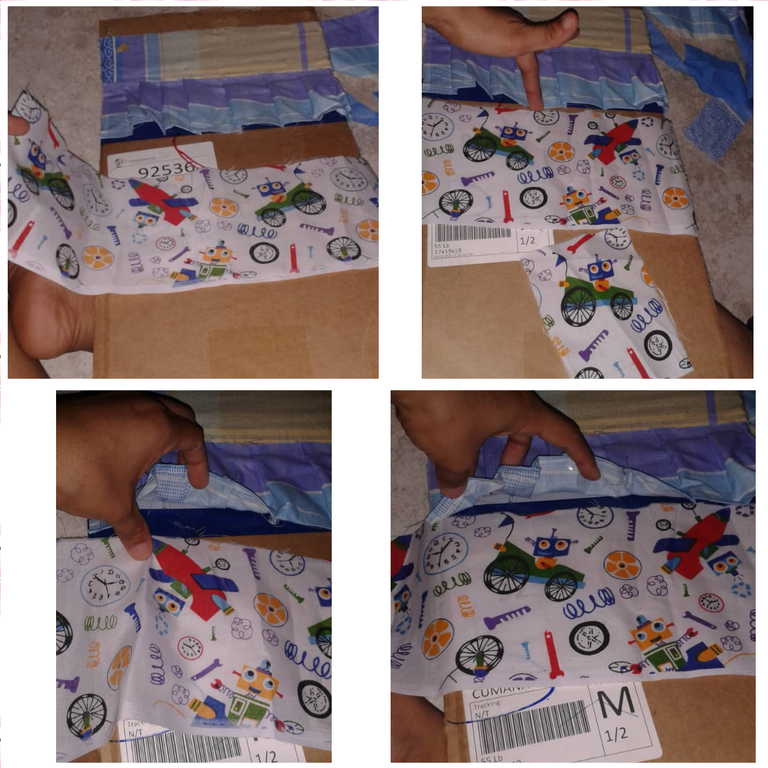
Step 7
The fourth fabric, I cut it, because I only wanted to grab the blue with the stripes, and I did, cut and glue it carefully.
Paso 7
La cuarta tela, la corte, porque solamente quería agarrar el azul con las rayas, y así fue, corte y la pegue cuidadosamente.
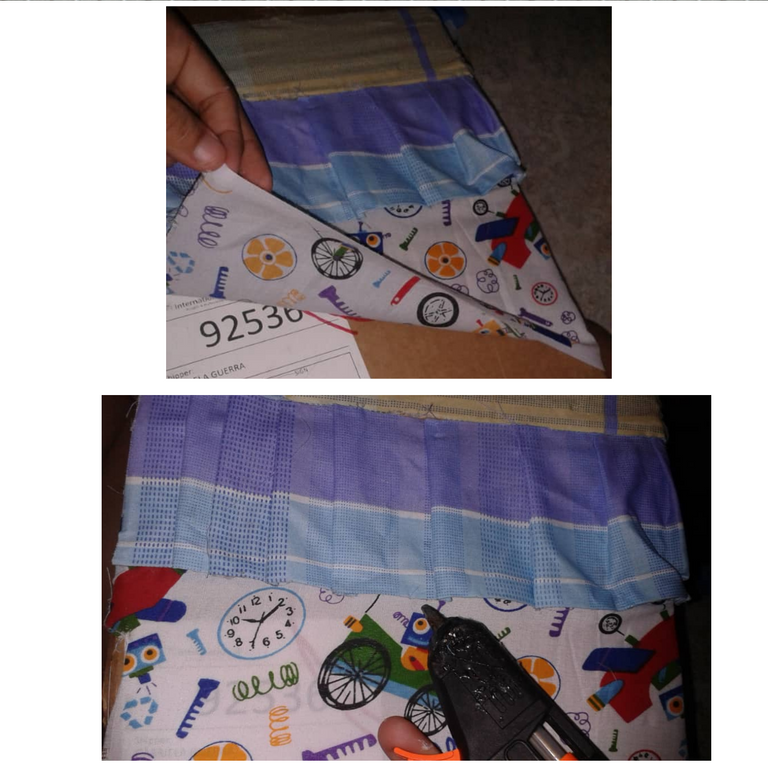
Step 8
For the fifth fabric, I didn't know what to put on it, I didn't want to put the previous fabrics on it again, I wanted it to have a different color but it would match, so I found this green fabric, it was thin and I wanted to wear the same thickness as the other cloth, that's why; who hits her twice.
Paso 8
Para la quinta tela,no sabia que colocarle, no quería ponerle otra vez las telas anteriores, quería q tuviera un color diferente pero que combinará, entonces encontré esta tela de color verde, era delgada y yo quería llevar el mismo grueso de las demás tela,es por ello; que la pega dos veces.
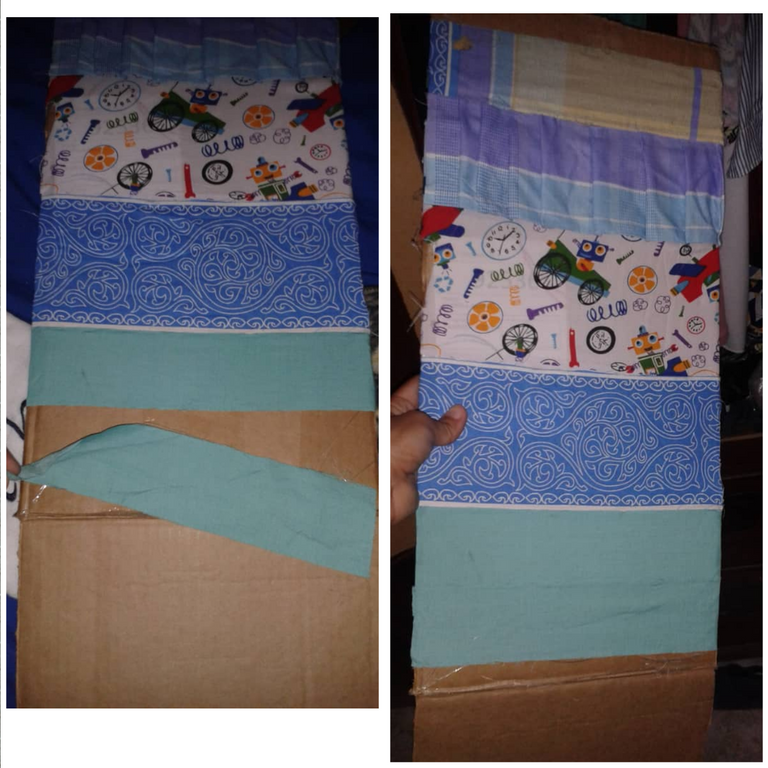
step 9
As we were already finishing covering the cardboard, I put the fabric on it and crumpled it up so that it ends the same as we started. We glued the top part, but not the bottom part.
paso 9
Como ya estábamos terminando de forrar el cartón, le coloque la tela y la arruche para que termine igual como comenzamos. Pegamos la parte de arriba, pero la parte de abajo no.
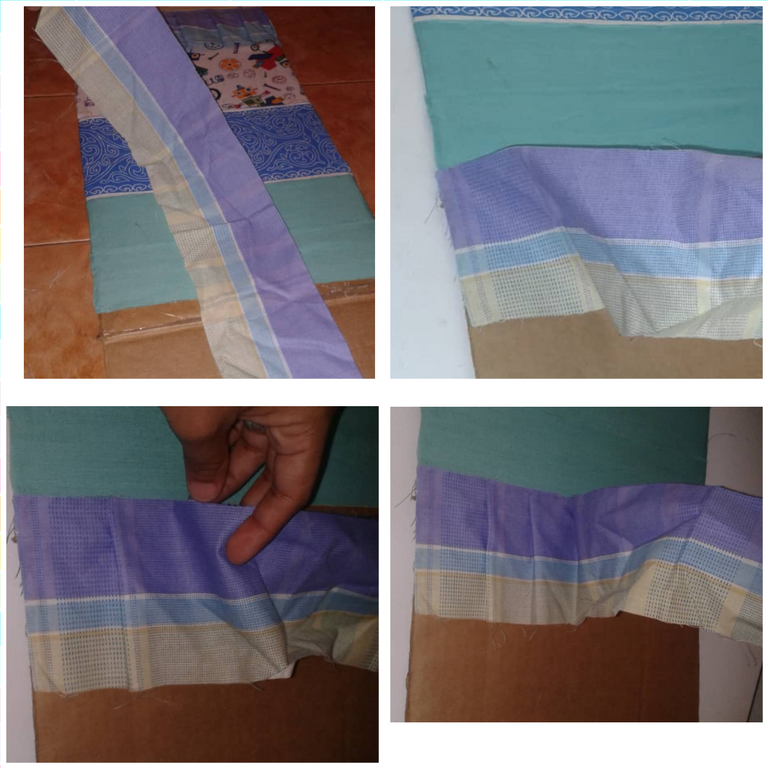
Step 10
This is the last fabric that we are going to use, and I found another trace of the same fabric from the first one, and I began to glue under the crumpled fabric and then the rest. And ✅ ready.
Paso 10
Ya es la última tela que vamos a utilizar, y encontré otro retrazo de la misma tela de la primera, y comencé a pegar debajo de la tela arruchadita y después lo demás. Y ✅ listo.
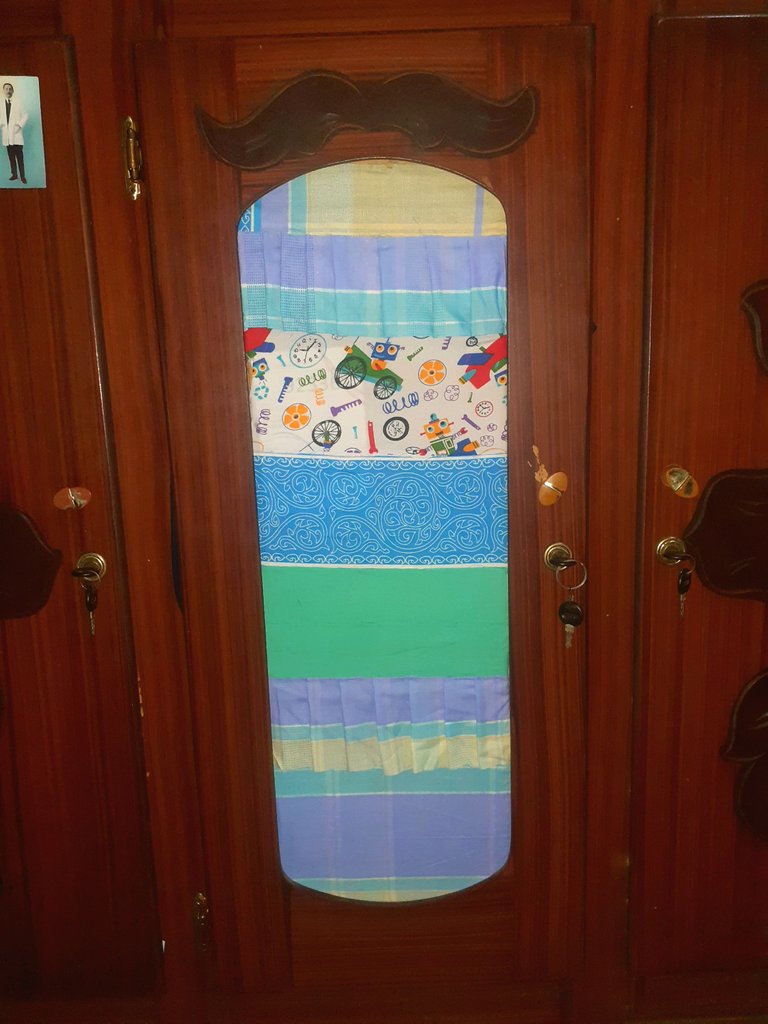
I loved the result, the combination fascinated me, I didn't think it would be so beautiful for my taste ❤... and that's how it turned out 😍 you won't see the mess inside my window anymore hehehehehehe 🤣🤣😂.
el resultado me Encanto, la combinación me fascinó,no pensaba que iba a quedar tan hermoso para mi gusto ❤... y así quedó 😍 ya no se va a ver el desorden que esta dentro de mi escaparate jejejejejeee 🤣🤣😂.