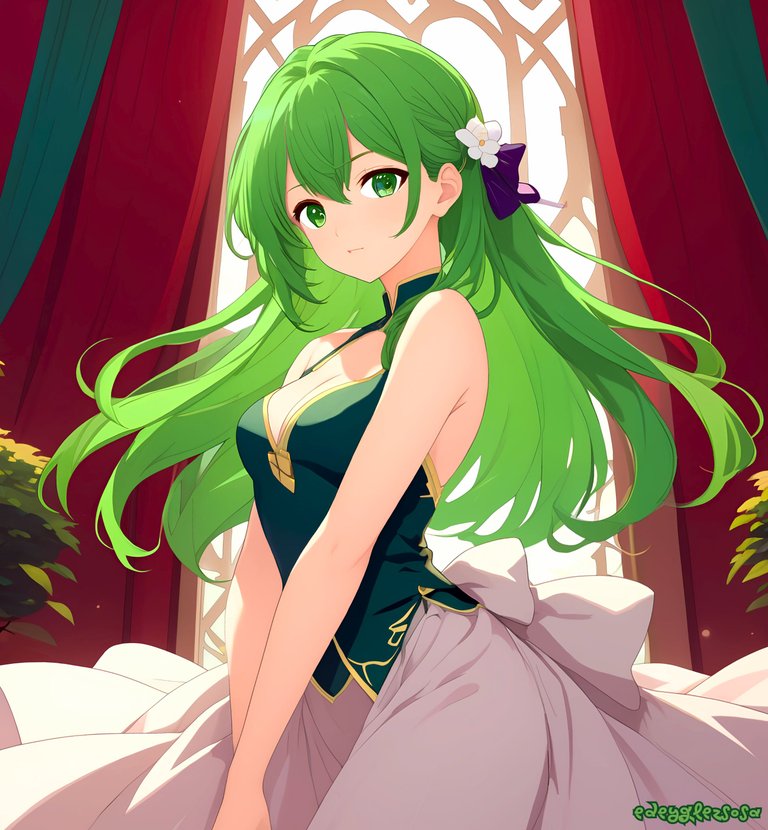
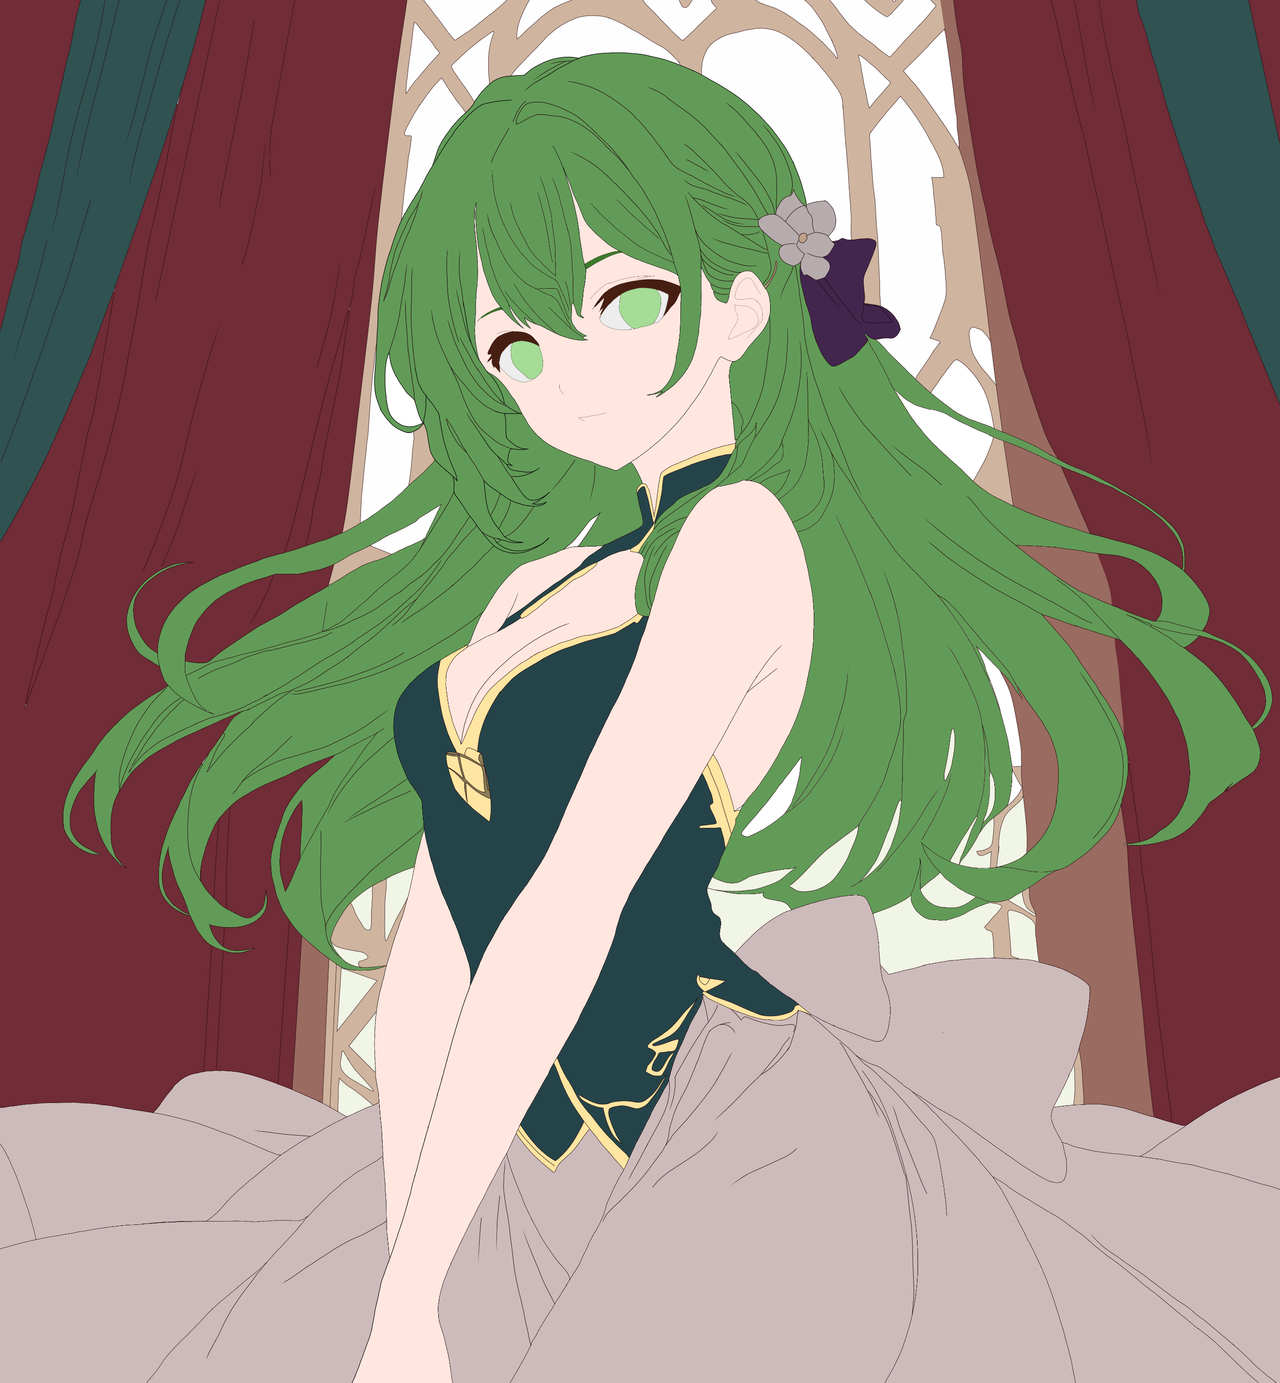
Forest Healer in an elegant dress. Holozing fan art. [ENG+ESP]
Hello everyone.
We continue with another of my drawings of the healers with casual clothes and this time it is again the turn of the healer of the forest. For this design I chose an elegant semi-full dress, composed of two pieces of different colors. On her head she does not wear her characteristic crown of branches, but, instead, she wears a purple ribbon with a beautiful flower tied on the side of her hair.
For the realization of the drawing I will be using mainly brushes of the G pen type and airbrush in its three versions. Below you can find the step by step explanation of how I created this fan art. I hope you like it.
Hola a todos.
Continuamos con otro de mis dibujos de las sanadoras con ropa casual y en esta ocasión le toca nuevamente el turno a la sanadora del bosque. Para este diseño escogí un vestido elegante semi completo, compuesto por dos piezas de distintos colores. En la cabeza no porta su característica corona de ramas, pero, en cambio, lleva atado en un costado del cabello una cinta violeta con una hermosa flor.
Para la realización del dibujo estaré utilizando principalmente pinceles del tipo pluma G y aerógrafo en sus tres versiones. A continuación podrán encontrar la explicación paso a paso de cómo fui creando este fan art. Espero que les guste.
Step by step // Paso a paso
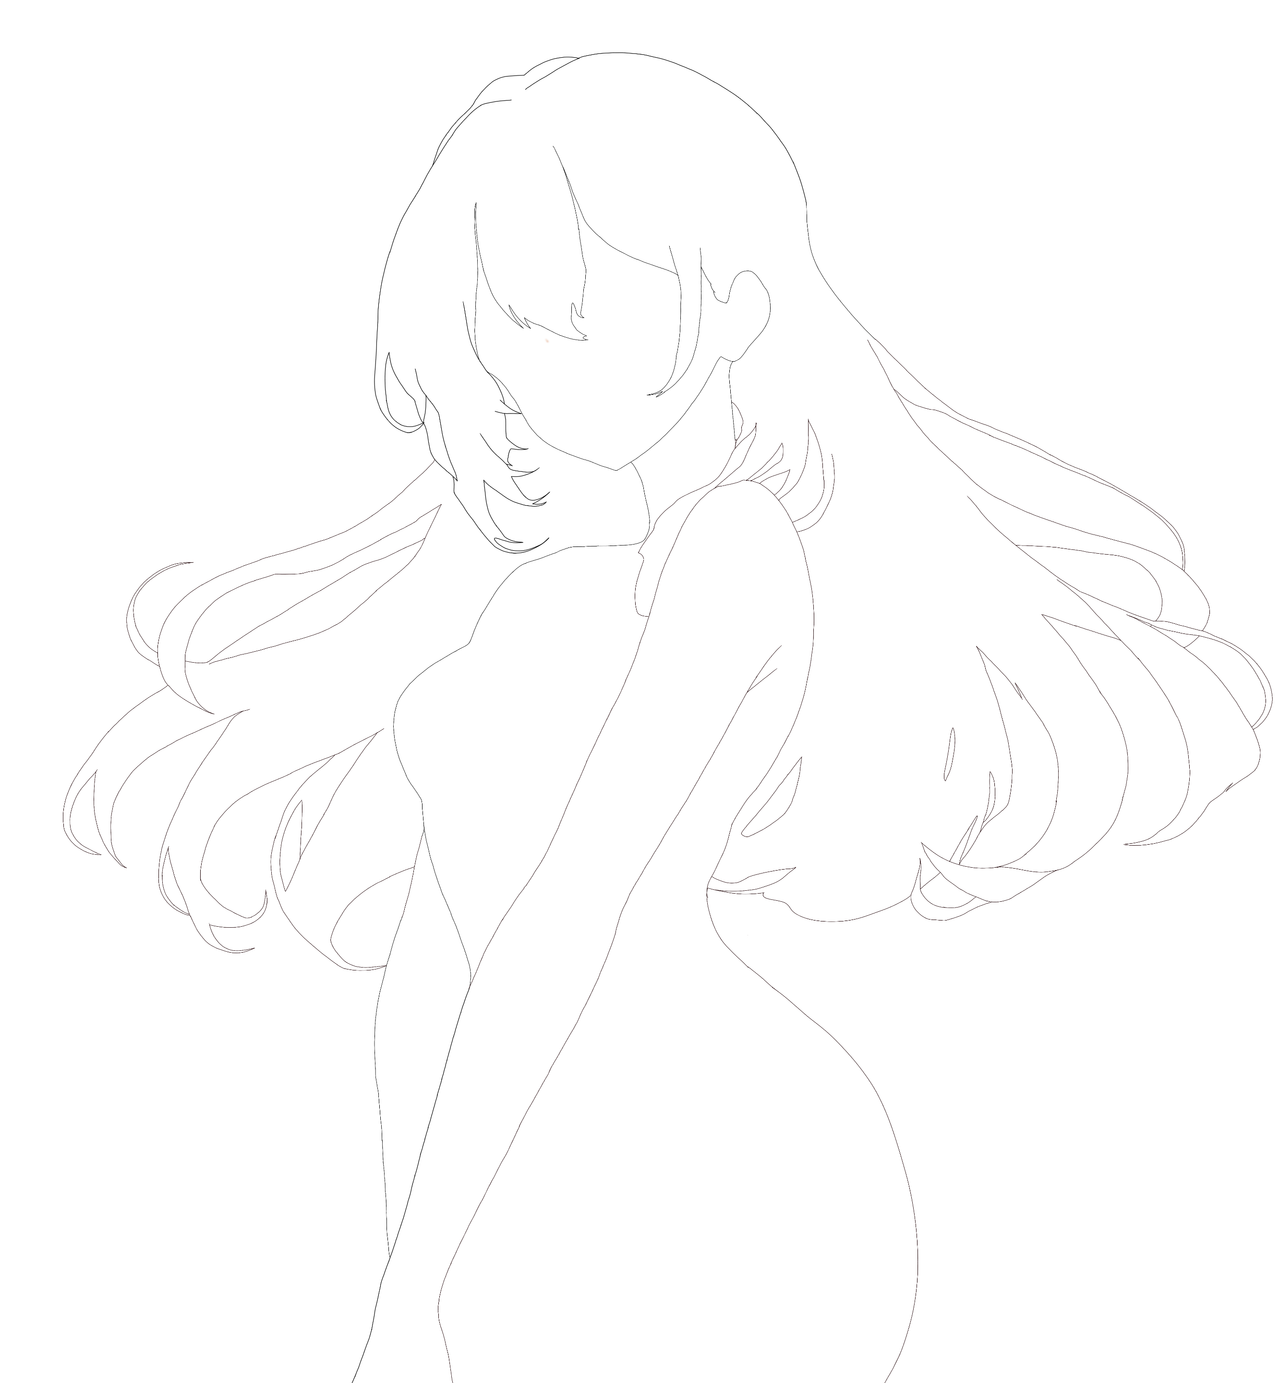
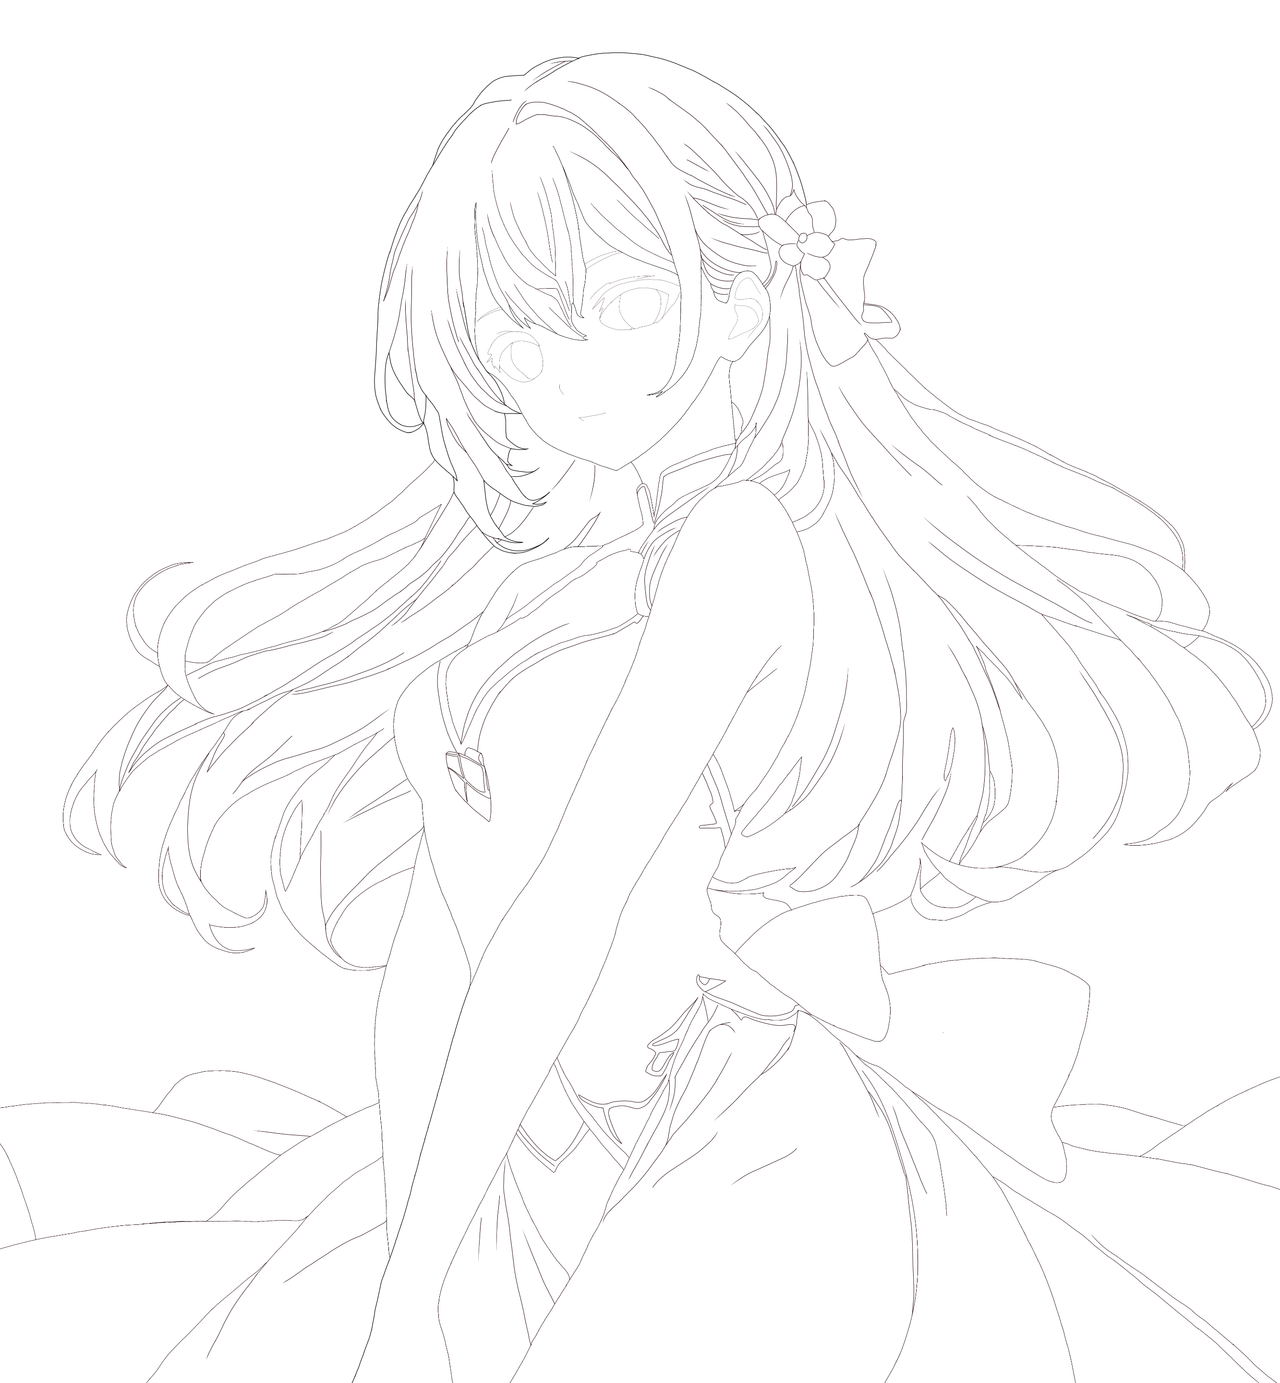
I start by drawing with the soft feather brush the whole silhouette of the dancer's body and the area occupied by the hair. To do this, I focus more on the ends of the tips than on the division of each part of the hair. On top of the body I erase some lines to add to the upper and lower part of the dress, the latter being wider, so it does not fit the body and covers all the lower area of the drawing.
Empiezo dibujando con el pincel pluma suave toda la silueta del cuerpo de la bailarina y el área que ocupa el cabello. Para ello, me centro más en las terminaciones de las puntas que en la división de cada parte del pelo. Encima del cuerpo borro algunas líneas para agregar a la parte superior e inferior del vestido, siendo esta última más amplia, por lo cual no ajusta al cuerpo y cubre toda la zona baja del dibujo.
 |
 |
Now I work on the hair and this time I draw each of the lines, detailing correctly where each lock of hair begins and ends. I add the bow and the flower that is tied and, after drawing the face, I start working on the lower part of the dress, drawing some lines that will serve as a guide to identify the folds of the clothes.
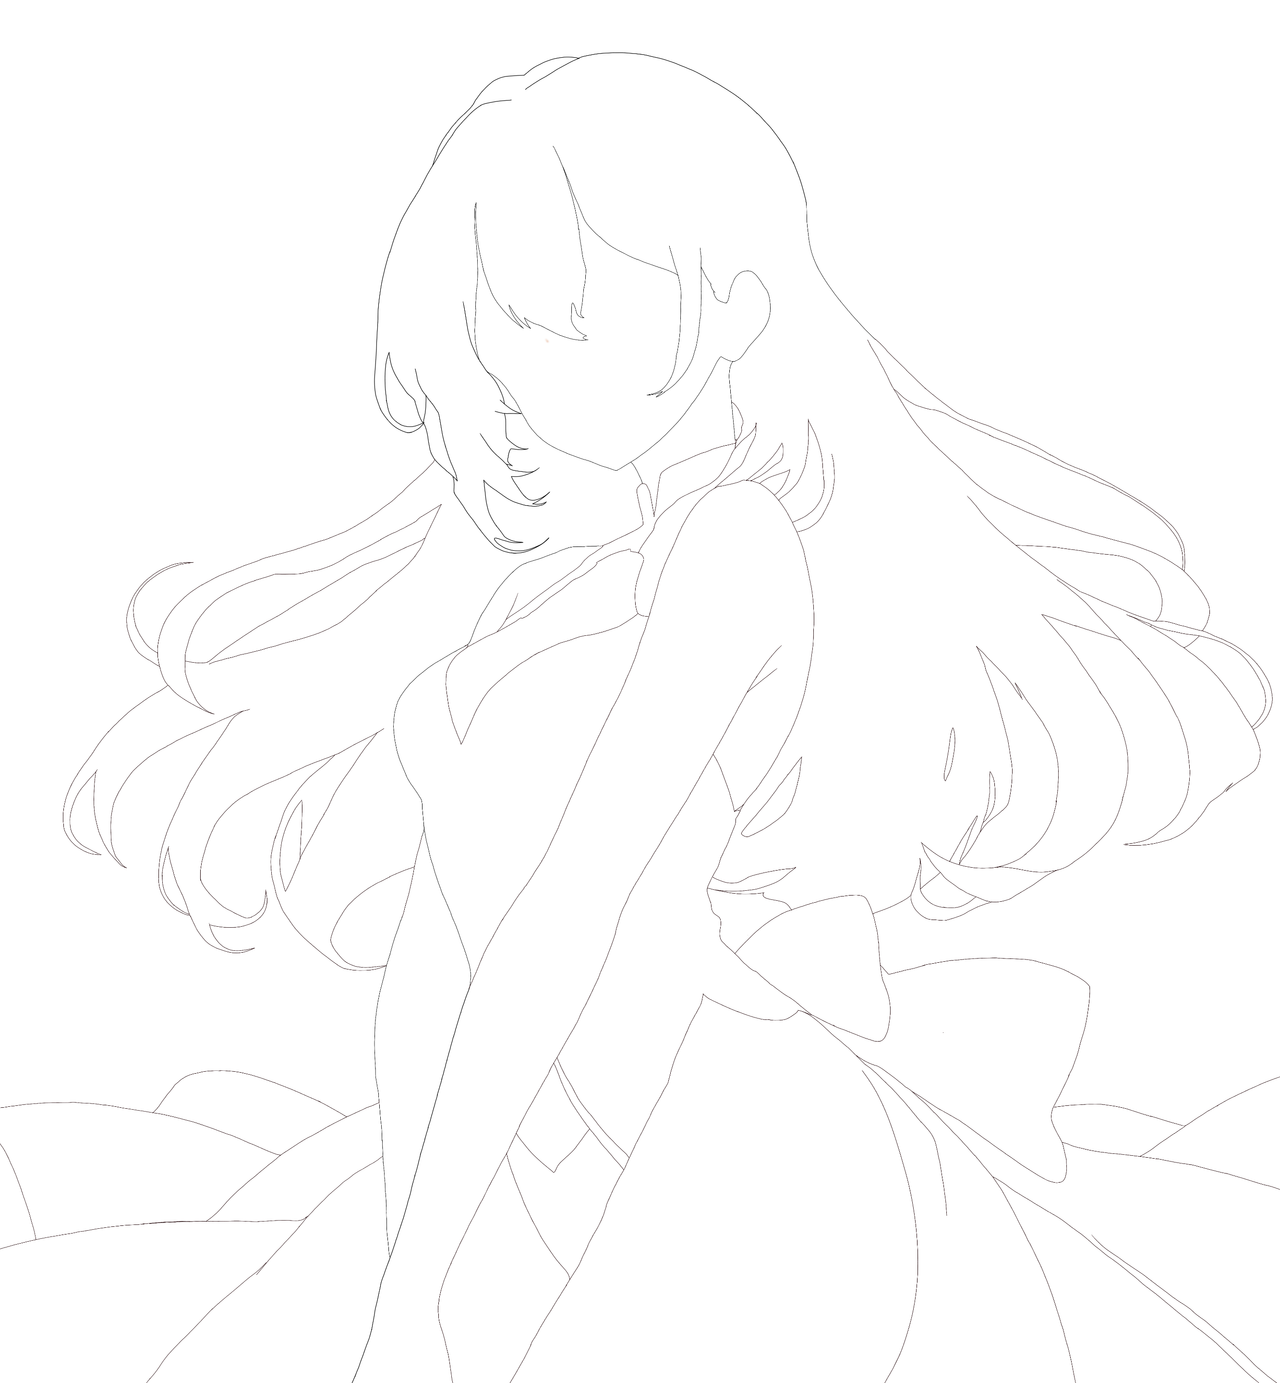
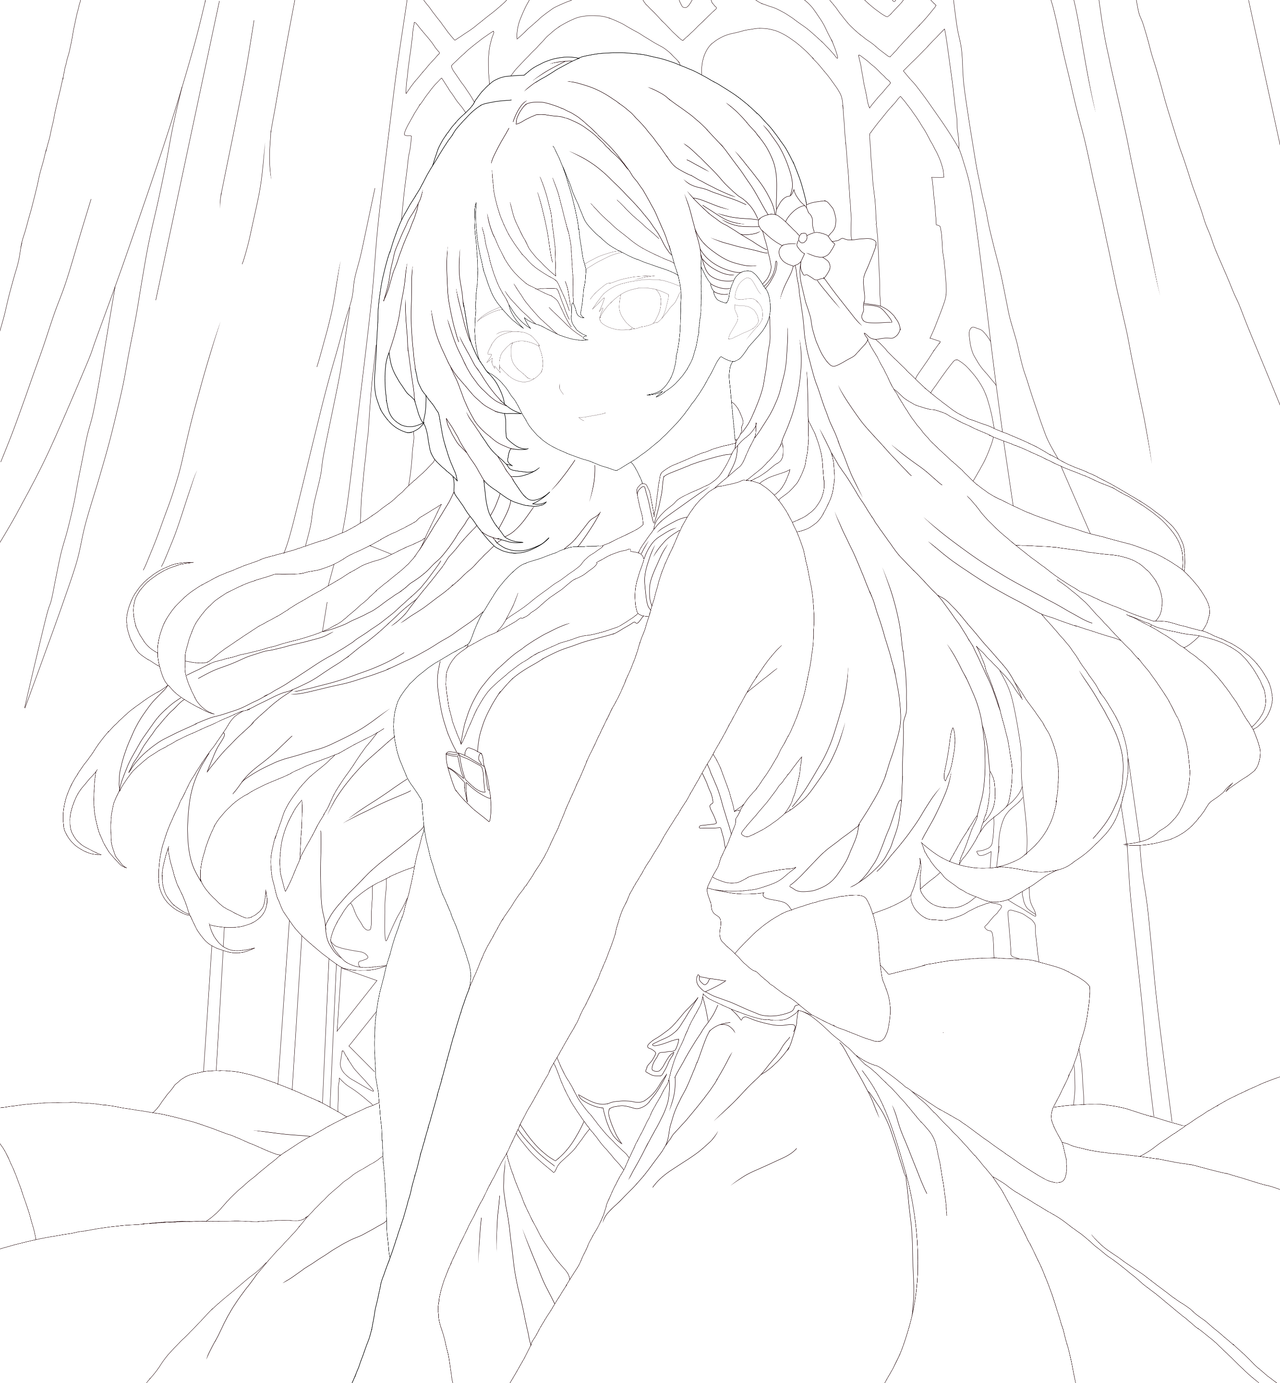
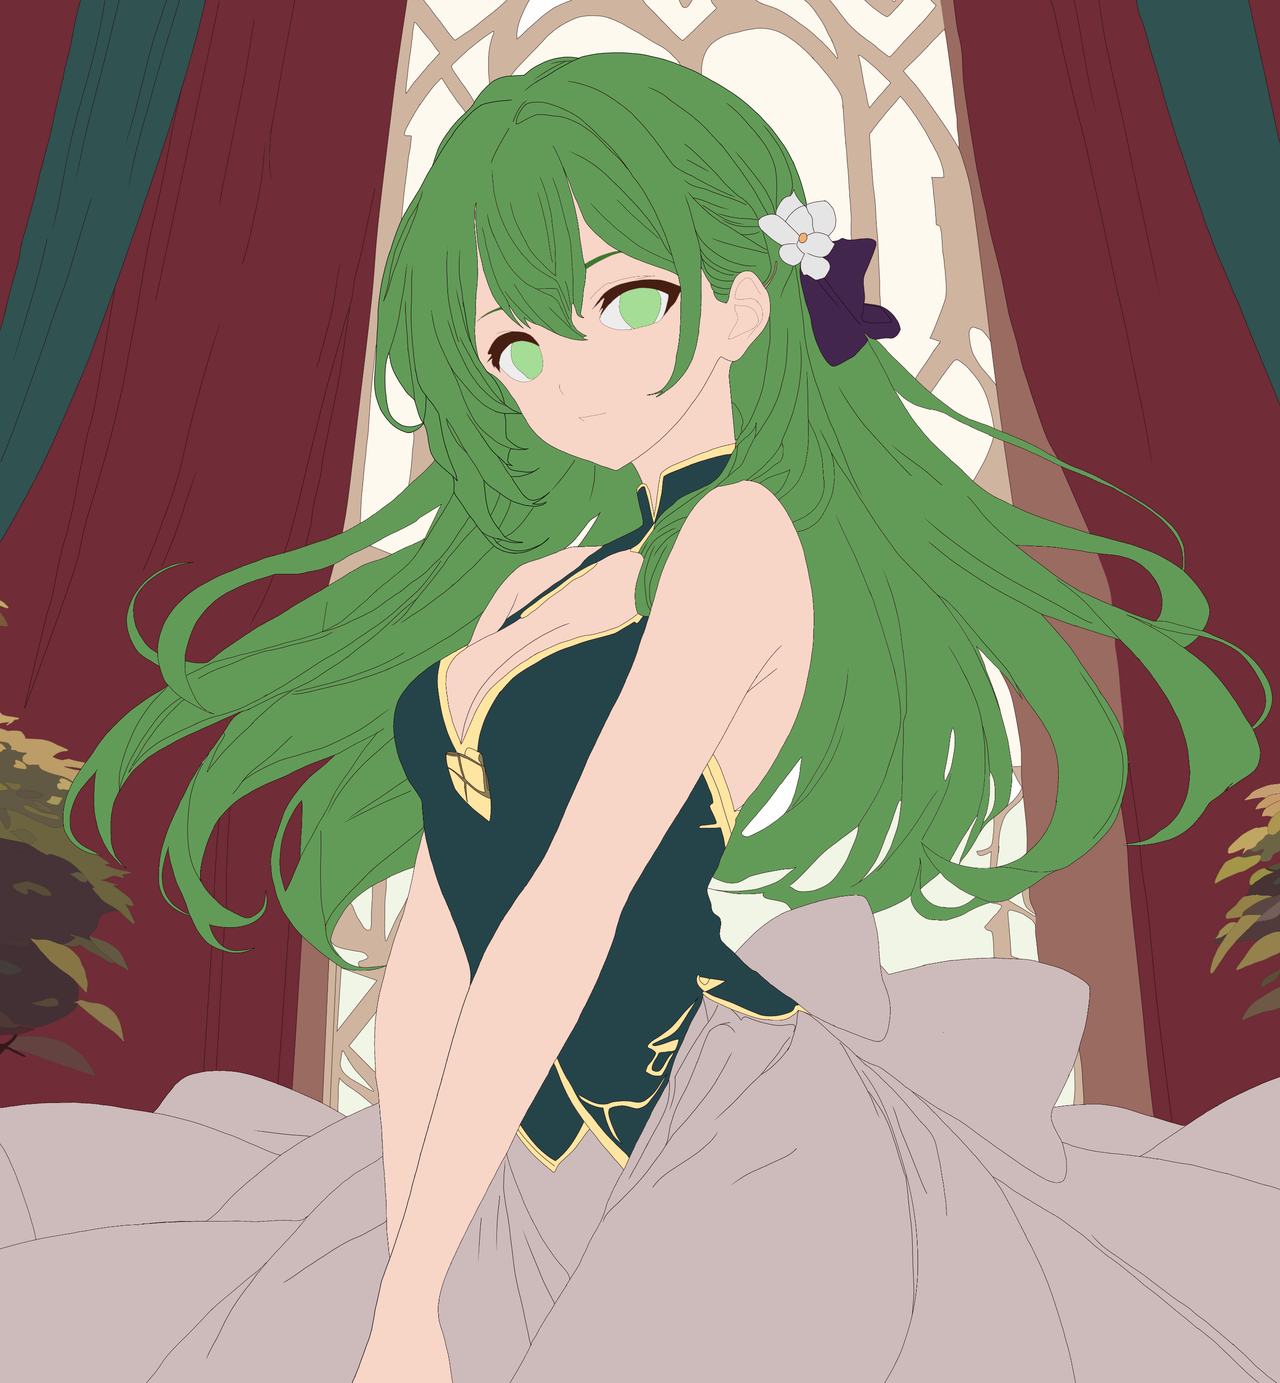
Once I finish with the details of the healer, I draw the background, which this time I will include in the line art and will be composed of a wooden window in the center and curtains on the sides. At first I wanted to make the window design as bilateral as possible, but in the end I ended up making a little mess. 😅
Ahora paso a trabajar sobre el cabello y esta vez trazo cada una de las líneas, detallando correctamente dónde comienza y termina cada mechón del cabello. Agrego el lazo y la flor que lleva atados y, luego de dibujar el rostro, paso a trabajar en la parte baja del vestido, dibujando algunas líneas que me servirán de guía para identificar los pliegues de la ropa.
Una vez termine con los detalles de la sanadora, paso a dibujar el fondo, el cual esta vez incluiré en el line art y estará compuesto por un ventanal de madera en el centro y cortinas a los lados. Al principio quise hacer el diseño del ventanal lo más bilateral posible, pero al final terminé haciendo un pequeño desastre. 😅
 |
 |
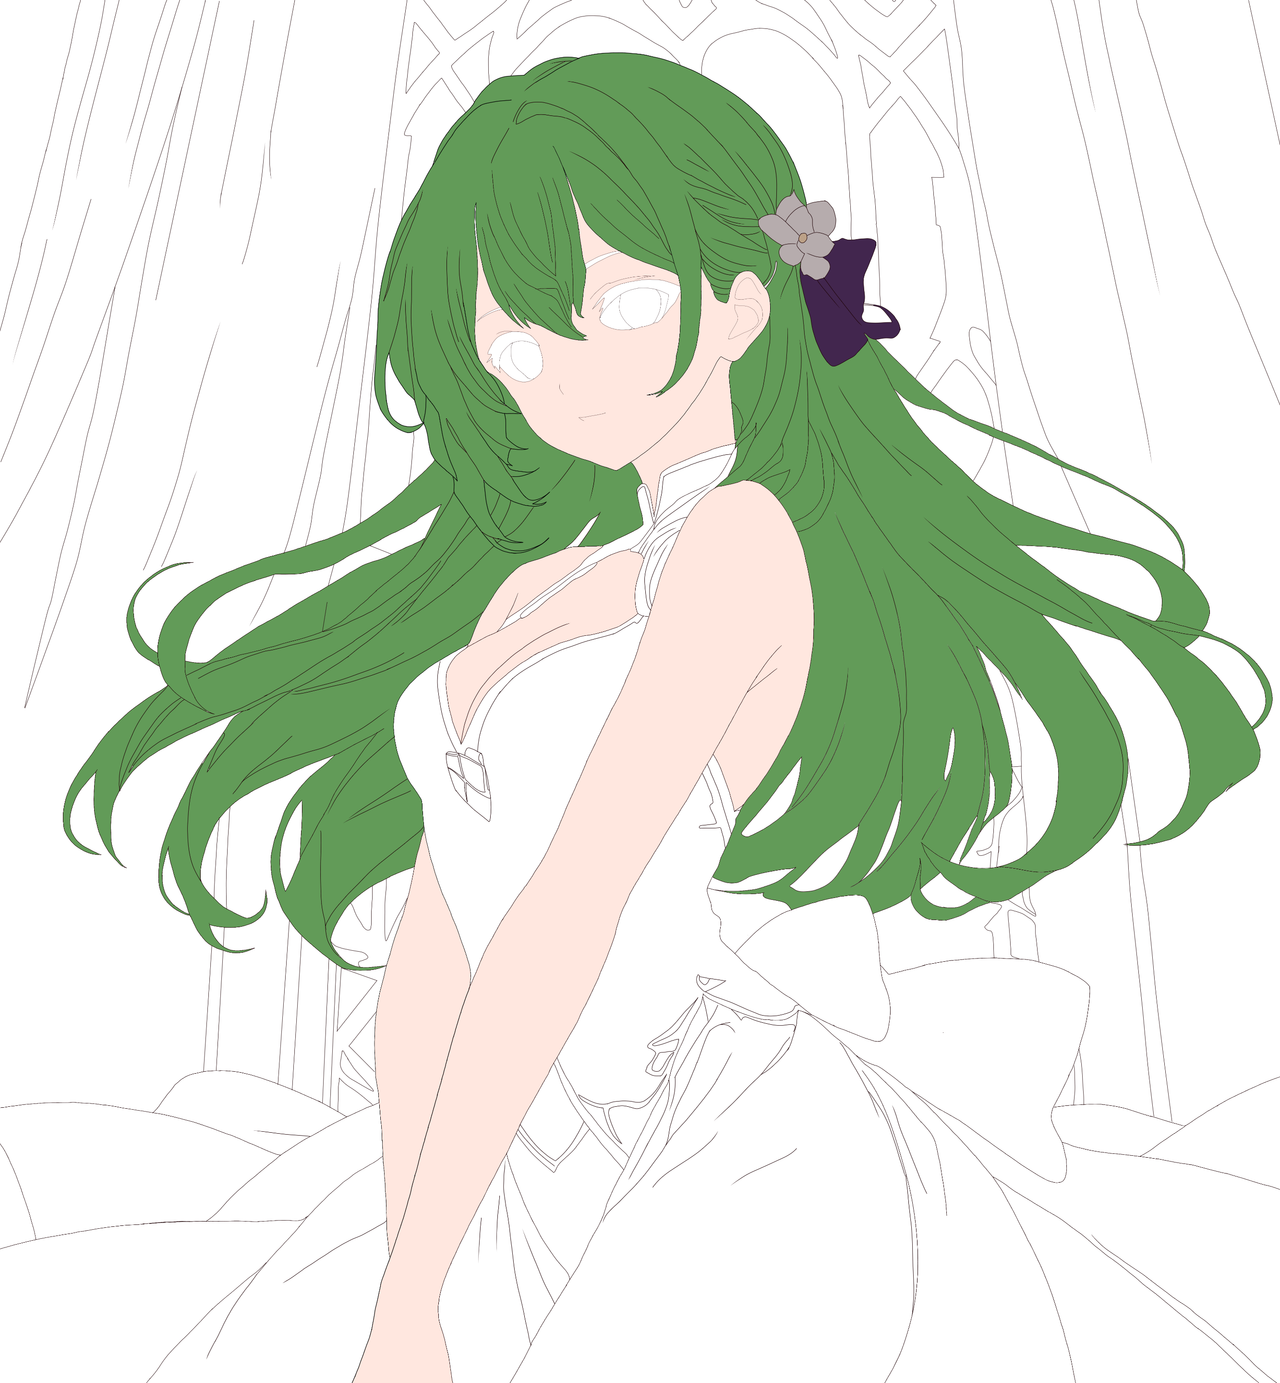
With the line art ready, I can move on to color on a new white layer. I start with the hair, its adornment and the skin of the healer and then move on to the parts that make up the dress and the ornaments on it. At first, you may notice that from now until the end the tone of various colors will change, but don't worry because I do this to help me see better the areas that are not colored correctly on the white background.
Con el line art listo, ya puedo pasar a dar color en una nueva capa en blanco. Comienzo por el cabello, su adorno y la piel de la sanadora para luego pasar a las partes que componen el vestido y los adornos de este. En un principio, se podrán dar cuenta de que desde ahora hasta el final el tono de varios colores cambiará, pero no se preocupen porque esto lo hago para ayudarme a ver mejor las áreas que no se colorean correctamente sobre el fondo blanco.
 |
 |
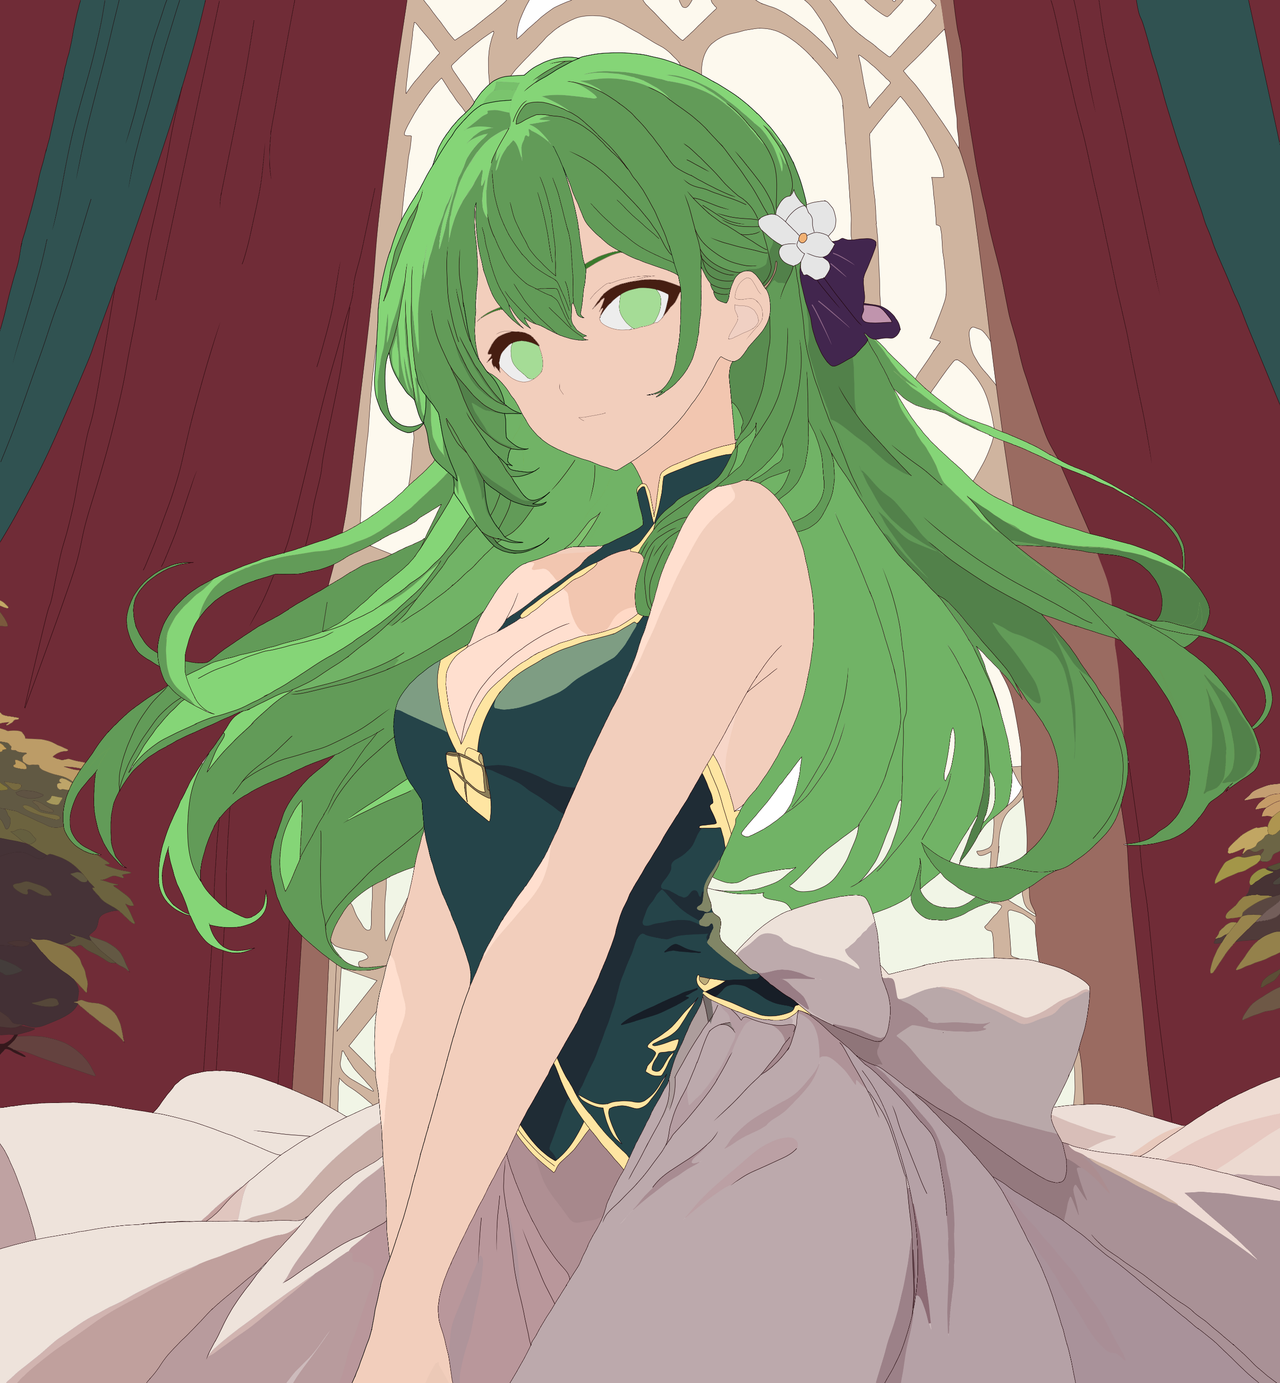
Then I start to color the background and this time I did it in a new layer, because later it will make the process easier for me. The walls in general will be the same color as the window. On each wall rests a huge red curtain with deep blue slats. In front of each curtain there are two bushes, which were not planned, but being a forest entrance, it makes sense that there would be a representation of nature.
Luego empiezo a dar color al fondo y esta vez lo hice en una capa nueva, pues más adelante me facilitará el proceso. Las paredes en general serán del mismo color que el ventanal. Sobre cada pared reposa una enorme cortina roja con listones azul profundo. Frente a cada cortina hay dos arbustos, los cuales no estaban planeados, pero al ser una entrada del bosque, lo más lógico es que hubiese una representación de la naturaleza.
 |
 |
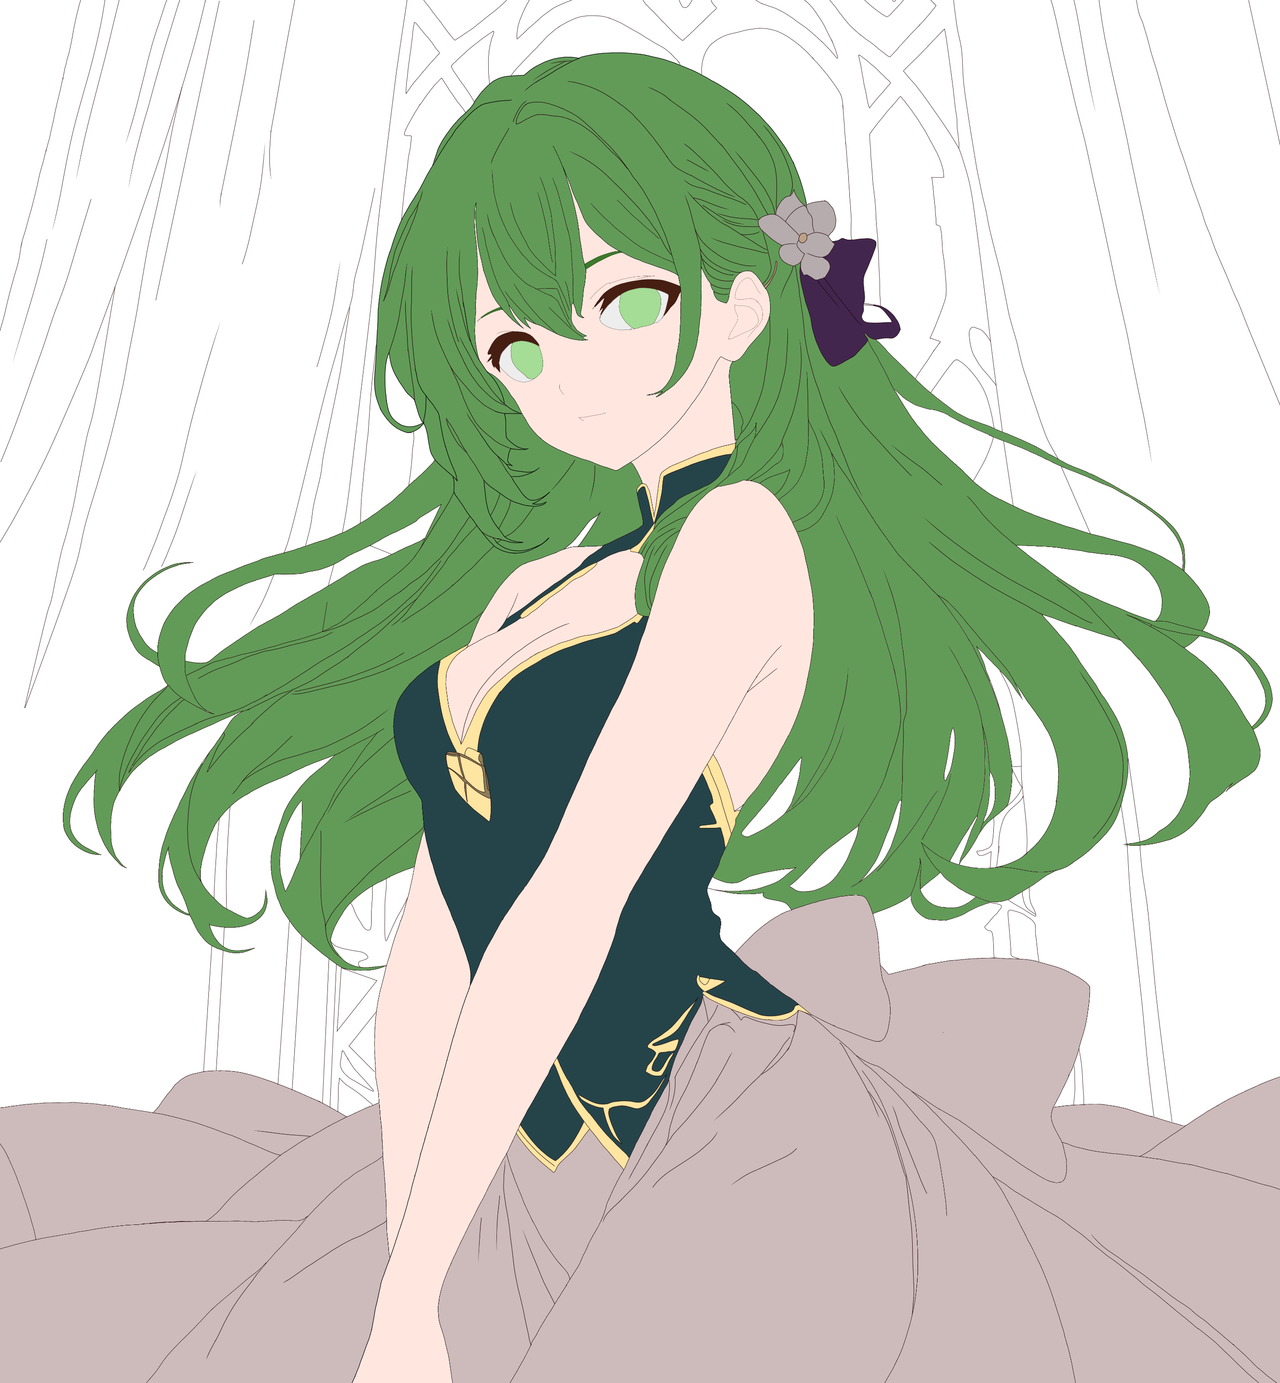
Already each section of the drawing is painted in one way or another with its respective color. Now it's time to create a new white layer and use the aerographer brush to give the first touches of lighting. I start with the hair, creating an area of lighting on the top left and darkening some areas on the opposite side for contrast. Note that I don't consider this shading yet.
Next, I identify the areas I'm going to light on the healer's body and dress, then do the same and darken some sections of the clothing to create the appearance of folds.
Ya cada sección del dibujo está pintada de una forma u otra con su respectivo color. Ahora es tiempo de crear una nueva capa en blanco y utilizar el pincel aerógrafo para dar los primeros toques de iluminación. Comienzo por el cabello, creando un área de iluminación en la parte superior izquierda y oscureciendo algunas zonas del lado opuesto para contrastar. Tengan en cuenta que esto no lo considero sombreado aún.
Seguidamente, identifico las áreas que voy a iluminar del cuerpo de la sanadora y el vestido, para luego hacer lo mismo y oscurecer algunas secciones de la ropa y así generar la apariencia de pliegues.
 |
 |
Before shading, I will work on the design of the retinas and the eye flare. Then I will change the brush to soft airbrush and lower the opacity to 35% to start shading little by little. The hair and the dress were the areas that took the most work, as they are where the light hits the hardest. In the background, I used a reduced brush size to draw a fine shadow over each line I had painted on the curtains, and thus created some fine creases characteristic of these large fabrics.
Antes del sombreado, trabajaré en el diseño de las retinas y el destello de los ojos. Luego cambiaré el pincel a aerógrafo suave y bajaré la opacidad a un 35% para empezar a sombrear poco a poco. El cabello y el vestido fueron las áreas que más trabajo llevaron, ya que son en las que incide la luz con más fuerza. En el fondo, utilicé un tamaño de pincel reducido para dibujar una fina sombra sobre cada línea que había pintado en las cortinas, y así creé unos pliegues finos característicos de estas grandes telas.
 |
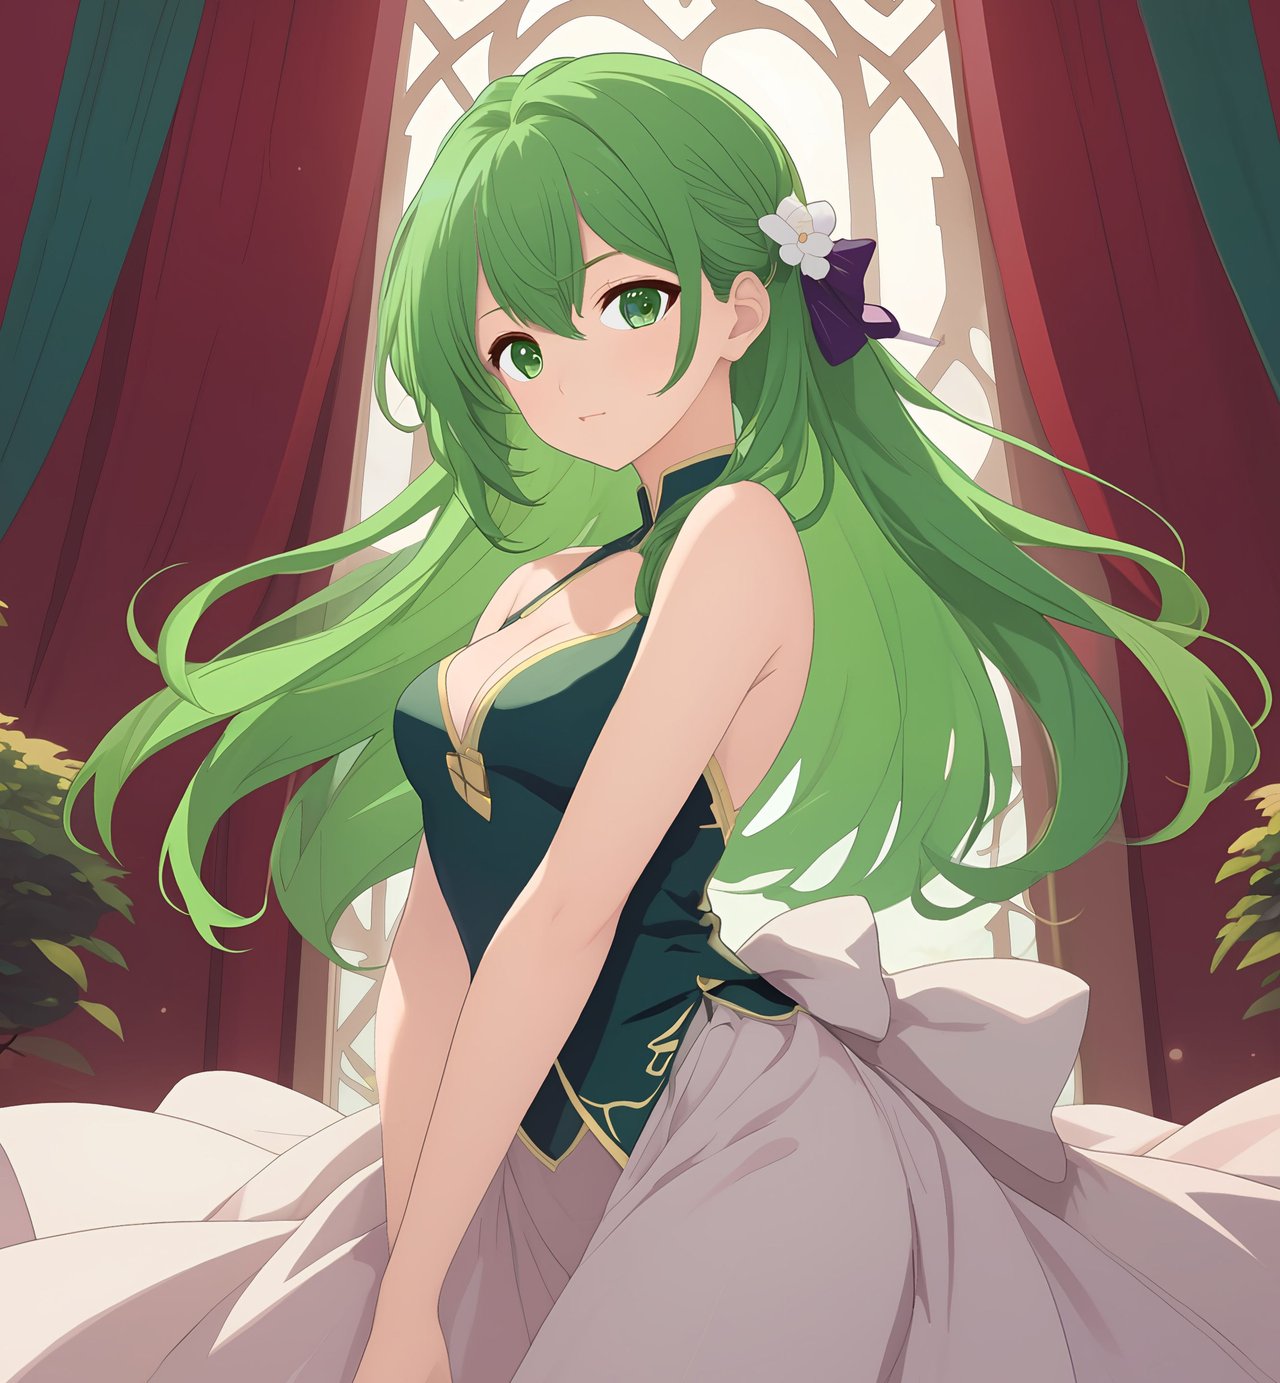 |
Finished Drawing // Dibujo Terminado
Finally, I import the image in PNG format to the gallery of my phone and this time I will not use accent filters, but I will only increase the contrast to 10% and the saturation to 25% to highlight and darken the colors more, achieving a more striking finish as shown below.
Para finalizar, importo la imagen en formato PNG a la galería de mi teléfono y esta vez no utilizaré filtros de acentuado, sino que solamente subiré el contraste a un 10% y la saturación a un 25% para resaltar y oscurecer más los colores, logrando un acabado más llamativo como el que les muestro a continuación.


Credits and Resources // Créditos y Recursos
Cover page created in Canva
Translated by DeepL
Drawn using MediBang Paint
Image edited with my Samsung Galaxy A53

Cover page created in Canva
Translated by DeepL
Drawn using MediBang Paint
Image edited with my Samsung Galaxy A53
Qué talento 👏🏻
Es más práctica que talento, pero aún así agradezco mucho el cumplido.
Thanks for the support 🫂
Congratulations @edeyglezsosa! You have completed the following achievement on the Hive blockchain And have been rewarded with New badge(s)
Your next target is to reach 80000 upvotes.
You can view your badges on your board and compare yourself to others in the Ranking
If you no longer want to receive notifications, reply to this comment with the word
STOPCheck out our last posts:
Holo! We've chosen your wonderful artwork to be viewed on holozing.com/fanart, please let us know if you'd like it removed from there for any reason. Thank you!
It is an honor and a real pleasure.
Ha logrado usted un diseño muy bonito, le felicito. El personaje de base ya era bastante atractivo, con el diseño que usted le aplicó, se reconoce el personaje y se disfruta con otra perspectiva.
Muy bueno su trabajo.
Muchas gracias 🫂