Splinterlands Battle Of The Week: Perfect Heals


The Ruleset

- Rulesets - Standard
- Mana Cap - 32
- Active Elements -

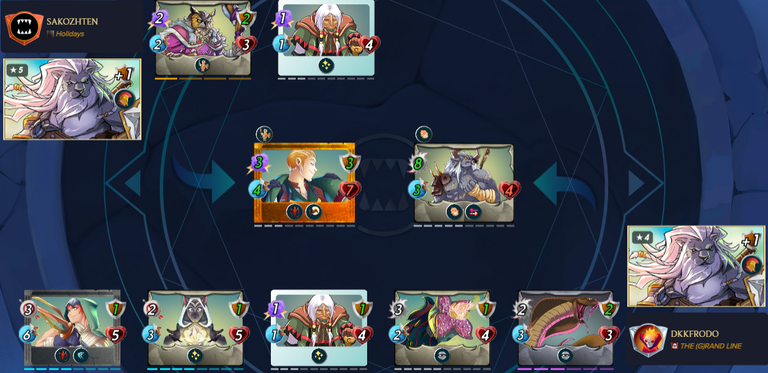
Here's my starting lineup
Summoner: Franz Ruffmane

- With the ruleset and element pick that I got I did not have much of a choice when it came to summoners
- I was forced to play life and even tho the mana cap suggested I play something low mana I decided to go with 6 mana Franz Ruffmane as he had at least a decent buff compared to my other summoners
- With Franz Ruffmane I was also able to play a single gladius monster which could possible turn the whole battle to its head
- Conscript - One extra gladiator card may be used in battle
1st Position: Drybone Barbarian
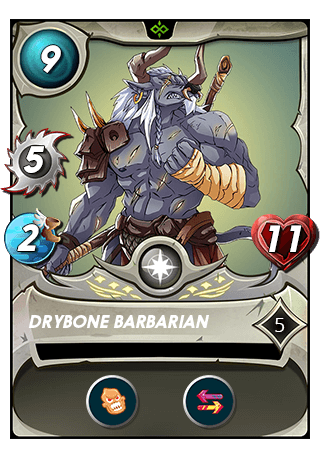
- Drybone Barbarian was my main tanks for this battle
- Main reason I like Drybone Barbarian here a lot is both of his abilities Enrage and Retaliate
- Even tho Drybone Barbarian costs a large amount of my mana cap I still played him as I have really started to like him a lot
- Enrage - +50% melee power and speed (rounded up) if not at full health
- Retaliate - 50% chance to counterattack successful melee attacks, even if defeated
2nd Position: Uraeus
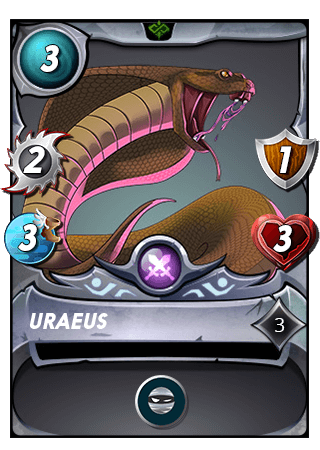
- Uraeus was first of two Sneak monsters in my team this time
- As usual Uraeus is my favorite pick in many of my battles just because how cheap and good this card is
- Sneak - Targets the enemy unit in the last position
3rd Position: Stitch Leech

- Stitch Leech was my second Sneak monster
- Stitch Leech as even better stats than Uraeus but his only down side is that he is only playable in life element which I really do not like but for this battle Stitch Leech is just an amazing monster
- Sneak - Targets the enemy unit in the last position
4th Position: Divine Healer
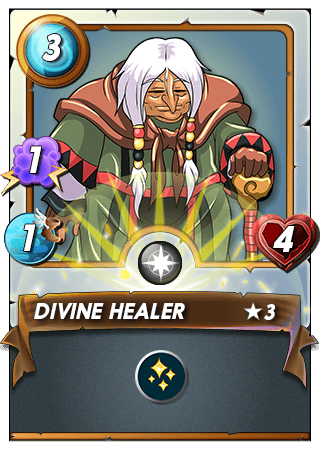
- Next up in line comes my two healers
- Divine Healer stats kinda suck but you can not go wrong with 3 mana Tank Heal monster
- Tank Heal - Each round, restores 1/3 of max health (rounded down) to the allied unit in the first position
5th Position: Venari Crystalsmith

- And here is my second healer
- Even tho he costs 1 mana more than the last healer he also has better stats so it was fine with me
- Also the reason for both of these healers was to out heal my enemies entire damage and let my Drybone Barbarian take down them one by one
- Tank Heal - Each round, restores 1/3 of max health (rounded down) to the allied unit in the first position
6th Position: Ajax Lightfoot

- As I already played a summoner with Conscript it would have been rude not to use it
- And because I only had 4 mana left I figured I would go with Ajax Lightfoot as he is an amazing backline tank with his high speed and Dodge
- Also for 4 mana getting 3 ranged damage and Bloodlust ever high chance he would become my unexpected carry
- Bloodlust - +1 to all stats after dealing a killing blow
- Dodge - +25% chance to evade physical attacks
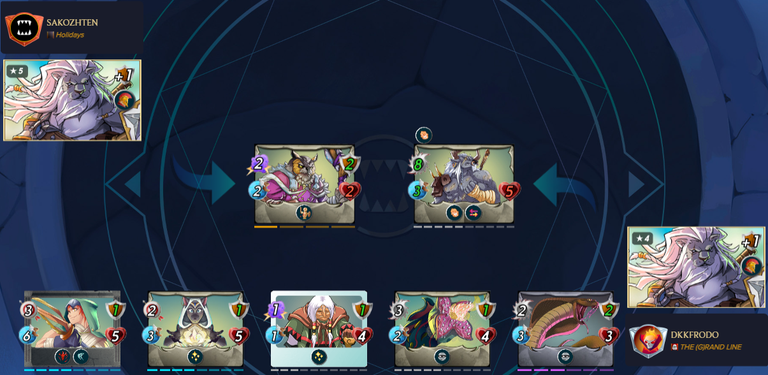
Starting board
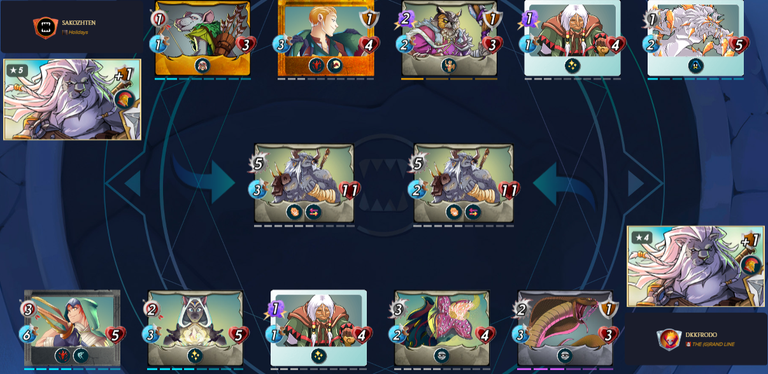
- After seeing the starting board I was quite on the fence about the results of the battle
- We both picked the same summoners so they cancel each other out basically and the teams ever also quite close in my opinion
- Even tho I had more damage I believed the battle would come down to who ever takes others Drybone Barbarian down first
- But my predictions could still be off by a mile so lets start the battle and have a look
Here's how the battle went
1st Round

- The battle had started amazing for me
- I managed to take down his Drybone Barbarian first with my one still alive but with low hp (also at 1hp for a brief second)
- But anything could still happen so lets keep watching
2nd Round
- After 2nd Round I was so clad I played two healers as my Drybone Barbarian was on 1hp two times in a single round
- But other than that the battle was going amazingly in all other aspects too, I had managed to take down his backline monster and had now I clear shot at his healer
- Lets hope for the best and keep watching
3rd Round
- This battle is totally owed to my two healers as my Drybone Barbarian was again at 1 hp (fourth times already)
- But with 3 rounds done I now just needed to wait for the start of the next and last round and then face my victory
4th Round
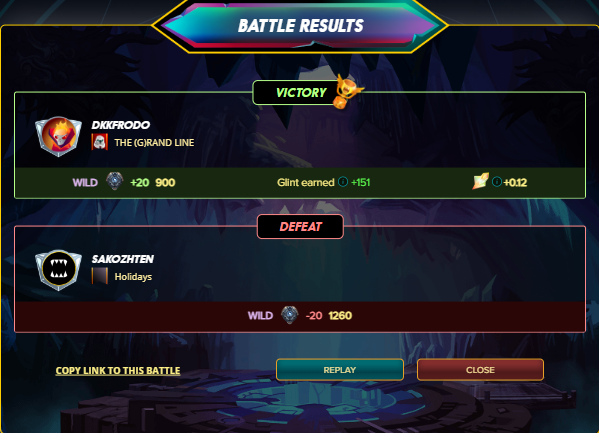
- It took me 2 attack to kill my enemies last standing monster
- After his Aves Sturgis had fallen I took the victory
- Battle Replay Link
Summary
- This battle was definitely heavily one sided in the end but many close calls with my Drybone Barbarian being on 1hp 4 times in this battle
- The strategy to take away from this battle is the basic double Tank Heal set up and also getting lucky with the attack orders
- If you also would like to hop on the Splinterlands train feel free to use my Referral
Thanks for reading and thanks for all the upvotes, reblogs, comments and follows. And till the next challenge, KEEP BATTLING!
0
0
0.000
Thanks for sharing! - @alokkumar121
