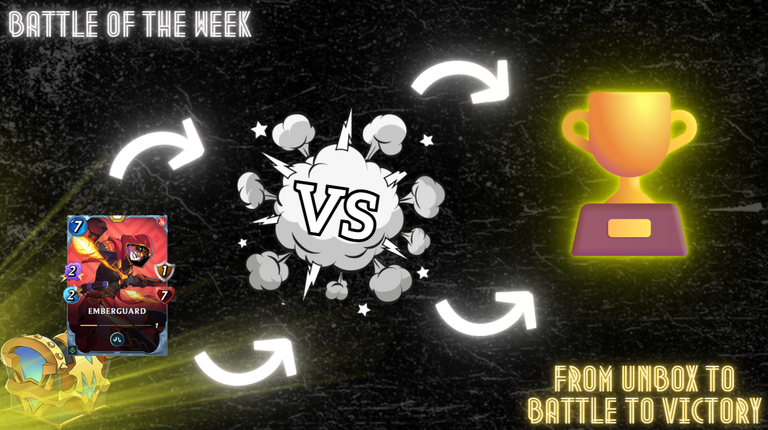
Splinterlands Battle Of The Week: from Unbox to Battle to Victory

The Ruleset

- Rulesets - Heavy Metal
- Mana Cap - 31
- Active Elements -


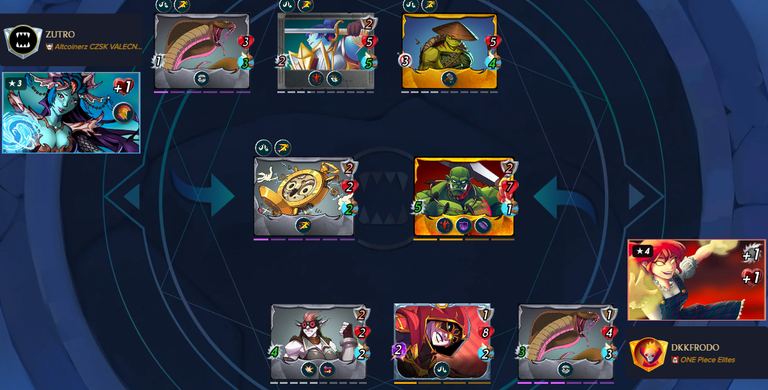
Here's my starting lineup
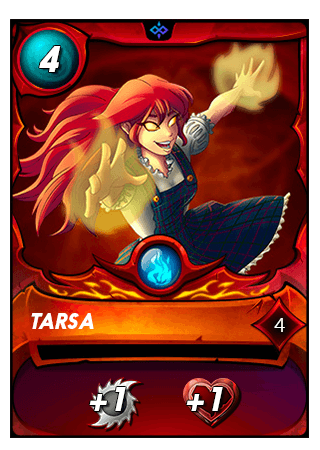
Summoner: Tarsa
- With the ruleset and element pick that I got the most important thing was that the element I was picking had great armored units in it
- In the beginning I thought about playing water but all of the units there were quite high mana cost and with only 31 mana available I had to think of another plan
- So in my case I went with fire element and Tarsa as my summoner because I had decently low mana armored monsters there and also because Tarsa had some great buffs being +1 melee damage and +1 hp
1st Position: Grum Flameblade
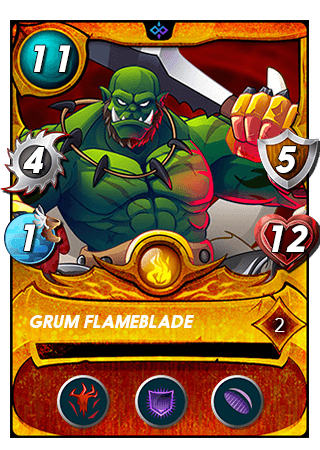
- Grum Flameblade was one of my main tanks for this battle
- Main reason I like Grum Flameblade here a lot is his Bloodlust ability
- Even tho Grum Flameblade costs a lot of mana I still decided to play him just because how strong he is when he gets couple quick take downs
- Bloodlust - Every time this Unit defeats an opponent, it gets +1 to all stats
- Void Armor - Magic attacks hit this Unit's armor before its Health
- Void - Reduced damage from Magic attacks by 50%
2nd Position: Uraeus
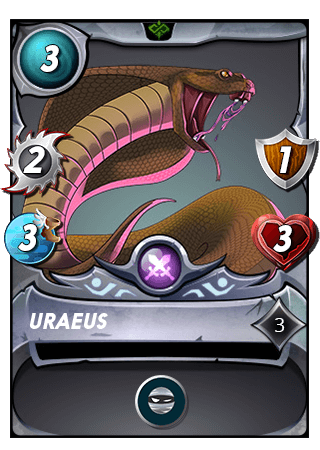
- Uraeus is possible my favorite monster in the entire game
- You get a lot of stats for only 3 mana
- And what is even better is that Uraeus is a Neutral monster which means he can be played in almost any battle
- Sneak - Targets the enemy unit in the last position
3rd Position: Emberguard
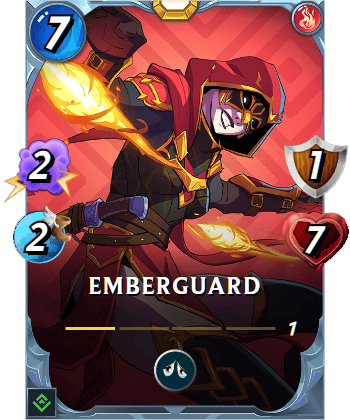
- Next up was my recently unboxed reward legendary Emberguard
- This was my first battle with him and I really liked the idea of him
- For decent 7 mana you get a quite strong magic monster with Demoralize which is really strong ability
- Demoralize - -1 melee power to all enemy units
4th Position: Dumacke Orc
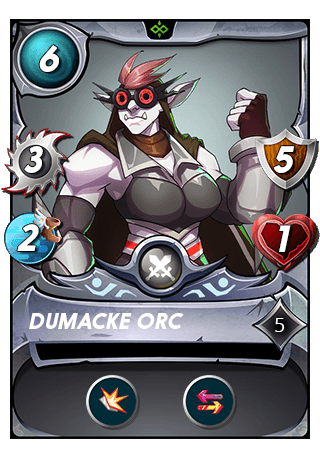
- And for last but not least is my second tank for this team and my backline
- The idea for him was that even tho he was not able to attack from the last position he still had his Retaliate ability which hopefully make him get at least couple attacks in before he gets taken down
- The other thing was that because I played a monster with Demoralize now my Dumacke Orc Shield was hopefully make him take very little of damage if not non
- Shield - 50% less damage (rounded up) from physical attacks or 0 damage from physical attacks of 1 power
- Retaliate - 50% chance to counterattack successful melee attacks, even if defeated
Starting board
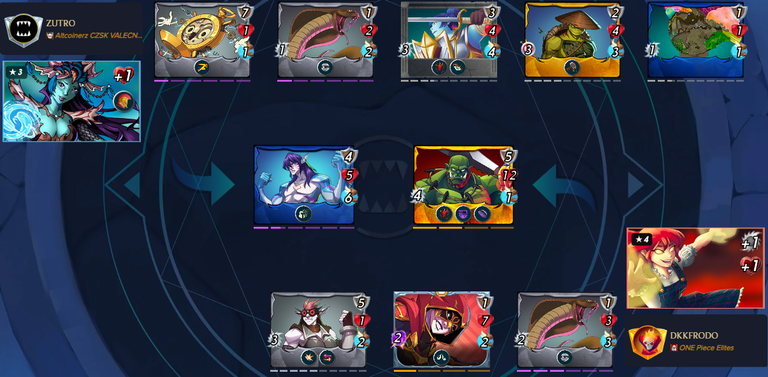
- After seeing the starting board I was kind of on a fence if I was going to win or lose this battle
- I had a lot more damage on my side and I also managed to predict my enemy playing backline attacking melee monsters with my Demoralize and Shield backline combo
- On the other hand my enemy had a lot of sustain on his side with his Repair and high hp + armor monsters
- After a little calculation I felt like I had a little edge on my enemy with the way my backline was set up compared to his attacking monsters who were dealing almost 0 damage to my backline
- But my predictions could still be off by a mile so lets start the battle and have a look
Here's how the battle went
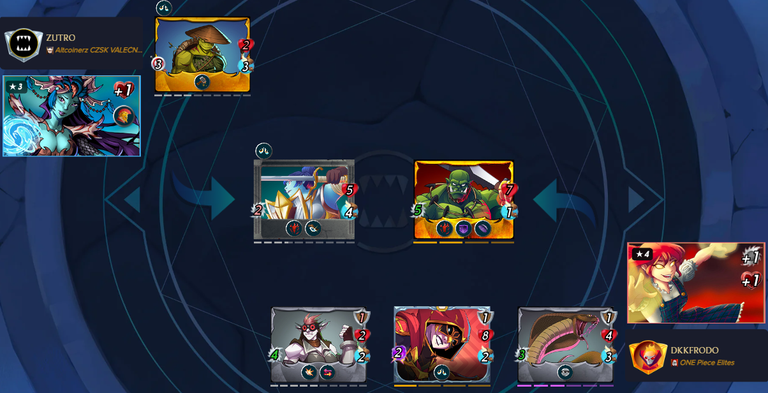
1st & 2nd Round
- After the first two rounds the board was still looking quite the same as in the start
- I still had my entire board while my enemy finally lost his first backline monster
- One scary thing was that my backline was being taken down little by little and I had to start moving with him front line to take same damage off my backline
- Great thing was that my enemy played a really high armored monster with only 2hp which meant if my magic monster could get a great fast attack on him the rest of his team would be exposed quite easily
- But anything could still happen so lets keep watching
3rd Round
- Next Round was 50/50 for me as I managed to take down my enemies first tank but after that I waisted my Grum Flameblades 5 damage melee attack
- But that aside I was still on the path to victory in my opinion
- Next round I was going to take down my enemies last tank and hopefully one of his damage dealers
- Lets hope for the best and keep watching
4th Round
- 4th Round was so huge for me as I managed to take down my enemies last tank and one of his damage dealers
- At this point I felt 100% safe of my victory in this battle
- Next round I was taking down his only ranged monster deleting the ability to repair his armor and focusing my entire damage on his last monster
- Lets make one more stop before the victory screen
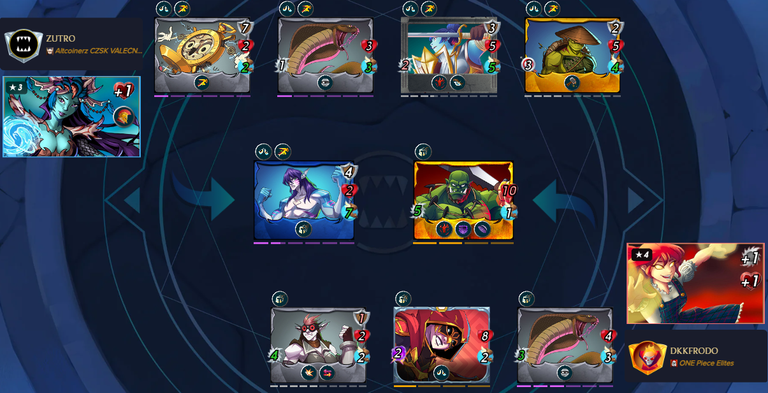
5th Round
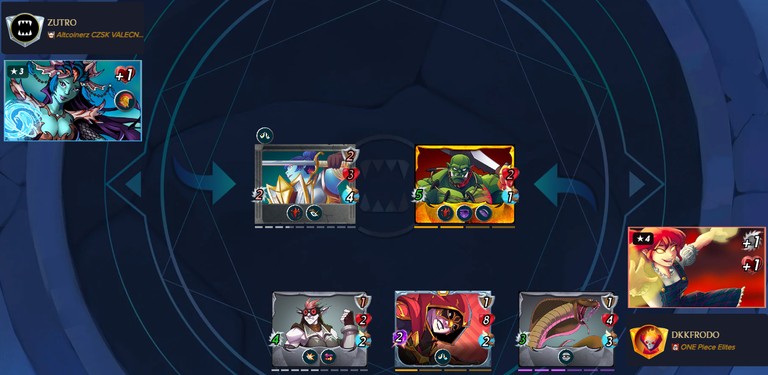
- Last stop after the 5th round and now you can see how sure this victory was going to be
- While I still had my entire board my enemy was on his last on only monster
- Now I just needed to wait for the start of the next couple of rounds and then face my victory
6th & 7th Round

- It took me 2 rounds to kill my enemies last standing monster as he sadly got a take down on my Grum Flameblade in the second to last round
- After his Isgald Vorst had fallen I took the victory
- Battle Replay Link
Summary
- This battle was definitely heavily one sided but still fun to watch
- The strategy to take away from this battle is the basic Demoralize and Shield backline combo
- This was also my first battle with Emberguard that I just recently unboxed and I have to say I really like him and will be playing him a lot more
- If you also would like to hop on the Splinterlands train feel free to use my Referral
Thanks for reading and thanks for all the upvotes, reblogs, comments and follows. And till the next challenge, KEEP BATTLING!
0
0
0.000
Delegate Tokens and HP to Fallen Angels to earn weekly rewards!
Delegate | Join to the guild
Thanks for sharing! - @cieliss
