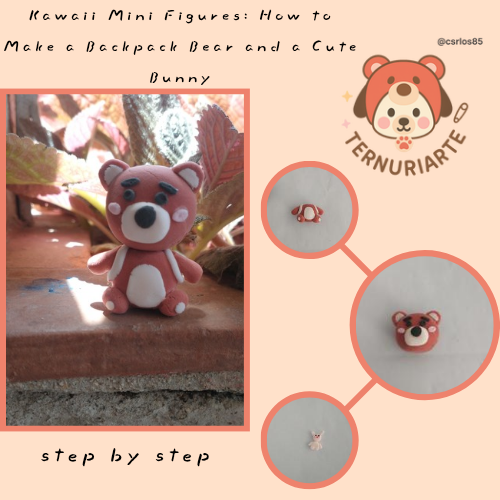
Kawaii Mini Figures: Tutorial to Create a Bear with a Backpack and a Bunny
¡Hola, creadores de Hive!
Espero que estén teniendo un día lleno de inspiración y ganas de crear. Hoy quiero compartir con ustedes una manualidad súper tierna y divertida: un osito con mochila acompañado de su pequeño amigo conejito, ambos modelados en foami moldeable. Son figuras ideales para decorar tu espacio de trabajo, regalar o simplemente disfrutar del proceso creativo. El osito lleva su mochila lista para la aventura, y el conejito, en versión mini, le da un toque aún más encantador a la escena. Espero que les guste el resultado y se animen a hacer su propia versión. Recuerden que pueden seguir los pasos tal cual o darle su estilo único.
Hello, Hive creators!
I hope you're having a day full of inspiration and creativity. Today, I want to share with you a super cute and fun craft: a little bear with a backpack, accompanied by his tiny bunny friend—both modeled in moldable foam. These figures are perfect for decorating your workspace, giving as gifts, or simply enjoying the creative process. The bear has his backpack ready for adventure, and the mini bunny adds an extra touch of charm to the scene. I hope you like the result and feel inspired to make your own version. Remember, you can follow the steps exactly or add your own unique style.

A continuación les mostré paso a paso la realización de mi trabajo. Comenzaré mostrando los materiales
Next, I'll show you step by step how I made my project. I'll start by displaying the materials.
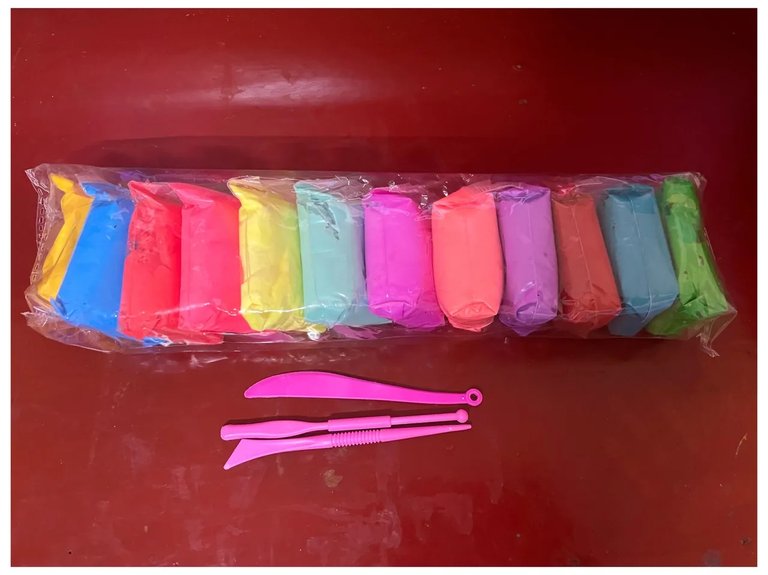
MATERIALES/ MATERIALS
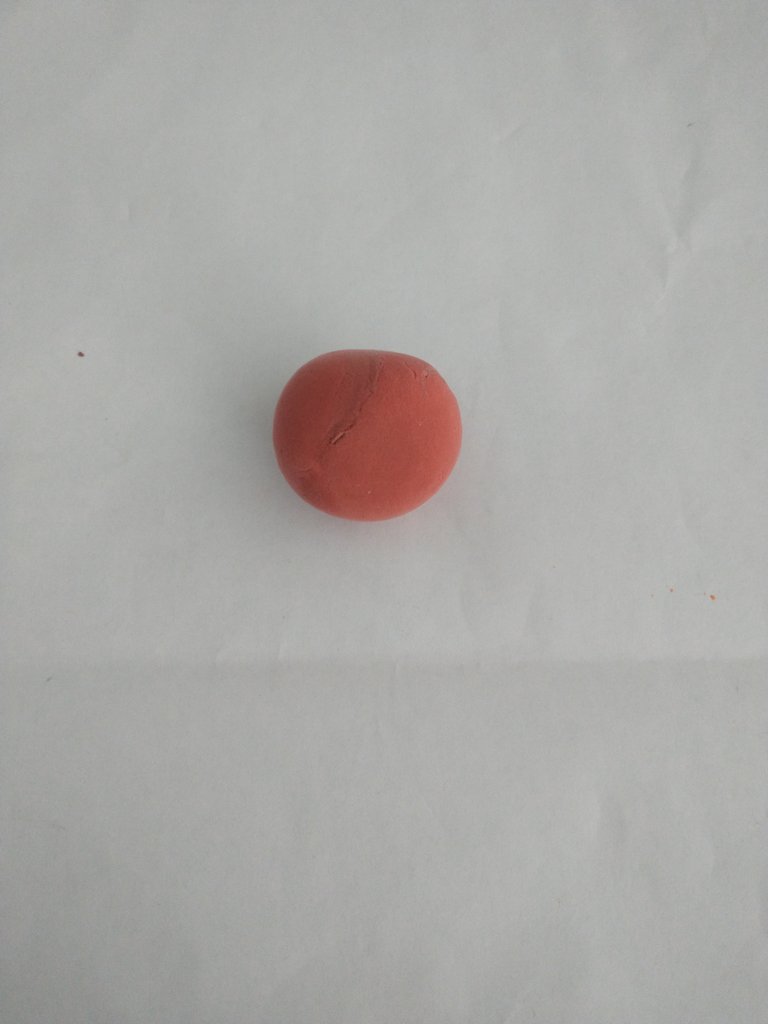
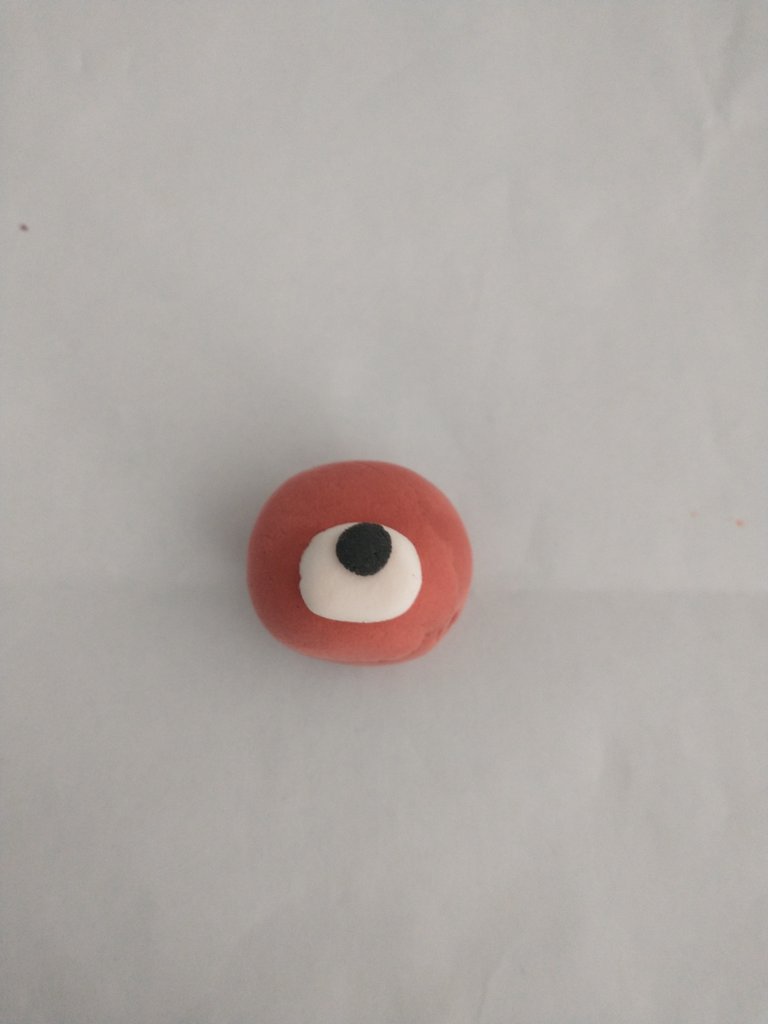
Step / Paso 1
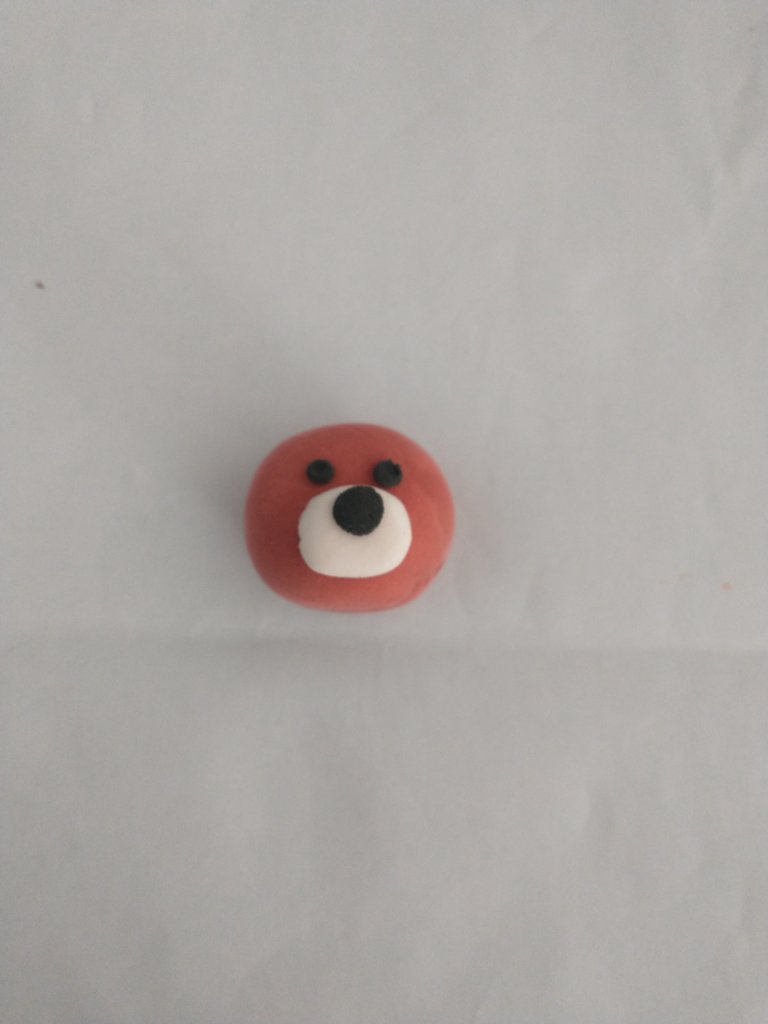
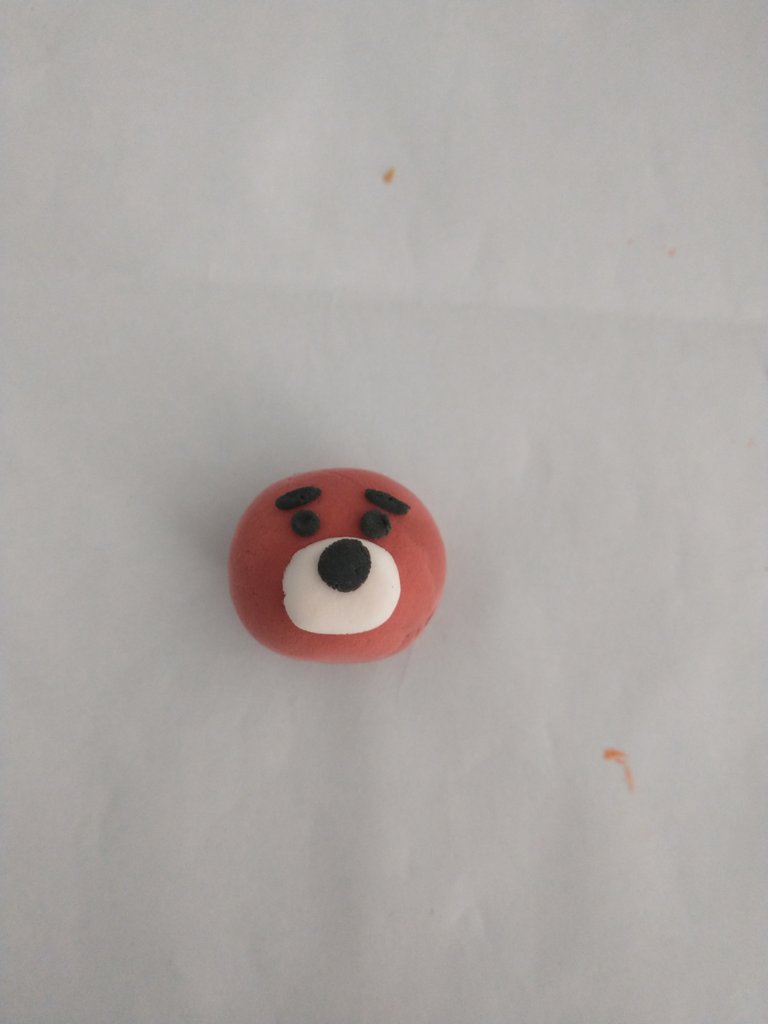
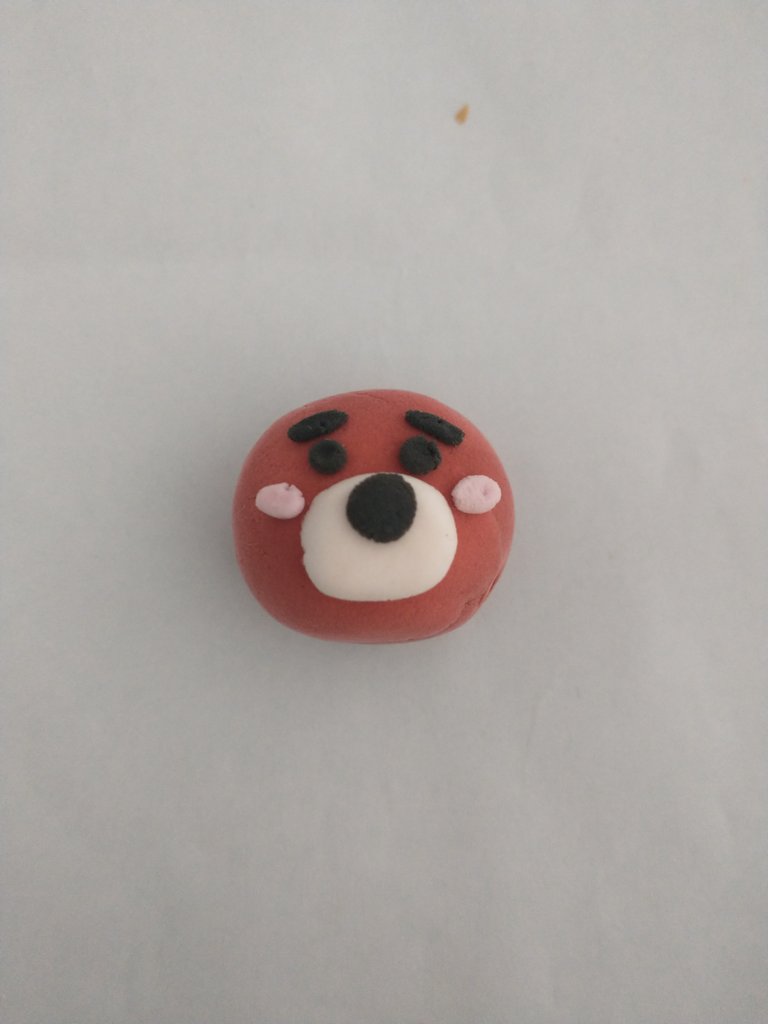
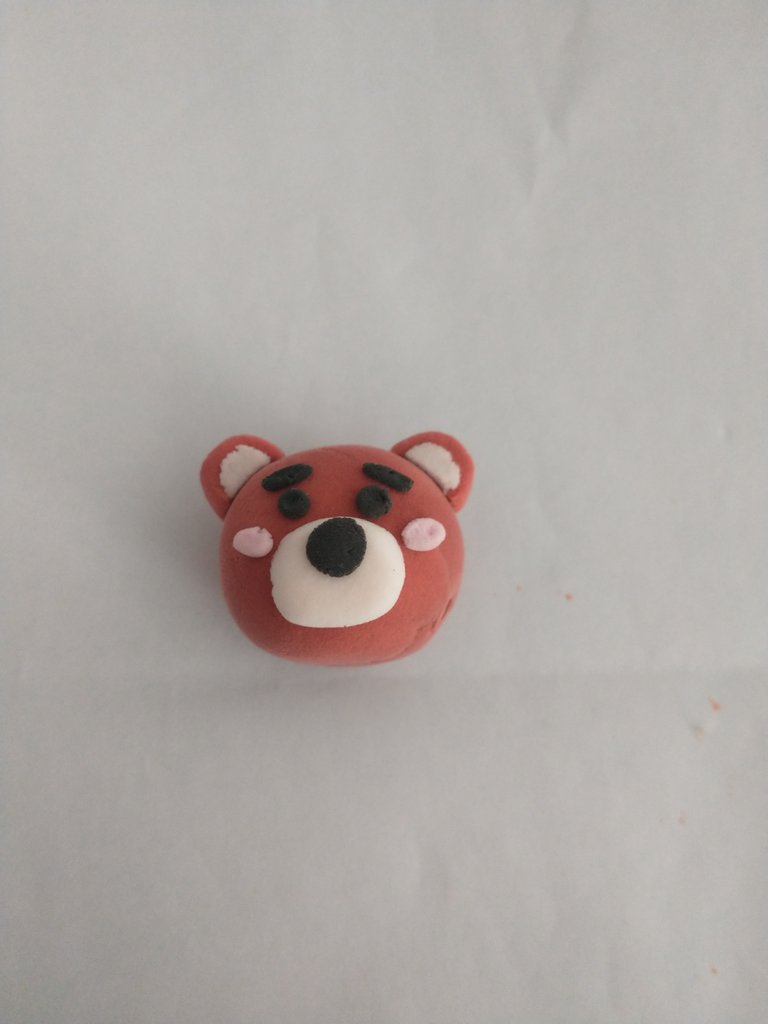
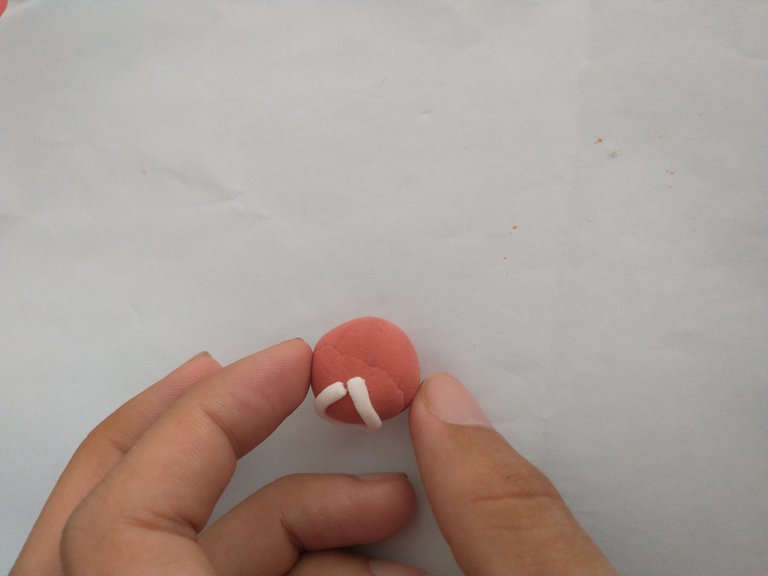
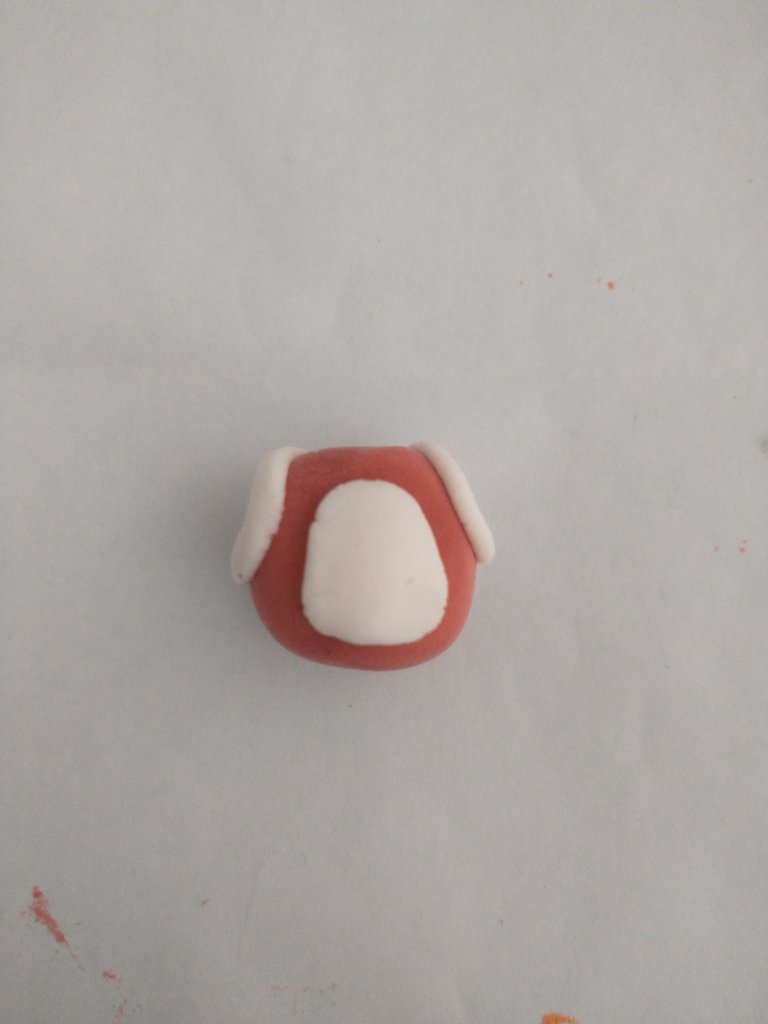
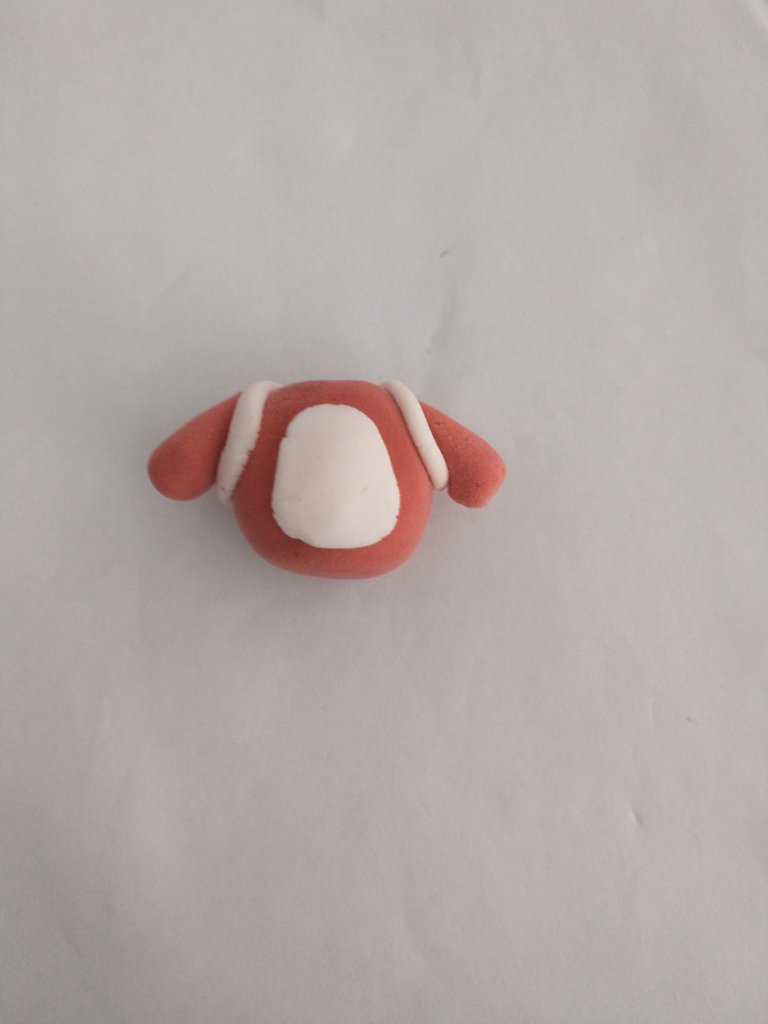
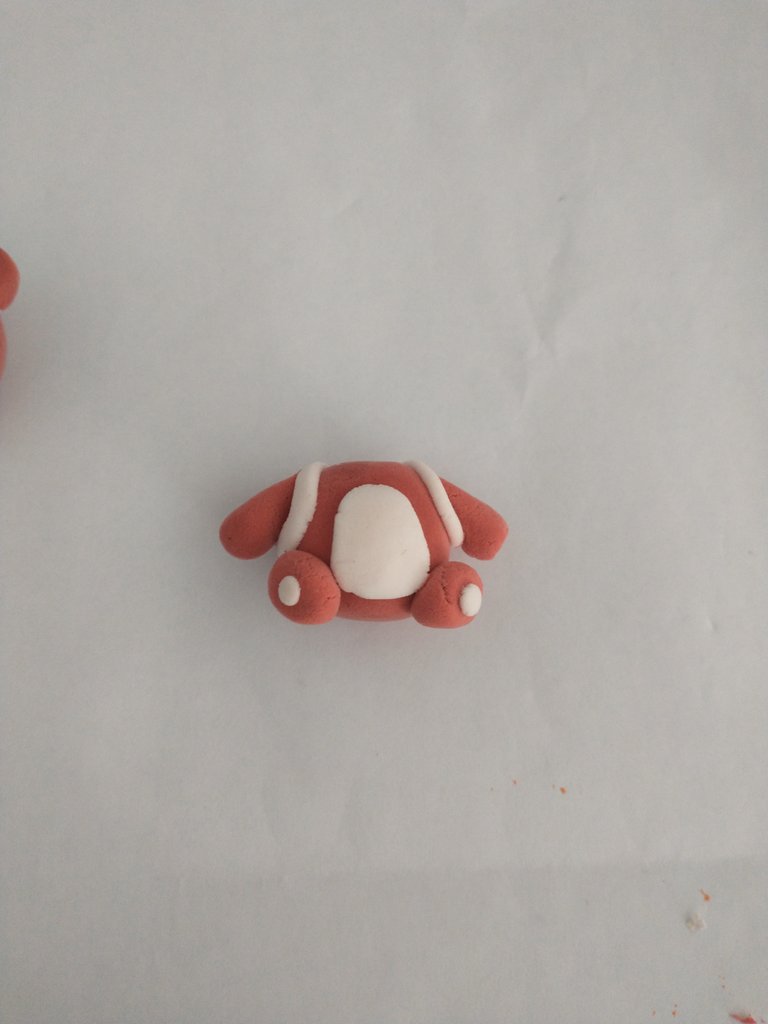
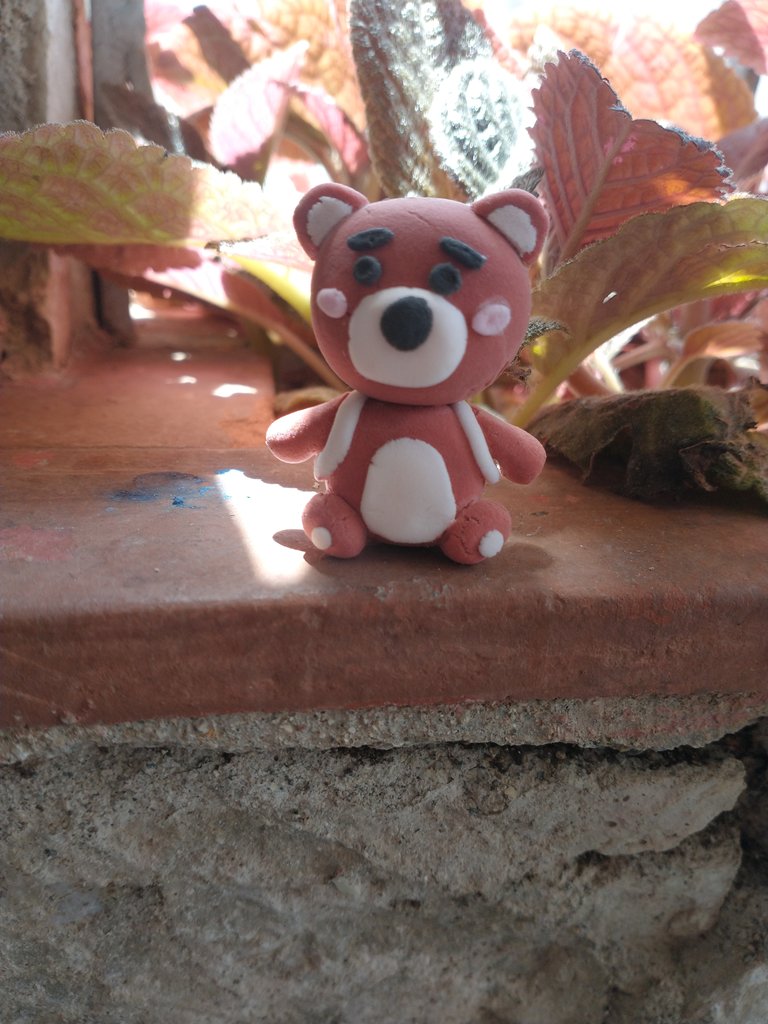
Comenzaremos moldeando la cabeza en color marrón. Luego, con masa beige, formaremos el hocico en forma ovalada y lo colocaremos en la parte inferior del rostro. Sobre este, añadiremos un pequeño círculo negro para crear la nariz. Para los ojos y las cejas utilizaremos masa negra: formamos dos círculos para los ojos, y para las cejas, estiramos una porción de masa y la cortamos con ayuda de una cuchilla. A continuación, hacemos dos óvalos en color rosa para simular el sonrojo y los colocamos a los lados del hocico. Para las orejas, moldeamos un círculo marrón, colocamos encima otro círculo beige un poco más pequeño, lo cortamos por la mitad y obtenemos dos orejas que fijaremos en los laterales superiores de la cabeza.
We will start by shaping the head in brown. Then, using beige clay, we’ll form an oval-shaped snout and place it on the lower part of the face. On top of this, we’ll add a small black circle to create the nose. For the eyes and eyebrows, we’ll use black clay: shape two circles for the eyes, and for the eyebrows, stretch a portion of clay and cut it with a craft knife. Next, we’ll make two pink ovals to simulate blushing and place them on each side of the snout. For the ears, mold a brown circle, place a slightly smaller beige circle on top, cut it in half, and you’ll have two ears to attach to the upper sides of the head.
 |  |  |
 |  |  |
 |  |
Step / Paso 2
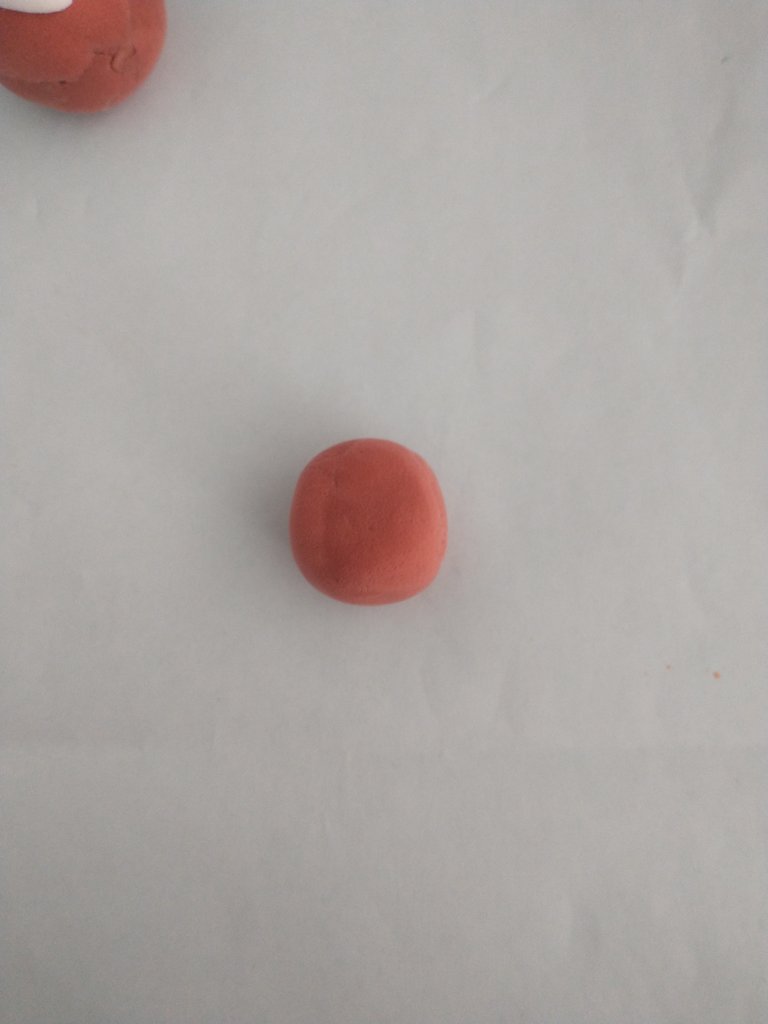
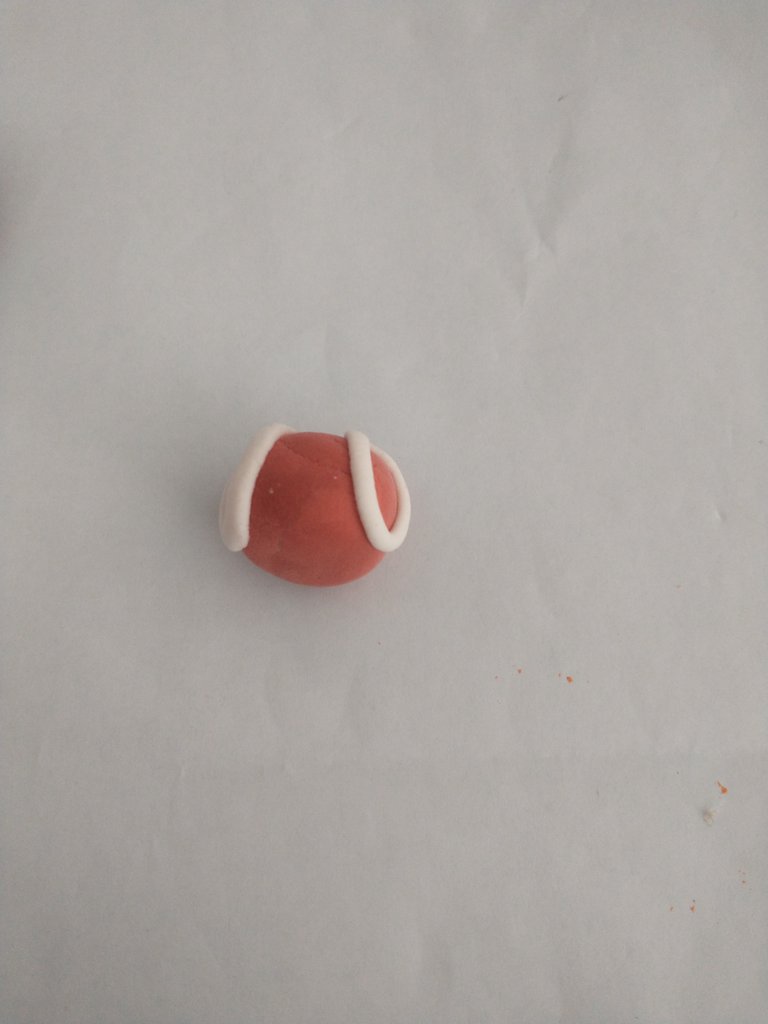
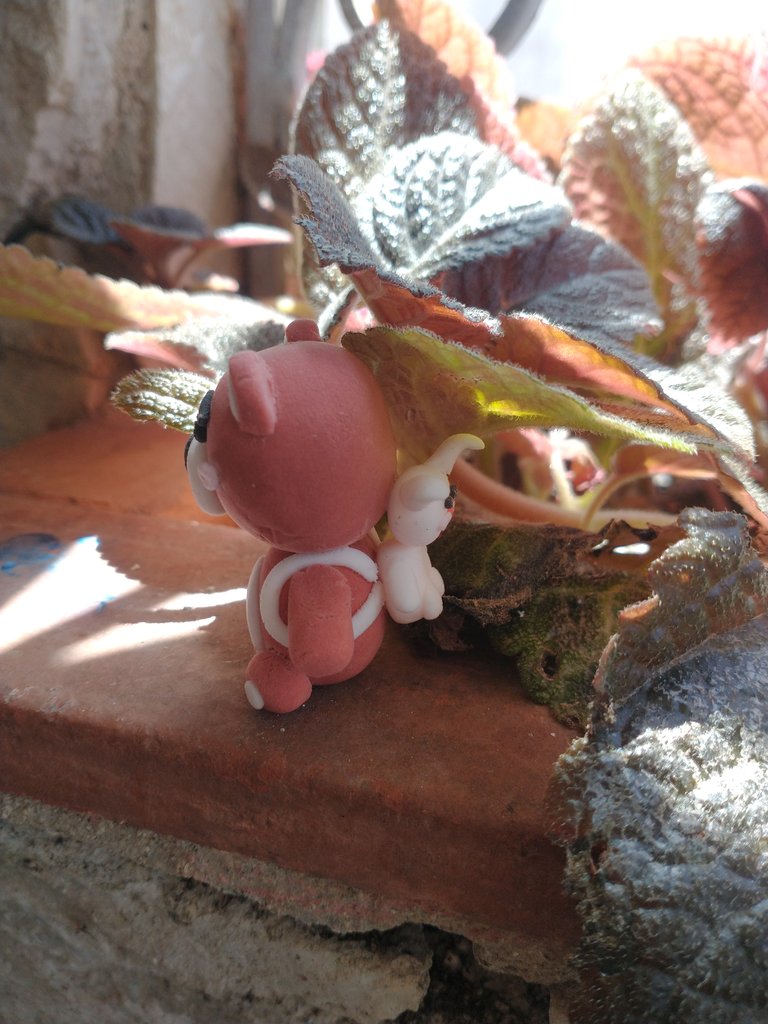
Continuamos moldeando el cuerpo con masa del mismo color marrón que la cabeza. Luego, estiramos dos tiras de masa beige y las colocamos a los lados del cuerpo, llevándolas hacia la espalda. Estas formarán las correas de la mochila. Con la misma masa beige modelamos un óvalo que será la pancita del osito y lo colocamos en el centro del cuerpo, en la parte frontal. Para los brazos, moldeamos dos formas de lágrima en color marrón y las fijamos a los laterales del cuerpo, entre las correas. Finalmente, para las patitas, formamos dos círculos marrones. Encima de cada uno, colocamos un círculo más pequeño en color beige para simular la almohadilla.
We continue by shaping the body using the same brown clay as the head. Then, we stretch two beige strips of clay and place them on the sides of the body, bringing them around to the back. These will form the backpack straps. With the same beige clay, we shape an oval that will be the bear’s belly and place it in the center of the front of the body. For the arms, we mold two teardrop shapes in brown and attach them to the sides of the body, between the straps. Finally, for the feet, we form two brown circles. On top of each one, we place a smaller beige circle to simulate the paw pad.
 |  |  |
 |  |  |
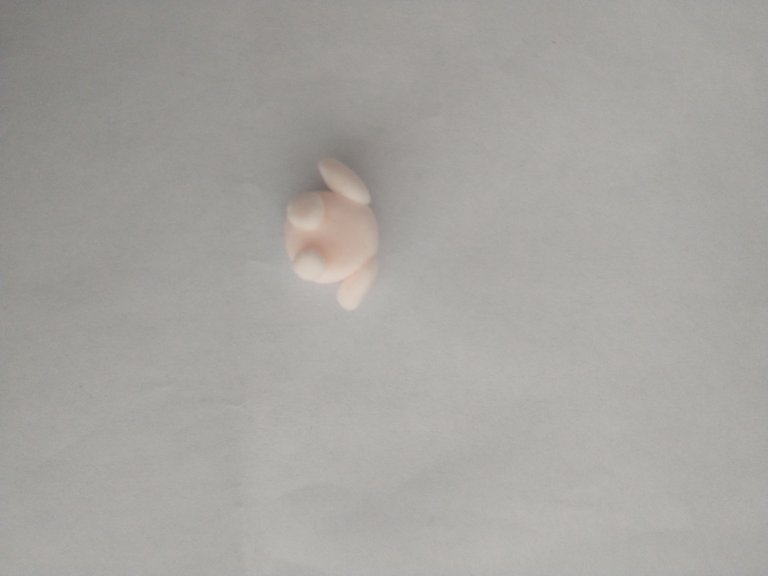
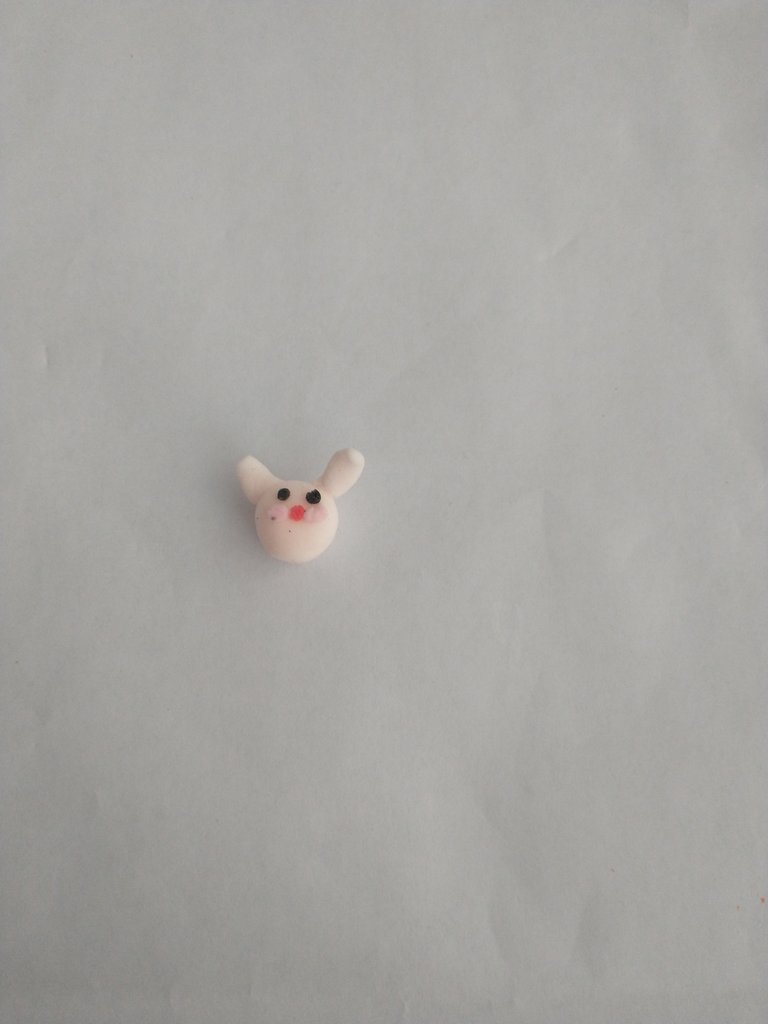
Step / Paso 3
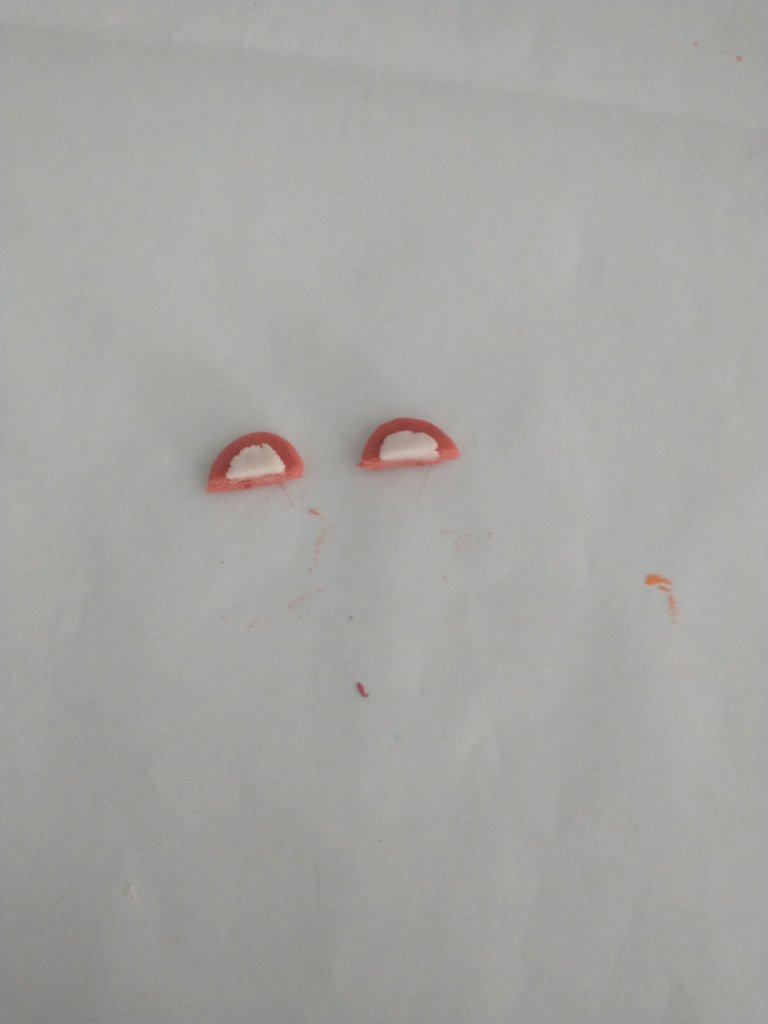
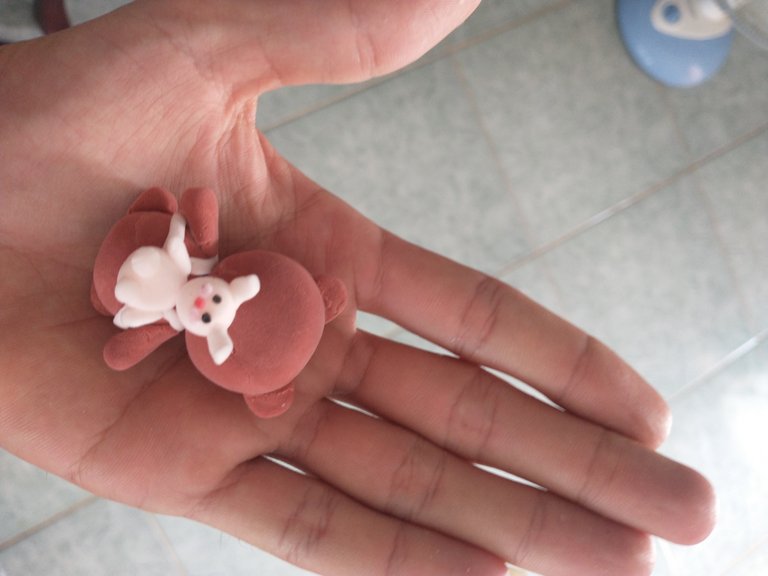
Moldeamos un círculo beige que será la cabeza del conejito. Luego, formamos dos pequeños círculos negros para los ojos y uno rojo para la nariz, que colocamos en el centro del rostro. Para dar un toque tierno, añadimos dos óvalos en color rosa a los lados de la nariz, simulando el sonrojado. A continuación, estiramos dos porciones de masa beige, las aplanamos ligeramente y afinamos uno de los extremos para darles forma puntiaguda. Luego las curvamos para formar las orejas y las fijamos en la parte superior de la cabeza. Moldeamos el cuerpo en proporción más pequeña que el del osito, y con el mismo color realizamos los brazos y las patitas, siguiendo el mismo estilo pero a una escala reducida.
We mold a beige circle that will be the bunny's head. Then, we form two small black circles for the eyes and a red one for the nose, placing it in the center of the face. To add a cute touch, we add two pink ovals on each side of the nose to simulate blushing. Next, we stretch two portions of beige clay, flatten them slightly, and taper one end to create a pointed shape. Then we curve them to form the ears and attach them to the top of the head. We shape the body in a smaller proportion than the bear's, and using the same color, we make the arms and legs, following the same style but at a reduced scale.
 |  | 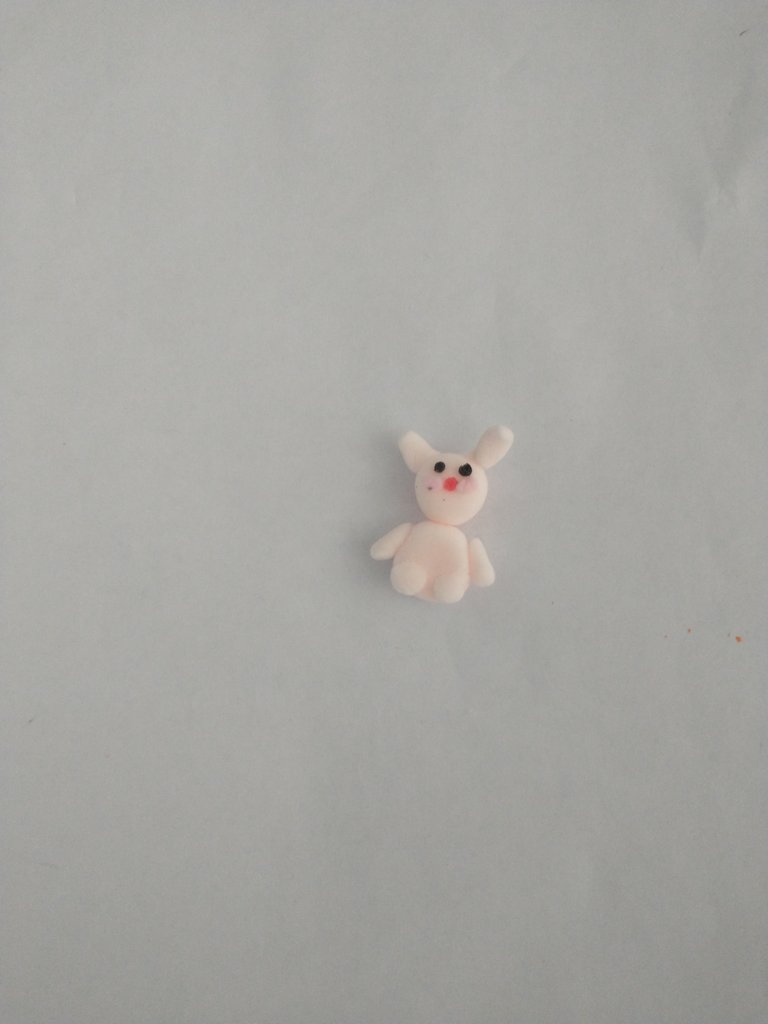 |
Resultado / Result
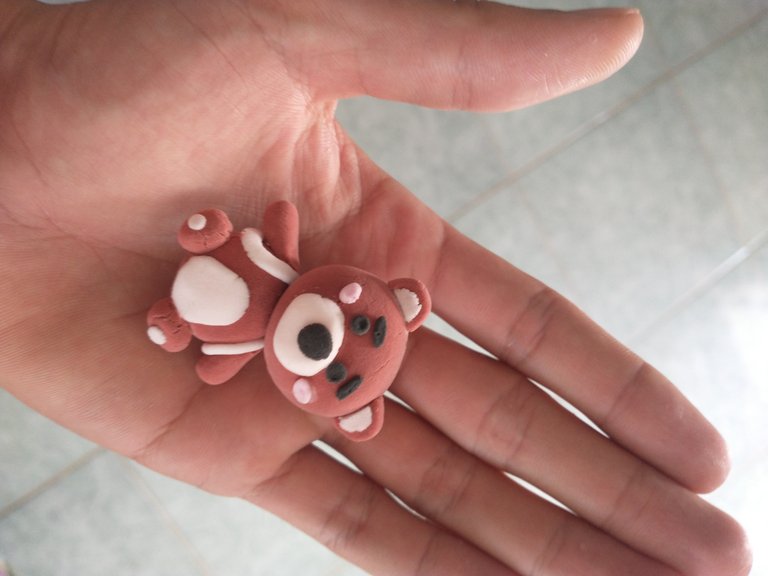 |  | |
 |  |
Todo el proceso de creación y las fotos mostradas en este tutorial fueron realizados por mí.
The entire creation process and all the photos featured in this tutorial were done by me.
Si te ha gustado este post, no olvides dejar tu comentario y seguirme para no perderte las próximas publicaciones.
Me encantaría leer tu opinión y conocer tus ideas para futuras creaciones. ¡Un saludo! 😊
If you enjoyed this post, don’t forget to leave a comment and follow me for more upcoming creations.
I’d love to hear your thoughts and get ideas from you for future projects. Warm regards! 😊
Congratulations @csrlos85! You have completed the following achievement on the Hive blockchain And have been rewarded with New badge(s)
Your next target is to reach 4750 upvotes.
You can view your badges on your board and compare yourself to others in the Ranking
If you no longer want to receive notifications, reply to this comment with the word
STOPThese kawaii mini figures are absolutely adorable. Your step-by-step process was clear. great craft.
selected by @stevenson7
Thank you so much! 😊 I'm really happy you liked the figure and found the step-by-step process clear. I appreciate your kind words
Thank you very much for your support! It really means a lot and motivates me to keep creating and sharing. 🙏😊
Ay pero qué monada! pensé que el conejito sería su compañero, no su mochila jajajaja me llevé una sorpresa al final.
Te quedó genial!. Tengo una pregunta curiosa, ese material de foami moldeable es como una plastilina o como arcilla? o pasta fría moldeable? es que es la primera vez que lo leo como foami 🙈
Jajaja me encantó eso de que pensaste que el conejito era su compañero 😄 Me alegra que te haya sorprendido el final. ¡Gracias por tu comentario tan bonito!
Sobre tu pregunta: el foami moldeable es un material súper ligero y esponjoso, algo así como una mezcla entre plastilina y goma eva. Viene en colores, se amasa fácilmente, no mancha y se seca al aire sin necesidad de horno.
Entonces es más práctico que la pasta fría. Mi abuelita trabaja con ella, por eso pensé que podría ser eso pero este material es otro y lo bonito es que cada uno tiene su técnica. Me encantó todo el proceso, lo hiciste super bien. Saludos y gracias por la aclaratoria!
Me alegra haber Sido de ayuda. Le invito a que se anime a probar este material en versátil, sencillo y de fácil acceso
Saludos🤗
¡Enhorabuena!
✅ Has hecho un buen trabajo, por lo cual tu publicación ha sido valorada y ha recibido el apoyo de parte de CHESS BROTHERS ♔ 💪
♟ Te invitamos a usar nuestra etiqueta #chessbrothers y a que aprendas más sobre nosotros.
♟♟ También puedes contactarnos en nuestro servidor de Discord y promocionar allí tus publicaciones.
♟♟♟ Considera unirte a nuestro trail de curación para que trabajemos en equipo y recibas recompensas automáticamente.
♞♟ Echa un vistazo a nuestra cuenta @chessbrotherspro para que te informes sobre el proceso de curación llevado a diario por nuestro equipo.
🥇 Si quieres obtener ganancias con tu delegacion de HP y apoyar a nuestro proyecto, te invitamos a unirte al plan Master Investor. Aquí puedes aprender cómo hacerlo.
Cordialmente
El equipo de CHESS BROTHERS