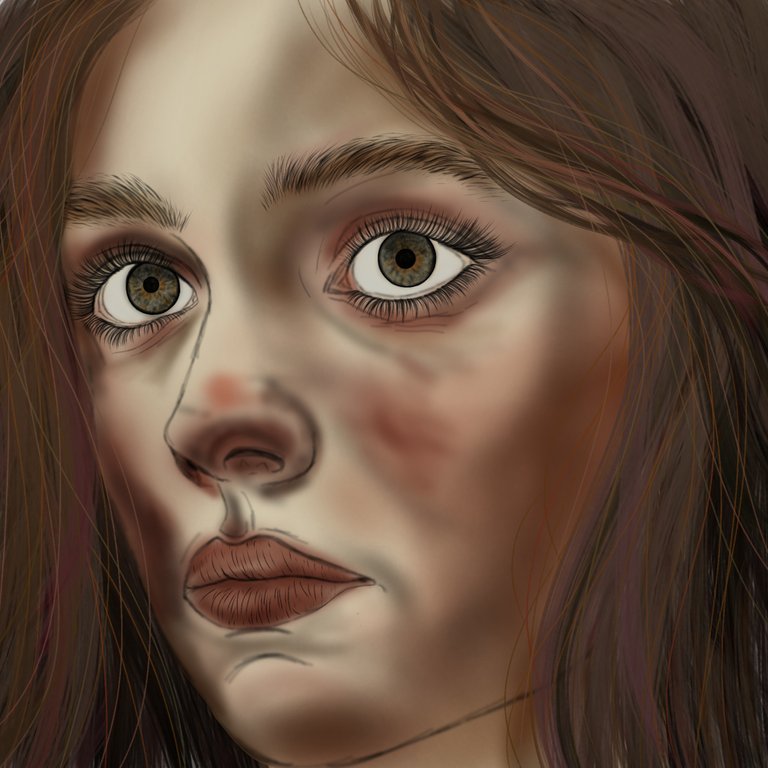
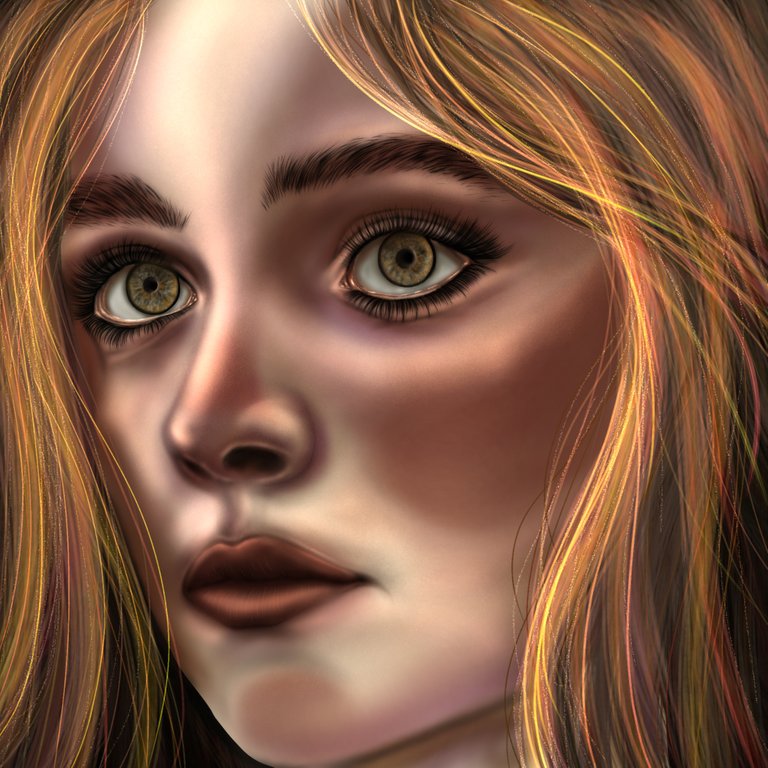
Resplandor💫Glow
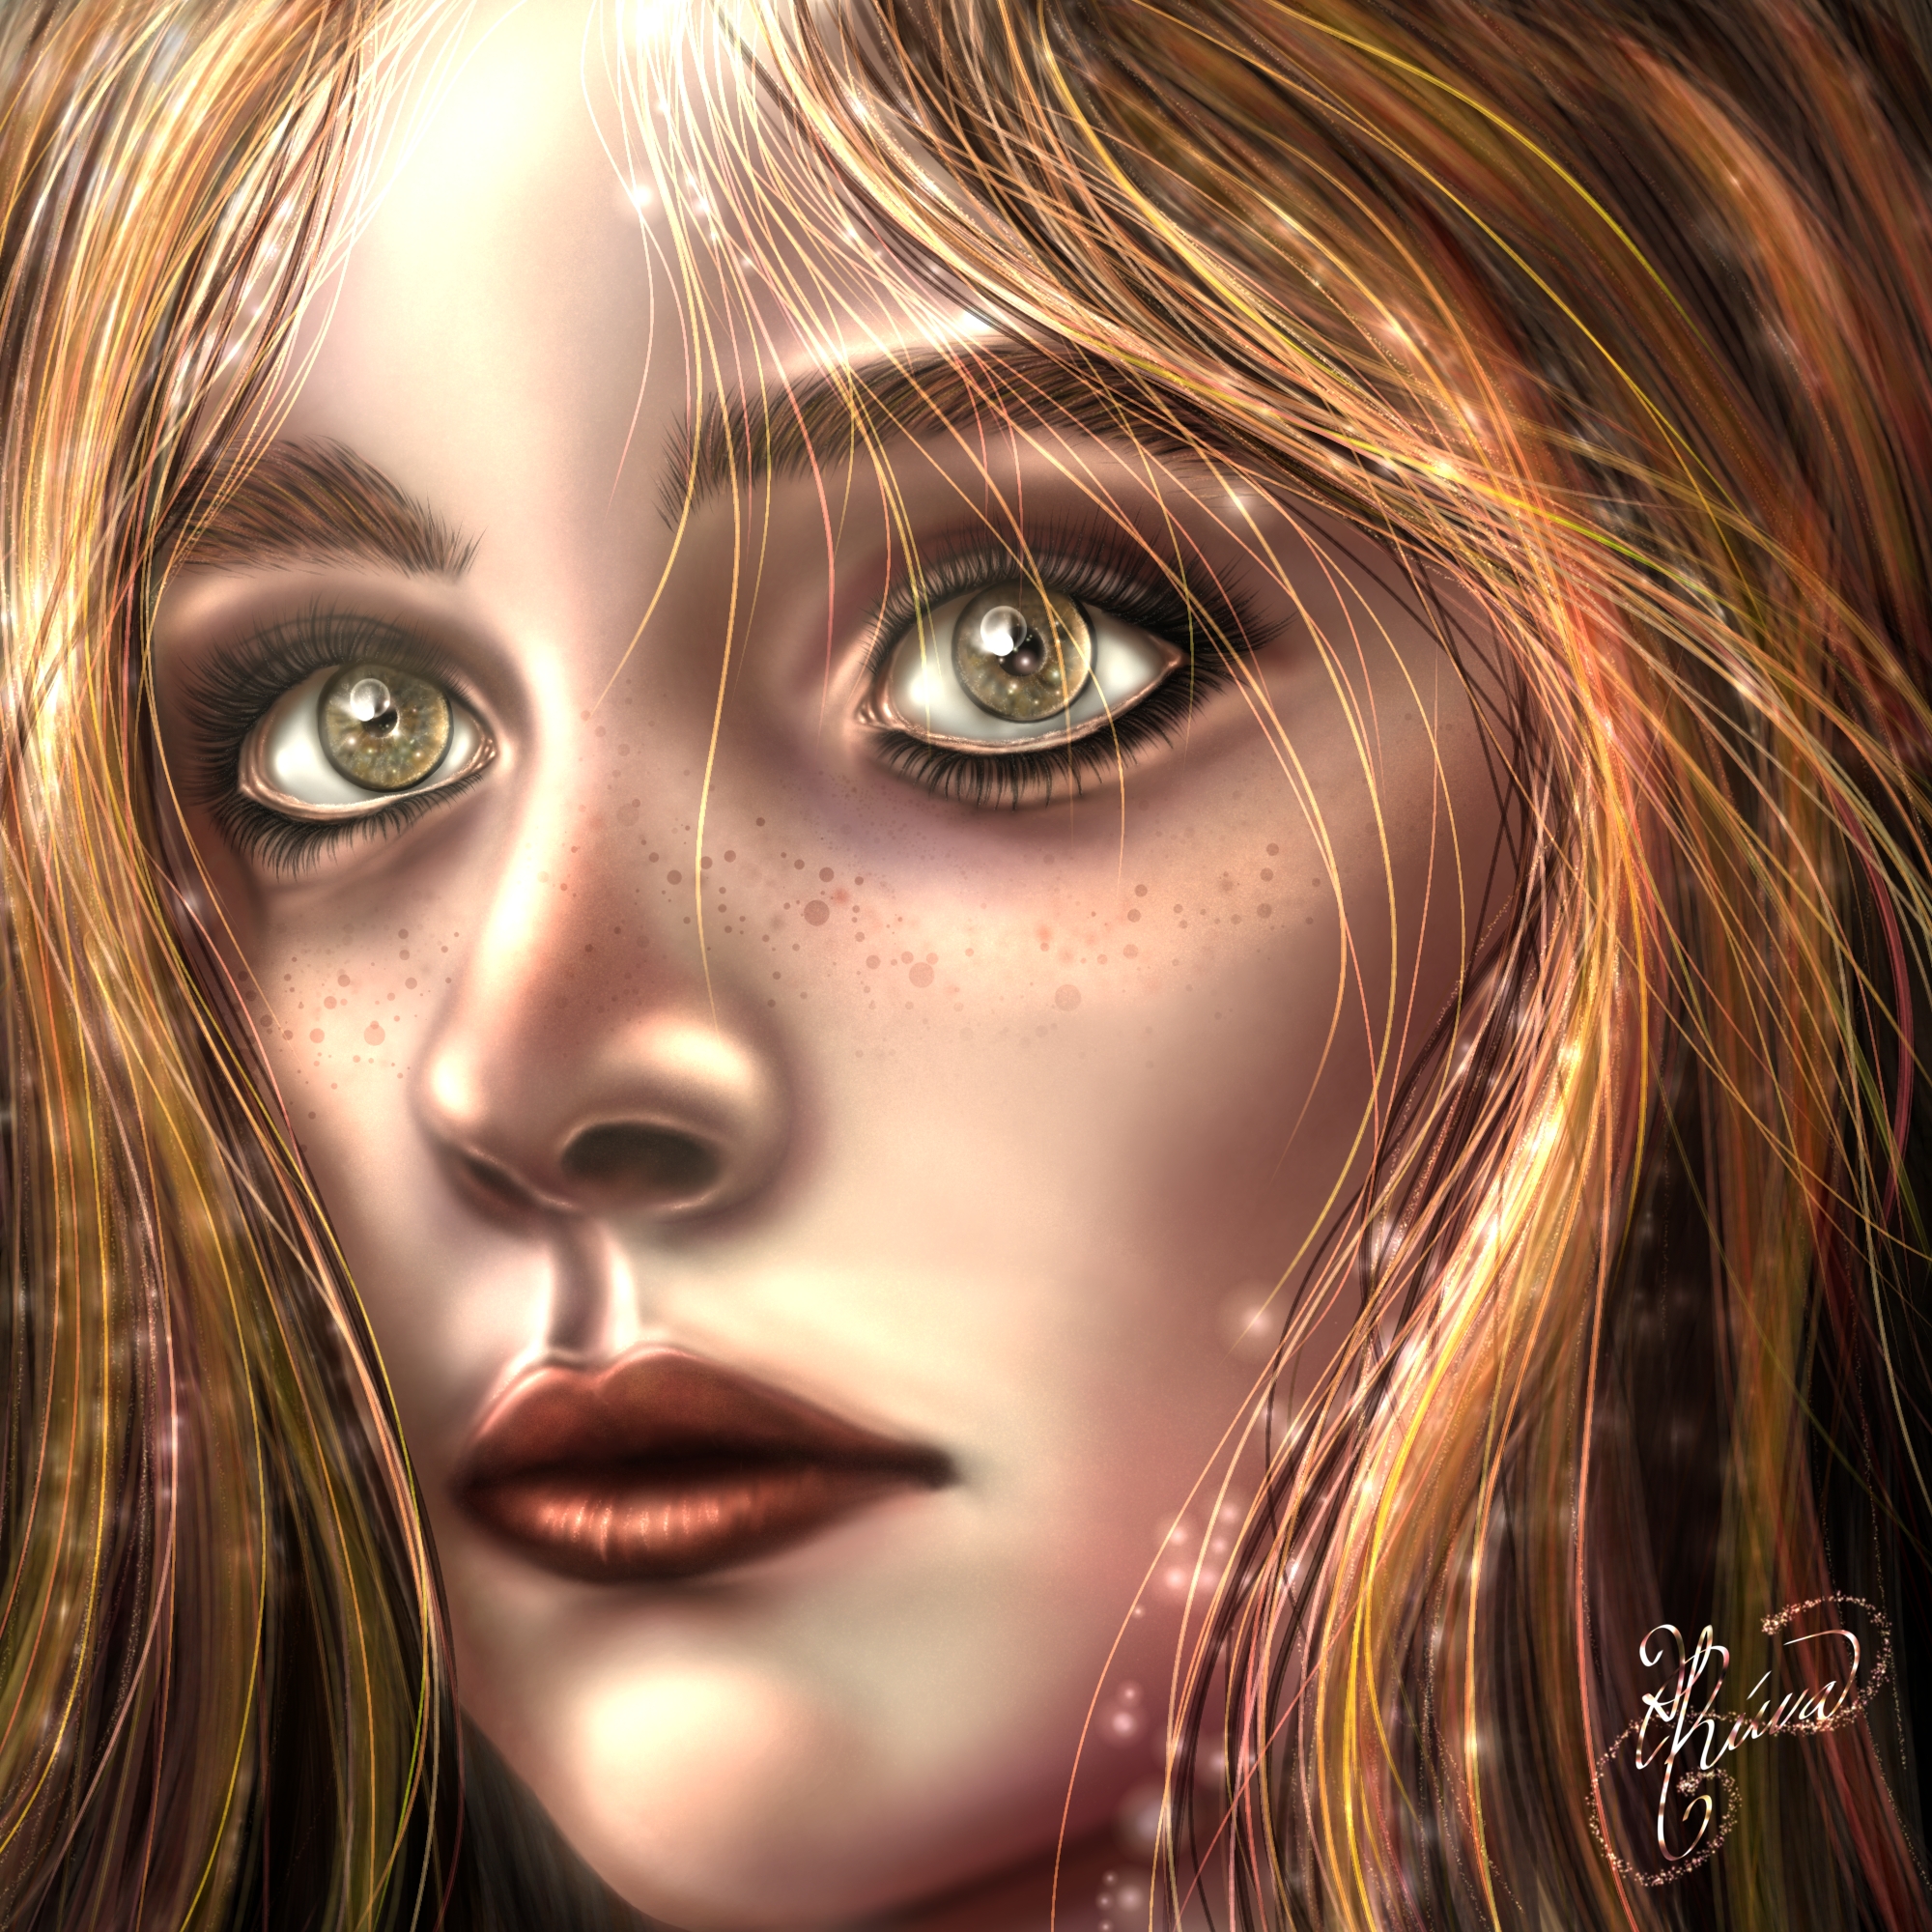
Hola! 😁 Mis saludos a todos ustedes, deseando que se encuentren muy bien. Aquí en este nuevo post que les traigo quise seguir ilustrando en este estilo del surrealismo y me dediqué a representar un rostro de una joven titulandolo "Resplandor". Quise realizar un rostro donde pudiera expresar los brillos y luminosidad de algo hermoso y que a la vez denotaran una tranquilidad apacible por lo que se ve. Realmente me gustó el resultado logrado en esta ocasión y al verlo me transmite una paz. Espero les guste y me cuenten en los comentarios que les trasmite esta pieza.🙂
Hello my dear artists I send my greetings to all of you, wishing you all well. Here again in this post I wanted to continue illustrating this style of surrealism and I dedicated myself to represent a face of a young woman titled "Radiance". I wanted to make a face where I could express the brightness and luminosity of something beautiful and at the same time denote a peaceful tranquility from what you can see. I really liked the result achieved on this occasion and when I see it, it transmits a peace to me. I hope you like it and tell me in the comments what this piece transmits to you.

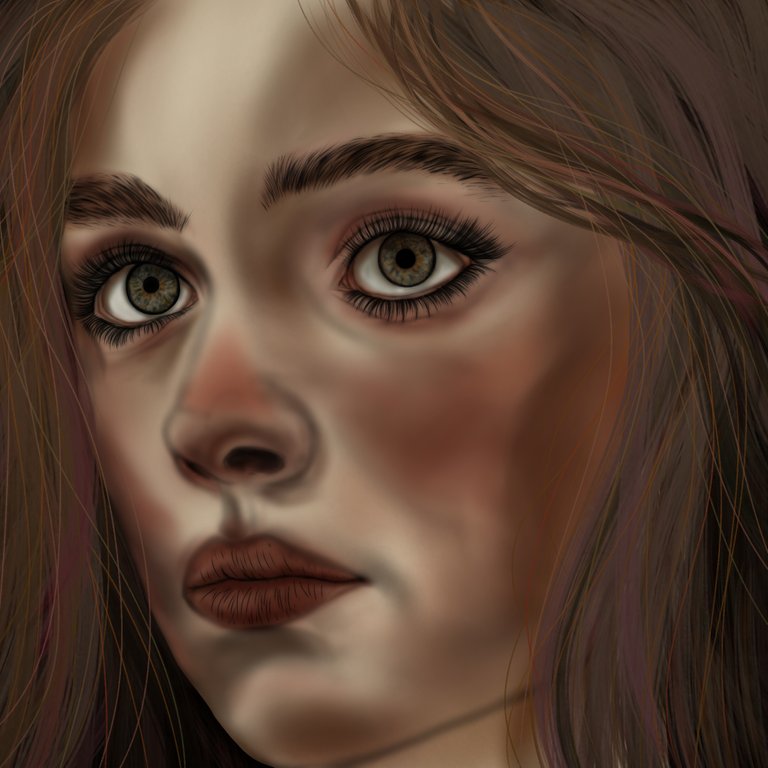
Etapas del dibujo/Drawing stages
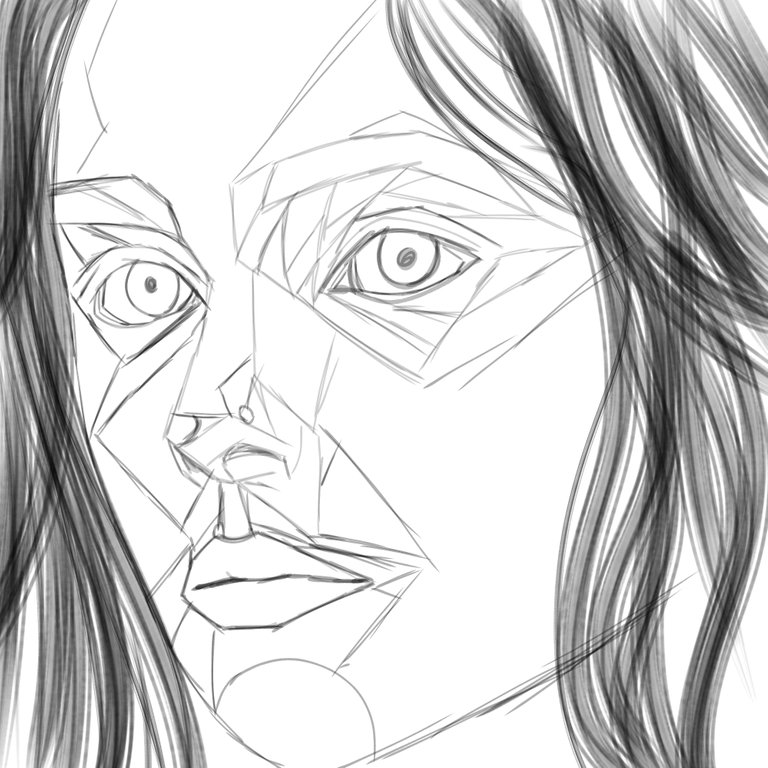
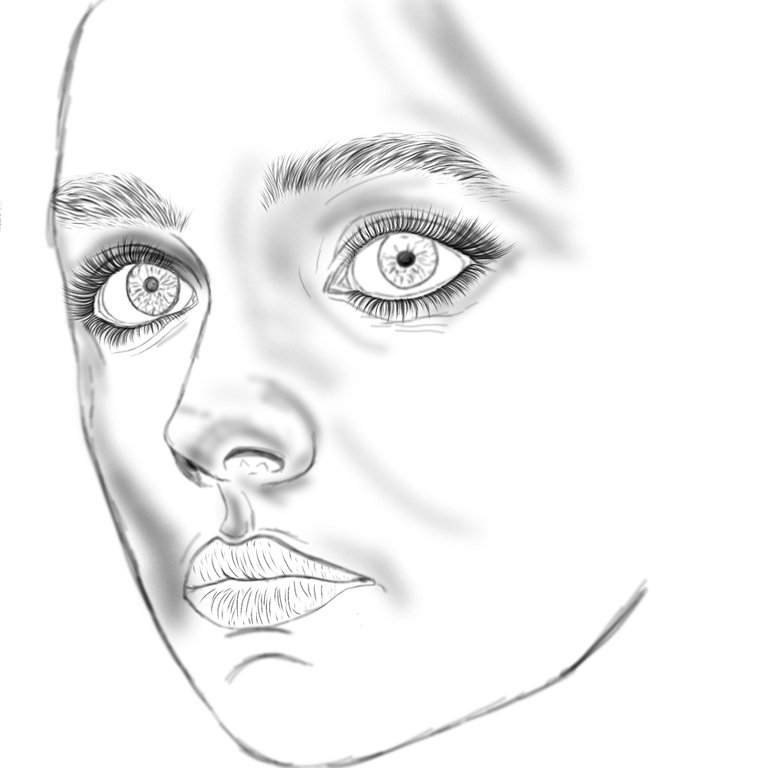
Primeramente realice un boceto simple para pasar a un delineado más definido utilizando para los trazos un Aerógrafo y una brocha tipo Pelo. Seguidamente seguí con las capas de colores base en un método de mezcla Normal, aumentando y bajando la saturación y opacidad se los colores, difuminando algunas sombras que me permitieron mayor profundidad.
First I made a simple sketch to move on to a more defined outline using an airbrush and a hair brush for the strokes. Then I continued with the base color layers in a Normal blending method, increasing and decreasing the saturation and opacity of the colors, blurring some shadows that allowed me more depth.
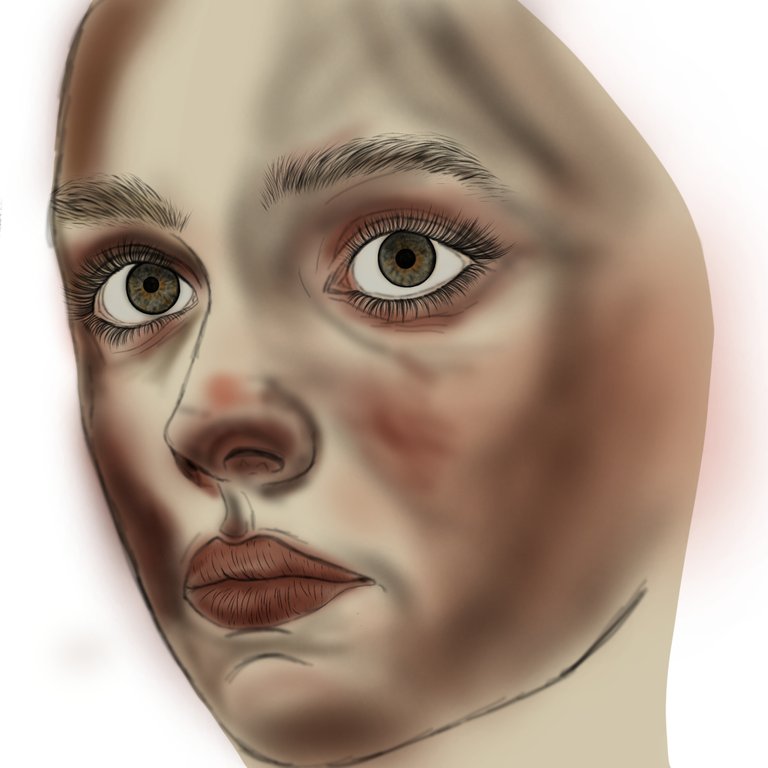
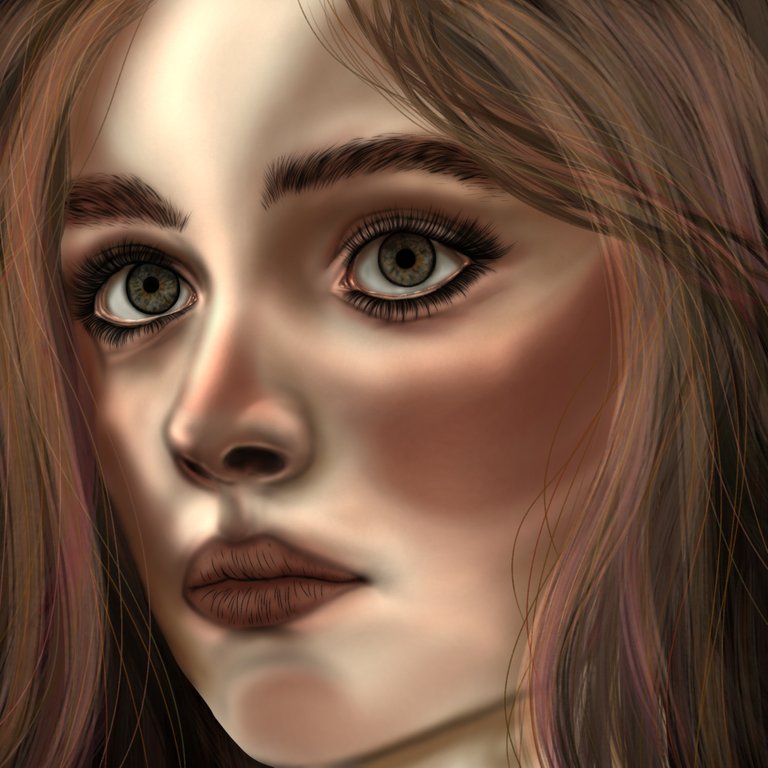
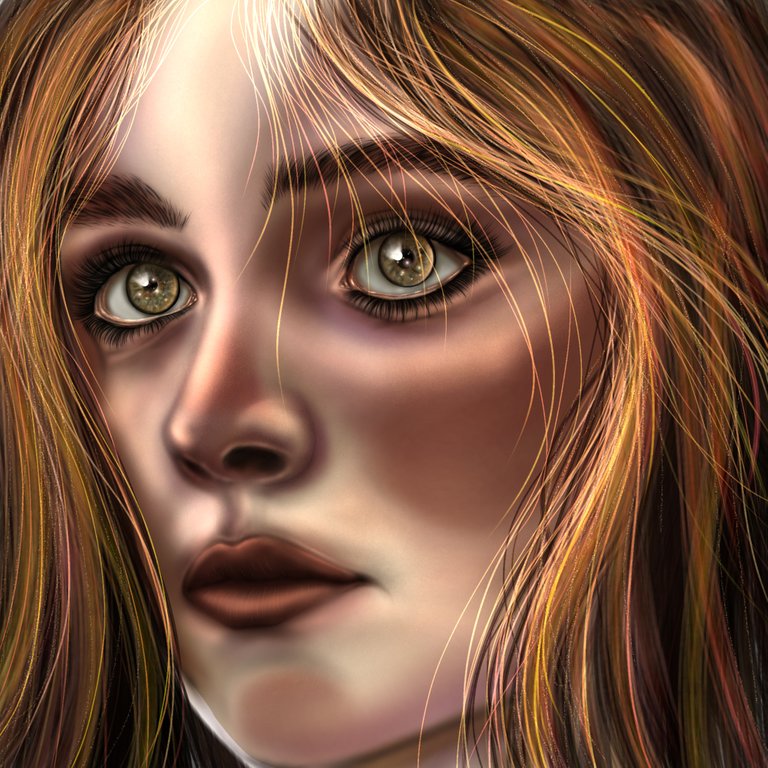
Para esta etapa quise seguir trabajando en otras capas con varios tonos de color para sombrear los rasgos del rostro. Utilizando Multiplicar para dar profundidad y Añadir para agregar los brillos, donde en esta última utilicé un pincel Puntillismo #5 y Brillo a un grosor muy mínimo de 1.0 a 2.0 que me permitió acentuar algunos brillos de los ojos. Quería dar más realismo a los ojos así que añadí con un pincel Erupción un pequeño destello de luz dorada en la parte interna de cada pupila y el iris, donde luego difuminé un poco para dar un efecto de brillo degradado. Trabajé mucho esta parte de la piel, aplicando varios tonos de color entre piel, rosas y lilas, difuminando y mezclando capas para conseguir una mejor mezcla de colores. Me gustó mucho la textura que conseguí con la capa de Añadir con una luz dorada para iluminar la nariz y la frente y en otras zonas del rostro utilizando el mismo pincel de puntillismo, provocando un efecto nacarado. Del mismo modo, trabajé con el pelo añadiendo reflejos con un método de difuminado Normal a Añadir para darle más cuerpo, utilizando un pincel Pelo variando el grosor y el tono entre amarillo y marrón. También me gustó el efecto que le di al pelo utilizando el pincel Brillo con un grosor mínimo, para que el trazo fuera muy lineal, con un método de mezcla Añadir para darle unos reflejos iluminados.
For this stage I wanted to continue working on other layers with various shades of color to shade the features of the face. Using Multiply to give depth and Add to add the shimmers, where in the latter I used a Pointillism #5 brush and Shimmer at a very minimal thickness of 1.0 to 2.0 which allowed me to accentuate some shimmers in the eyes. I wanted to give more realism to the eyes so I added with an Eruption brush a little flash of golden light on the inner part of each pupil and the iris, where I then blurred a little to give a gradient shimmer effect. I worked this part of the skin a lot, applying various shades of color between skin, pinks and lilacs, blurring and blending layers to get a better blend of colors. I really liked the texture I got with the Add layer with a golden light to illuminate the nose and forehead and in other areas of the face using the same pointillism brush, causing a pearlescent effect. Similarly, I worked with the hair adding highlights with a Normal to Add blending method to give it more body, using a Hair brush varying the thickness and tone between yellow and brown. I also liked the effect I gave to the hair using the Shine brush with a minimum thickness, so that the stroke was very linear, with an Add blending method to give it some illuminated highlights.
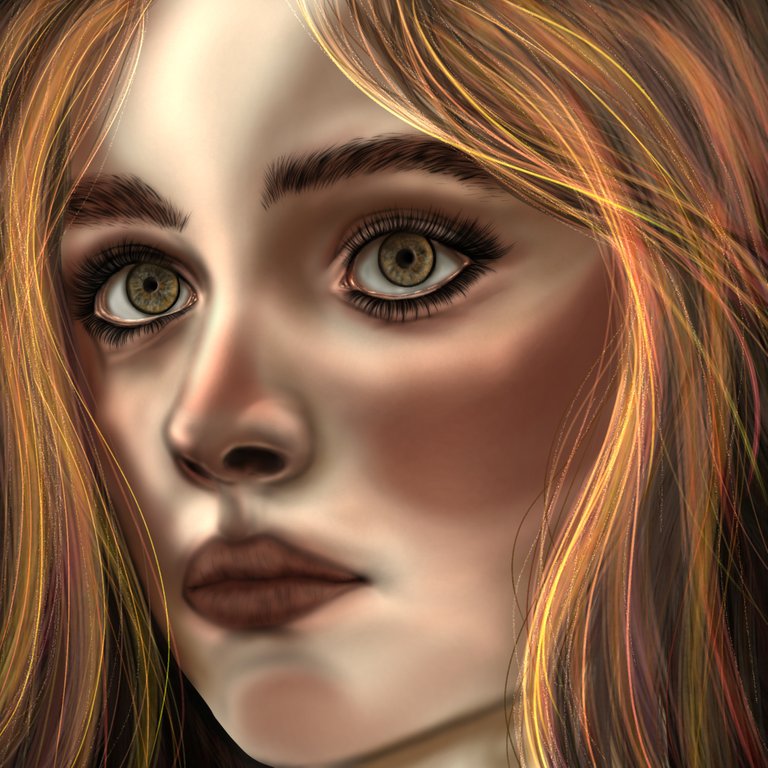
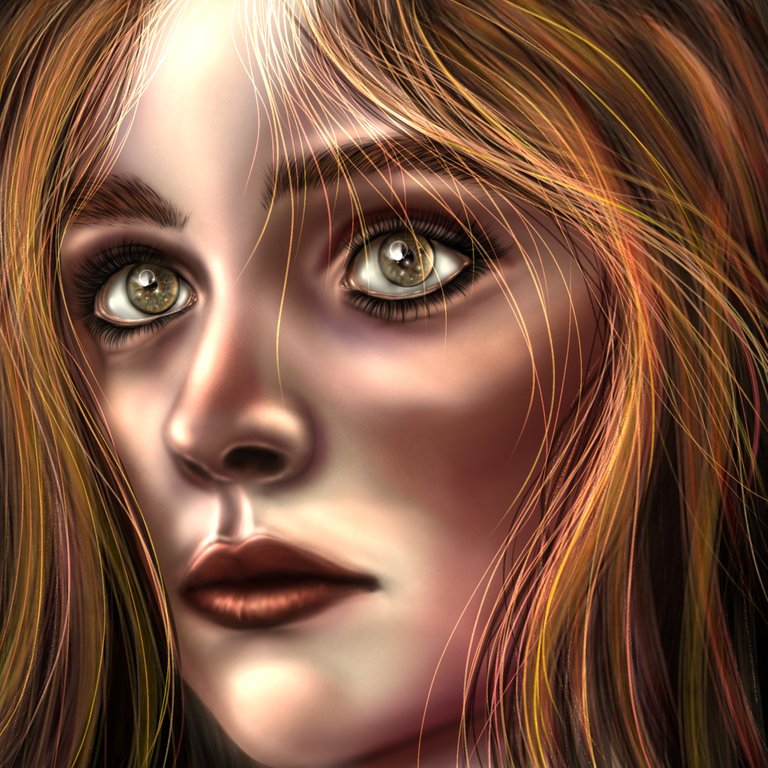
En esta última etapa dediqué ya el trabajo a ubicar más brillos en general, y para definir más los ojos agregue brillos más duros en una nueva capa de Añadir, use los pinceles tipo Brillo y Erupción, también difumine el brillo más duro por un costado, el cual realice con un pincel tipo Rotulador Fuerte y encima de ello agregue con un grosor medio con el pincel Erupción el círculo de luz y terminé dando toques aleatorios y haciendo pequeñas líneas de brillos con la Brocha tipo Brillo jugando con su grosor. Seguidamente, acentúe y difumine algunas sombras, también defini con brillos el contorno de los labios para darle forma, difuminando el mismo. No me sentía muy cómoda con lo saturada que se veía la parte de la mejilla y algunas partes del rostro en general, veía mucha saturación, de manera que en una nueva capa con un método de mezcla Normal y con un pincel Puntillismo #5 con opacidad a la mitad fui aclarando algunas zonas que se veían muy cargadas. Finalmente, agregue algunas pecas y utilice luego difuminado gauseano para luego aplicar unas pecas más definidas con un pincel tipo Pulverizador. Agregue en una capa Añadir con Aerógrafo un color amarillo, el cual bajando su opacidad muy mínima cree un efecto de resplandor sobre el Rostro y parte del cabello y luego agregué algunos brillos por algunos contornos del cabello, a una opacidad media. Y de esta manera logré este arte surrealista del cual me siento muy contenta de culminar ya que es un reto realmente, espero de verdad les guste como he ido evolucionando en esta técnica y lo que he podido lograr con lo aprendido en este fantástico mundo artístico digital.!😄👋🙂😍
In this last stage I dedicated the work to place more glosses in general, and to define more the eyes I added harder glosses in a new layer of Add, I used the Glow and Eruption brushes, I also blurred the harder glow on one side, which I did with a Strong Marker brush and on top of it I added with a medium thickness with the Eruption brush the circle of light and I finished giving random touches and making small lines of glosses with the Glow Brush playing with its thickness. Next, I accentuated and blurred some shadows, also defined the lip contour with glosses to give it shape, blending it out. I didn't feel very comfortable with how saturated the cheek area and some parts of the face in general looked, I saw too much saturation, so in a new layer with a Normal blending method and with a Pointillism #5 brush with half opacity I lightened some areas that looked too heavy. Finally, I added some freckles and then used Gaussian blending and then applied some more defined freckles with a Spray brush. I added in a layer Add with Airbrush a yellow color, which lowered its opacity very minimal to create a glow effect on the face and some of the hair and then I added some glitters for some contours of the hair, at a medium opacity. And in this way I achieved this surrealist art which I am very happy to finish because it is a real challenge, I really hope you like how I have been evolving in this technique and what I have been able to achieve with what I have learned in this fantastic digital art world!!!😄👋🙂😍

Herramientas usadas/Used tools
- Tablet Android
- Ibis Paint X
- Traductor Deepl
- Servidor de imagenes Imgbb
- Dactilopintura digital
HASTA EL PRÓXIMO POST
Detenerse es retroceder
To stop is to go backwards
Qué bonito. Que pinceles usas?
Hola @ramon2024, muchas gracias 😊. Para la textura de la piel use brocha tipo Puntillismo #5 jugando con los diferentes colores desde sombras y brillos, para el cabello brocha tipo Pelo, el cual utilice para las pestañas y cejas también variando su grosor. Los detalles de las pecas fue con un pincel Pulverizador variando también su grosor y opacidad. Y para definir los brillos el pincel tipo Brillo también jugando desde un grosor mínimo a uno medio, cambiando un poco la opacidad.
Muy buena tecnica. Podrias hacer un video de como los difuminas los distintos tonos.
Muchas gracias @ramon2024, tomaré en cuenta esa idea de guardar el proceso 😊
Congratulations @catrynart! You have completed the following achievement on the Hive blockchain And have been rewarded with New badge(s)
Your next target is to reach 3250 upvotes.
You can view your badges on your board and compare yourself to others in the Ranking
If you no longer want to receive notifications, reply to this comment with the word
STOPCheck out our last posts:
Support the HiveBuzz project. Vote for our proposal!
Increíble amiga,me encantó la serenidad que transmite en su mirada ☺️
Hola @lorentm, muchas gracias por apreciar este nuevo trabajo🙌❤️😊
Great glowing and lights effects
Thank you very much @pegarissimo! 🙂
You are super talented!
I just visited your profile to see more of your work, in fact. And yep! Amazing the whole way through... 👀
Hello!
Hello @nickydee, 🙂👋❤️Thank you very much, thank you very much for taking your time and appreciating my learning in this fantastic space. Thanks so so
Pleasure so mine!
Love art and you're good! Keep on creating!
If you release and NFTs do tag me please!
Of course it is, your comment is very long-winded. Actually, I am new in this world of Hive and crypto art, when I get more information and better handling about NFTs I would be letting you know. Thank you, thank you @nickydee!🙌❤️