My sneaky formation tactics in little league rule set
Hello splinter nerds
When it comes to battle line up, the strategies used depend on some factors like the ruleset and the mana cap of the battle.

I love to use the sneaky line-up in the Little League ruleset because I have confidence in the sneaky monsters; they have strong attacks and are often reliable in battles...
The problem I encounter is when the opponent uses a monster with high speed or dodge, which causes my monsters to miss and ultimately leads to my losing the battles.
Most of the time, the opponent fortifies their tank and makes it hard to penetrate from the front, but in most cases, they only put one defense card at the back, which makes their team vulnerable once the defender is gone.
The fire and death splinter is my go-to in little league battles because that is the splinter with the most sneaky melee attackers with 4 mana below.
The dual splinter summoners make it better as we can now summon monsters from fire and death splinter, with the summoner making the sneaky attackers available for usage.
Many players also know how strong the sneaky monsters are in the little league ruleset, so most time, we end up using the same tactics, but there is a little difference in the choice of monsters and their position.


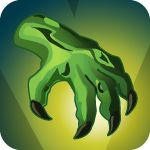
I had this battle where we were given the 3 ruleset above, the first rule is the Little League, which indicates only archons and monsters with 4 or less mana can be used, the second rule was up close & personal, which indicates only melee attack monsters can be summoned and the last rule was Maneuvers which indicate all units have reach ability.
Based on the ruleset that only melee attacks can be used, players only have 3 options.
- Attack the opponent from the front.
- Attack the opponent from the back.
- Use monsters with opportunity ability, and their attacks will be on the opponent monsters with the lowest health.
3 Splinters were available, but the opponent and I ended up using the same Splinter and Archon..
We came up with the fire splinter, our monsters were similar to, and some of the positions also rhyme, except for a few... Let us dive into my formation and why I put the monsters in those positions.
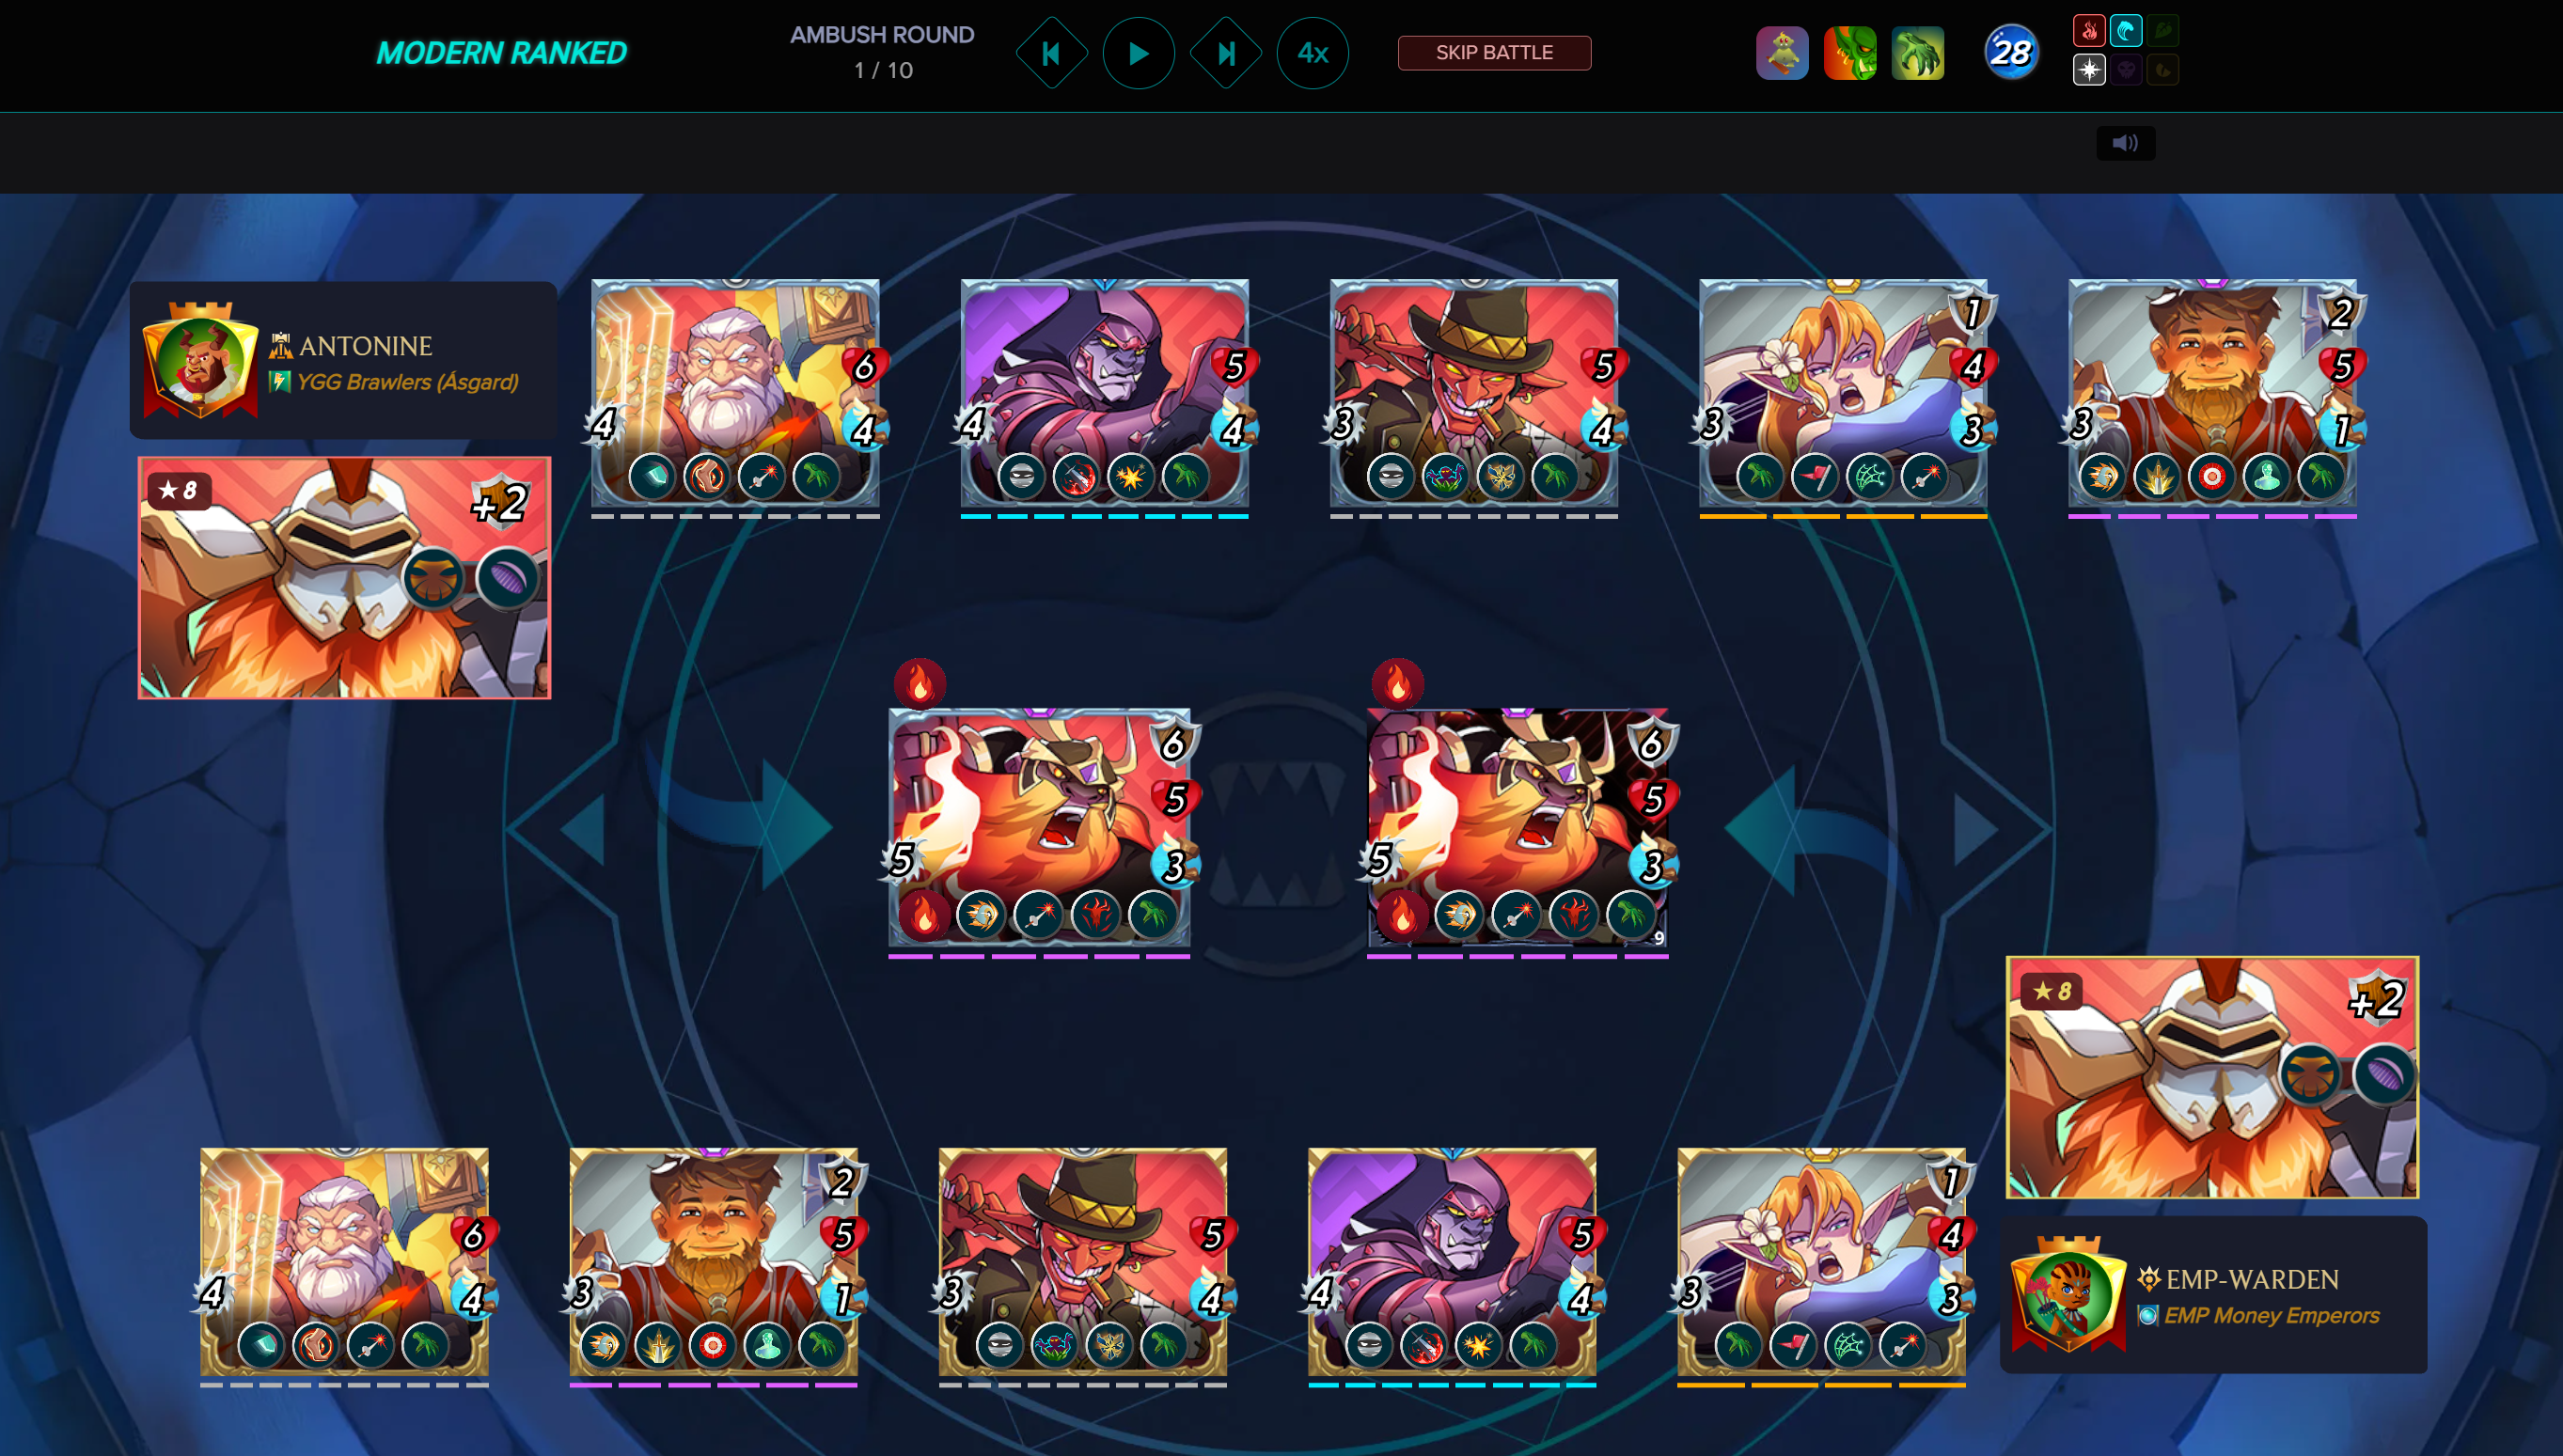
The Blazebeard was my tank, and I was not surprised the opponent used it as his first monster, too. It has 6 armour that protects it from the opponent's attacks, the front line monster must be strong enough to withstand many attacks to avoid the team being vulnerable early in the battle. The opponent made his own stronger by placing a monster with shield ward behind it, which gives it a shield in the battle.
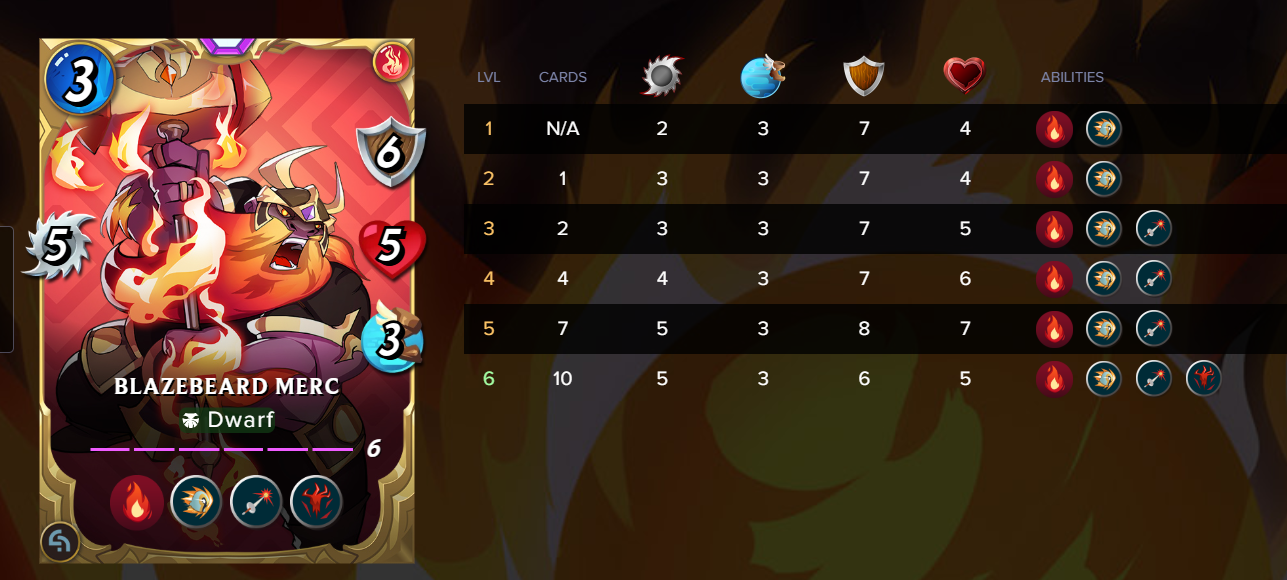
While I place Loreswift in the second position, all monsters have the reach ability anyway, so no matter the monster in the second position, it would still be able to attack. Loreswift has an inspire ability which boosts the melee attack of her team, the opponent also used her but placed it in the second-to-last position, I guess as a defense.


The Night Stalker was the monster placed in the third position, while the Gobalano Soldier occupied the 4th position. These two were my main sneaky attackers, which made winning possible due to the fatal damage they inflicted on the opponent team.
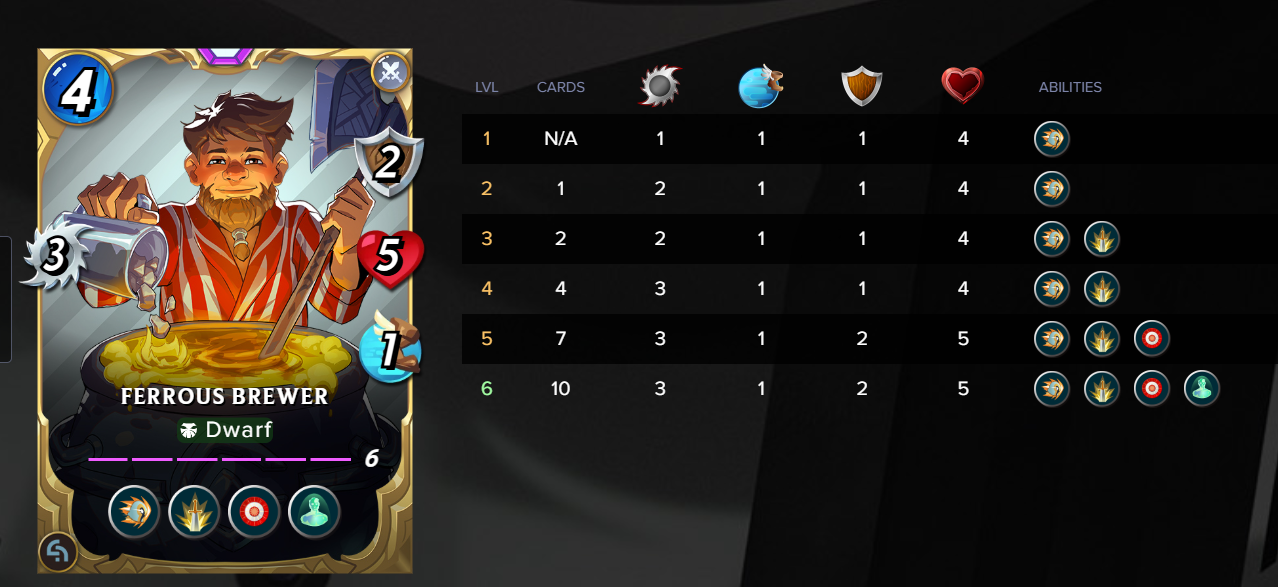
Ferrous Brewer was the second-to-last monster, and I placed it there as a defense against the opponent's sneak attack. I also use Mana Warden to further strengthen its power by giving it a shield, which delays the opponent a bit.
In the end, it was a close call battle, and I was victorious because my Night Walker attacked first.


If you want to be a part of this week's Splinterlands community engagement challenge, you can join from here
All pictures are obtained from Splinterlands lore and game

Just call me Burl.
I am a professional gamer, motivational speaker and a crypto enthusiast
Discord: burlarj
Twitter id: burlarj1
Telegram: burlarj
God exists, I am a living testimony
Giving up is not an option, every hustler has a payday
Don't wish for it, Make it happen
Only Love can heal a broken Heart


It looked like you were honestly going to lose lol, the nightstalker with that double combo did a huge number. Also, that burn, helped to eliminate your opponents backline
we both used a monster with burn defect but then it didn't affect any of our rear monsters, the night stalker is indeed the Mvm of the battle.
Thanks for sharing! - @mango-juice

Congratulations @burlarj! You have completed the following achievement on the Hive blockchain And have been rewarded with New badge(s)
Your next payout target is 48000 HP.
The unit is Hive Power equivalent because post and comment rewards can be split into HP and HBD
You can view your badges on your board and compare yourself to others in the Ranking
If you no longer want to receive notifications, reply to this comment with the word
STOPCheck out our last posts: