Battle Mage Secrets Challenge - Up Close And Personal
Hi Splinterlanders, I hope you are all having a great Splinterday!
The Battle Mage Secrets Challenge is a wonderful and effective way to get to know rulesets better and improve your gameplay. Not only do you study and analyse rulesets and example battles closely, you also get to read and see what other Splinterheads are thinking and doing with their little darlings on the battlefield.
With many battles now being comprised of 3 rulesets, it is important to know your rulesets well, how they relate to other rulesets and what corresponding cards work well to either exploit the ruleset or defend against it. We have also seen a number of new rulesets coming into the game lately and a bunch of new monsters have received new abilities.
The game is becoming more and more technical, leaving you with ever decreasing chances of winning battles with sheer brute force and overkill strategies. All these reasons and the clear challenge that players (and bots unfortunately) are getting „smarter“ all the time underscore the need to know rulesets very well. The Battle Mage Secrets Challenge helps and motivates us players further to do just that.
In today's challenge we are looking at the Up Close And Personal ruleset.


UP CLOSE AND PERSONAL
Only units with melee attacks can be used
The Up Close And Personal ruleset is quite easy to play, provided you know your cards (the same goes of all other rulesets). But with this particular ruleset, your choice of cards is restricted to melee and melee specific abilities. Therefore, knowing all your cards in a particular deck provides a big advantage when dealing with this ruleset. There are several factors that play a decisive role : melee power, speed, health, shield, ability and positioning. Of course, powers and buffs provided by the summoner, is also a prime consideration when putting together your team (careful, Mylor is also lurking around, ready to ruin your melee day with Thorns!).
Melee power – The attack strength of your individual monsters is significant, because most melee monsters have big stats to come as solid tanks and/or hard hitting protagonists that you have to act against. Fielding a picnic team of little lurkers will get you nowhere.
Speed – To me, this is always the most important consideration, as who hits first often determines the fate of your ensemble. The faster your monsters are, the more significant their strikes will be, especially when using stealth abilities that can wipe out individual enemy monsters with a single hit before they get a turn to strike back at you. Speed also contributes to the miss ratio of enemy attacks and sometimes a miss by your foe makes all the difference.
Health – Melee monsters often come with high health and the healthier your monsters are, the longer they will live statistically, so count that in. As your opponent will surely field a heavy hitting team himself, you need lots of health to get past the first two rounds of enemy fire to have a realistic chance to follow on and clinch your victory.
Shield – this also also very important to consider. In an all-melee setting, where there will be no magic attack, your shield plays a primary role in your defense. Using monsters with high shield stats, especially in the frontline position, will act as a solid wall which your opponent will have issues with to get through. Pay close attention to your defenses.
Abilities – there are several abilities, which melee monsters can use with this ruleset to create a tactical advantage. These abilities include Sneak, Opportunity, Reach, Shield, Taunt, Heal, Thorns, Retaliate and probably others that don’t come to mind right now (but as you can see, there are a bunch of them). It is therefore crucial to figure out a good attack strategy to include some stealth and defense considerations.
Positioning – As with any other battle environment, your positioning is of fundamental importance. Your opponent will probably focus on attacking both your frontline and your backline. Put heavily armoured tanks in the first and second positions and put some kind of protective monster in the backline to protect the rear, such as a Retaliate monster. Avoid low health monsters in your midfield, as they are sitting ducks for enemy Opportunity monsters, unless you field a Taunt.
So, on the one hand, this ruleset is quite easy to manage because the choice of cards is rather limited, but on the other hand, there are a number of things to consider and being considered by your opponent to wipe you out in what sometimes may seem to be an easy walk in the park. One little detail can ruin your strategy, like, for example, forgetting that Mylor Crowling might appear.
The battle I have chosen to study today takes a number of factors discussed above into consideration, most notably shield, Dodge and Sneak.

The battle stats are the following:
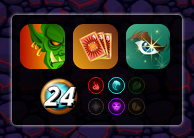
RULESETS: Up Close And Personal, Odd Ones Out and Equal Opportunity
MANA: 24
SPLINTERS: RED/BLUE/PURPLE
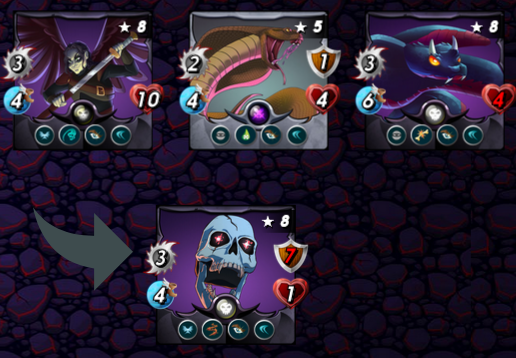
Apart from the ruleset in focus, we also have the Equal Opportunity ruleset, which only means one thing to me: Ever-Hungry-Skull! Here is the team I put together:

The battle circumstances outlined above are perfect for an Astral/Skull combination: all enemy monsters will attack the same high shield monster to then be resurrected. With a total of up to 20 shield, this combo is the obvious choice.
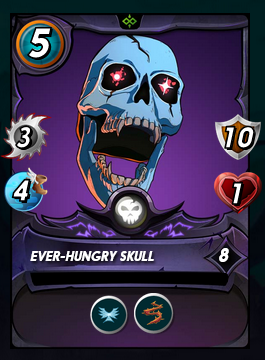
EVER-HUNGRY-SKULL is the primary ingredient for this battle cocktail. Not only does he have more shield than most other monsters in any deck, he also has good speed, Thorns, Flying and will receive Dodge from ASTRAL ENTITY to make him hard to hit.
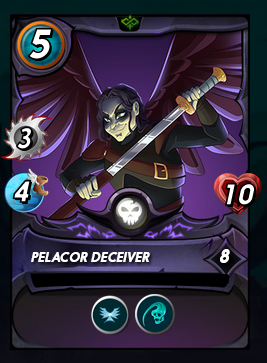
The obvious choice for position 2 is PELACOR DECEIVER, again with good speed, Flying and he will also get Dodge to make him hard to hit. furthermore, a miss will have consequences with Backfire. This is going to be fun to watch!

One of my very favourite cards comes in to take position 3: URAEUS. He will attack the enemy backline and hopefully deliver a dose or 2 of poison while he is at it. He is the first of 2 Sneak monsters in the team to decimate everything behind the enemy frontline tank one by one.
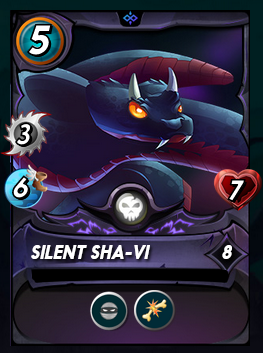
Last but not least is SILENT SHAVI, who will be hard to hit with 6 speed and Dodge from Astral Entity. The second Sneak attacker, SILENT SHAVI will fly past the frontline and hit at the backline. Cripple will also contribute to the damage he will inflict.

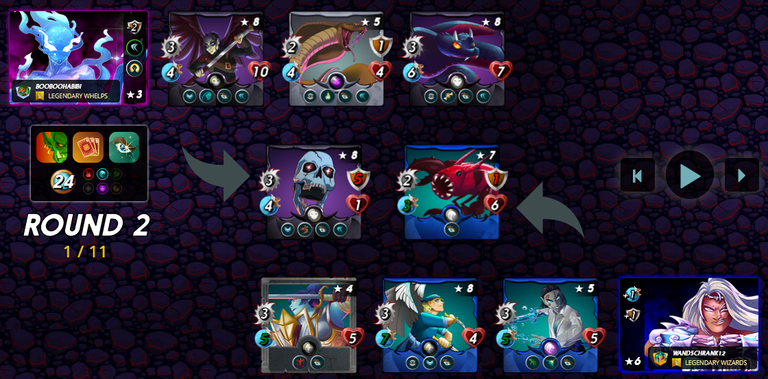
So now let's take a closer look at the battle in focus. Being a brawl battle, my opponent brought Isgald Vorst, who may become a problem, as he is a very powerful Gladiator. Lets take a look at the action:


Pelacor Bandit opened the batting... but missed. SHAVI then hit War Chaang, who retaliated... and missed. Then it was Tide Biter's turn... and missed. Isgald then had a go and actually scored but Thorns took his shield. War Chaang then took center stage, his arrow missed but his melee struck iron. Thorns reduced his health to 3. URAEUS smacked War Chaang, he retaliated... and missed to then be finished off by PELACOR DECEIVER. Cruel Sethropod, who was not so cruel, had a go... and missed. There were 6 misses in the first round! I couldn't have asked for a better start!

SHAVI further reduced Isgald's health and Tide Biter... missed. Isgald took a swing at the SKULL and succumbed to Thorns. PELACOR DECEIVER hurt the Pod, who then... missed the SKULL.

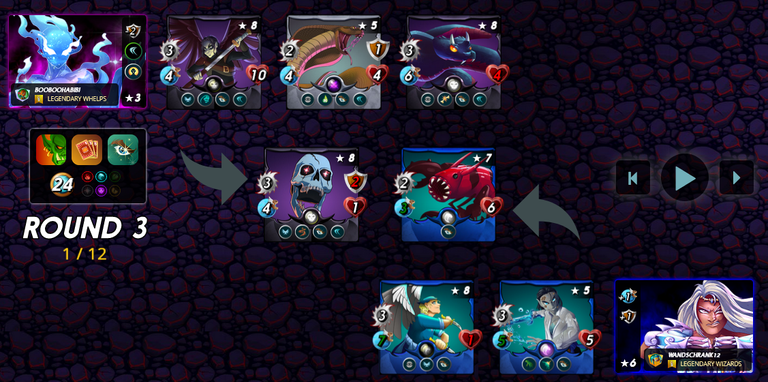
This time Tide Biter landed a hit but collected a dose of Thorns. In the meantime, Pelacor Bandit had collected his third miss to then be wiped out by PELACOR DECEIVER. The Pod then landed his first hit and killed the SKULL, who swiftly reappeared with 10 shield!!

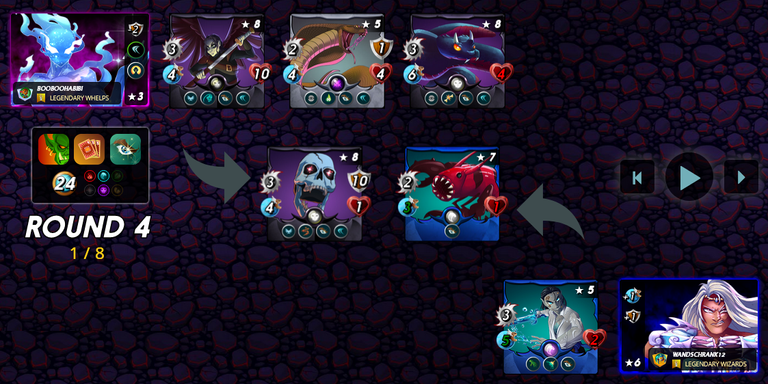
In the fourth and final round, SHAVI reduced the Tide Biter to 2 health to be cleaned up by URAEUS. The Pod was left to be finished off by the SKULL. We then changed the channel and watched the footy.


Easypeasylemonsqueezy! This was a quick and easy battle. Isgald and War Chaang did look menacing but were no match for my Skull/Sneak combo helped along by Dodge from ASTRAL ENTITY. I lost count of all the misses my opponent delivered, which pre-determined the outcome. The moral of the story - speed kills!
Seeyaround Splinterheads!
images of model tombstones from myshopify.com
Thanks for sharing! - @mango-juice

Astral Entity is pretty awesome! How are you doing?
!DHEDGE
This post has been selected for upvote from our token accounts by @thebighigg! Based on your tags you received upvotes from the following account(s):
- @dhedge.bonus
- @dhedge.oneup
@thebighigg has 14 vote calls left today.
Hold 10 or more DHEDGE to unlock daily dividends and gain access to upvote rounds on your posts from @dhedge. Hold 100 or more DHEDGE to unlock thread votes. Calling in our curation accounts currently has a minimum holding requirement of 100 DHEDGE. The more DHEDGE you hold, the higher upvote you can call in. Buy DHEDGE on Tribaldex or earn some daily by joining one of our many delegation pools at app.dhedge.cc.